Hi.
I forgot to mention that I use this method because I'm placing some classic carriers around the westpac and mediterranean areas.....its a personal scenery that includes Essex class, forrestal class carriers and others from different authors....something very simple that I wanted to make.....in basis they are static ships using the same method as the ''Carriers 2006'' nimitz carrier package from Fernando Martinez....also available at flightsim.......and I used the same ocean flattens and AFCAD deck techniques, but for the arresting and catapult zones, I edit them manually gettig the coordinates directly from AFCAD .....using slew control , then pinpointing the corners with the AFCAD nodes ..........it´s a bit tricky and could be confusing on the first attempts....but once you understand the logic of the entries and get it done correctly....nexts attempts will be more easy.
BTW, there is also a file at flightsim.com that has already the arresting and catapult entries to be used in several available carrier packages.....I don't know if you already looked at it, but assuming you are intending to include a carrier with hardened deck not included on this files......here are the basic instructions.....the very first thing to do is to copy an entry , just as the example you posted ....paste it into a notepad and work from there, you can set the name of the carrier, location, etc.
----It will be more easy if you use FS9 not on full screen....so you can easily switch between AFCAD and FS9...
1.- Having both AFCAD AND FS9 OPEN , use slew control and set your plane on the carrier landing heading....alligned as accurately as possible with the runway
2.- if the carrier has an AFCAD already made, go to that ''airport''...if not, open ANY OTHER AIRPORT and use the ''lock the map location'' option on AFCAD...it will automatically set your location ......
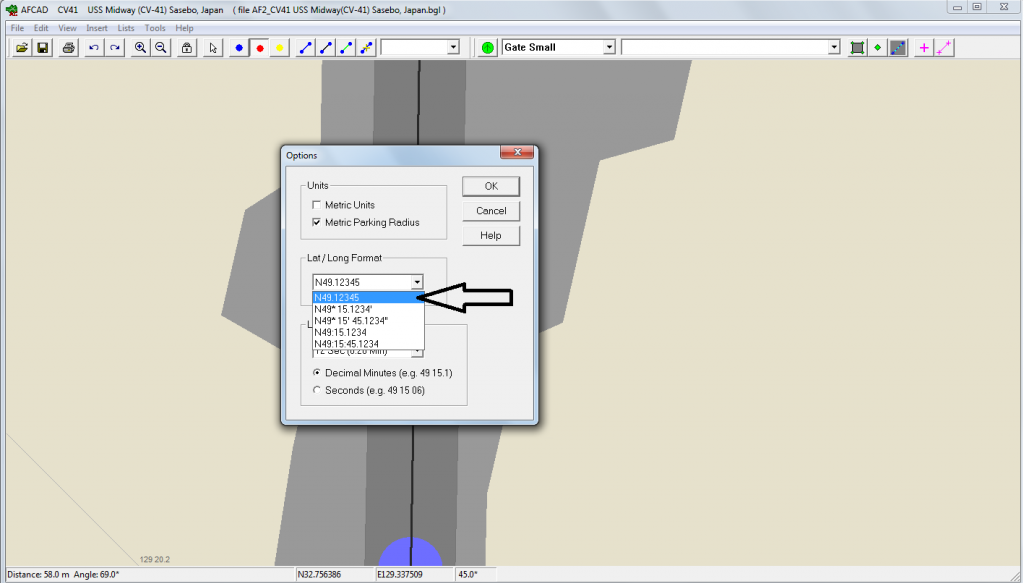
3.- on AFCAD, open the Tools...options menu and select the fisrt Lat-Lon format
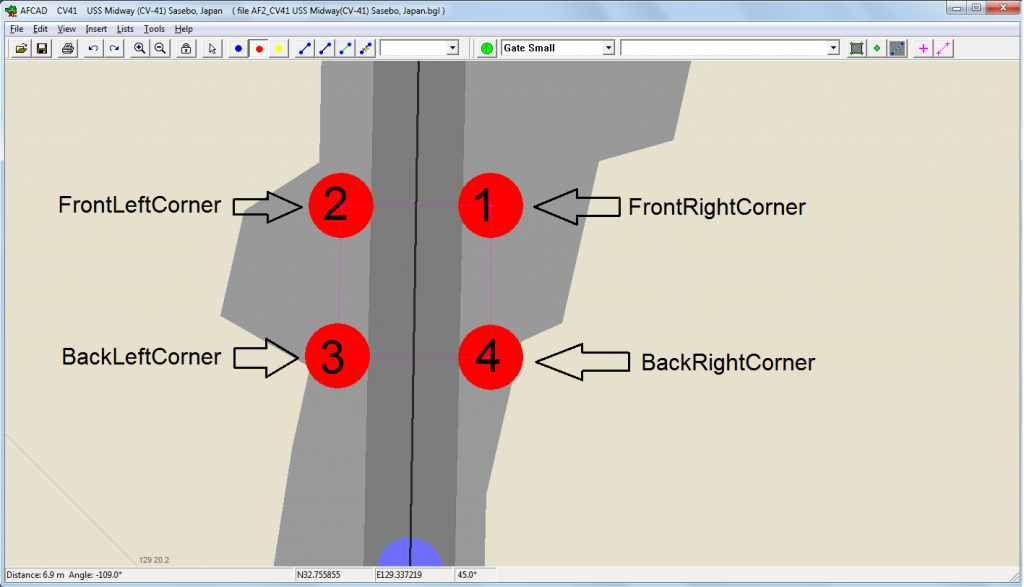
4.- Slewing in FS9....but without changing the runway heading....move back, forward, left or right to locate the ''square'' where the arresting zone will be....each time you locate a corner press the period key on your keyboard.....when FS9 is locked with AFCAD it automatically places a node on the plane's location...REPEAT THE STEP FOR THE REST OF THE CORNERS.
5.- once the 4 corners are pinpointed in ACFAD, it should look something loke this.....in my case, I use an afcad with surface and runway.....but here's the logic of each of the ARRCAB entries....in strict order.
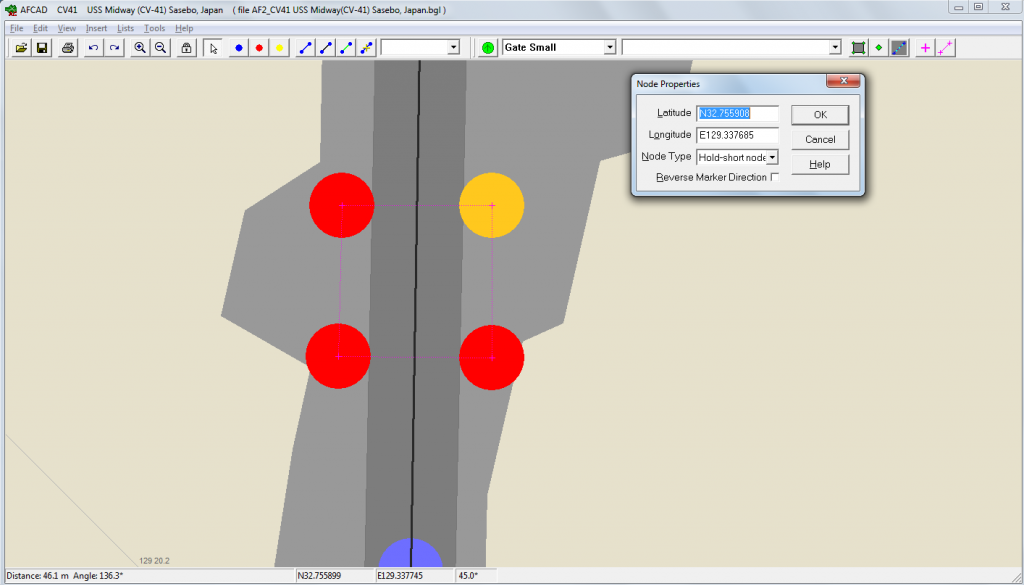
6.- Select each node properities and copy-paste Lat and Lon values into your entries .... do not copy the N,S,W,E letters ....the arrcab entries use positive or negative numbers on the lat-lon values...so the logic here goes like this.
N..... positive
S..... negative
E..... positive
W.... negative
in total, you will copy and paste 8 values and match them positive or negative , the image below shows the very first entry to copy...just continue with the strict order as image above..
7.- Once you have completed the latitude and longitude entries, set the ''
RunwayHeadingInDegreesMag'' ....this will be the magnetic heading shown at the top of the screen when slewing in FS9.....
8.- For nimitz carriers the altitude is usually 70.5 FT.....any other carrier will require a trial and error procedure to get the correct altitude......but after that its done, you can now copy your new entry into the dsd arresting zones file, set a consecutive number on the first line....and save.
I hope this explanation helps you...I'm not good providing instructions....but let me know if you have any troubles and I can help.
GOOD LUCK.
")