• Guest Please check out the Help Wanted thread in Ickie's NewsHawks.
    The future of the Outhouse depends on you!
    Help Wanted

For FS9 Gmax Users - Create a Basic VC with Gauges in 15 Min

Milton Shupe

Staff Contributor
Staff member
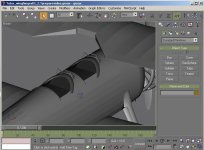
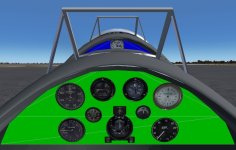
Video: For FS9 (and FS8) - Creating a Basic VC Panel and Displaying Gauges in Less than 15 Minutes

by Milton Shupe

The very basic video describes the process necessary to create a basic VC panel with displaying gauges.

For the beginning modeler who has an Exterior model and wants to create a VC.

Video Length: 15 minutes

Many budding new modelers ask how to do this simple process and there is precious little around focused just on this process.
So, here you have it in a brief 15 minute video.

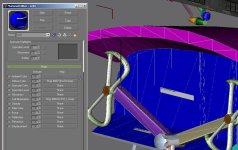
It starts with an Exterior Model, adds the VC planars, maps, textures, creates an Interior VC model, exports, and shows the model in FS9.
It also shows the required entries in the panel.cfg.

It's quick and simple, once you know how.

Hope this helps get you started.

YouTube Link: https://www.youtube.com/watch?v=UC3By8GNM7k

Download version: http://www.sim-outhouse.com/sohforums/local_links.php?catid=8&linkid=20557
 

Attachments

  • HOMEUNIT-2015-nov-26-001.jpg
    HOMEUNIT-2015-nov-26-001.jpg
    114.7 KB · Views: 1
  • HOMEUNIT-2015-nov-26-002.jpg
    HOMEUNIT-2015-nov-26-002.jpg
    98.2 KB · Views: 1
Last edited:
Thanks very much for this video! I'm planning to make a VC for an FSX model, will this procedure work in FSX?
 
Thanks very much for this video! I'm planning to make a VC for an FSX model, will this procedure work in FSX?

I was hoping an FSX native modeler would answer this question but I see that is not going to happen until I step in it.

So, with some caveats, the basic procedure is the same for FSX models but the mapping material options are more sophisticated especially regarding gauge back lighting.

Also, there are many options in FS9 and FSX to do much better 3D gauges rather than using flat 2D gauges as I have in this example.

If you use 3D gauges, essentially you do not need the added planar for the panel background, just the gauge faces.

You can setup a material (one or more) to contain all the gauge faces used in the 3D bezels or faces behind the panel/gauge holes in the panel face.

Fr. Bill has detailed such options in his white paper that you may find at FSDeveloper.
 
I can't get the Vid to play as it seem to need somthing better than my old XP has but I'm going to guess this is tell you how to use bitmaps that start with “$” or “_panel_” ?
 
That is more or less what I have been doing for years and it works in CFS2 just fine as well.
 
I was hoping an FSX native modeler would answer this question but I see that is not going to happen until I step in it.

So, with some caveats, the basic procedure is the same for FSX models but the mapping material options are more sophisticated especially regarding gauge back lighting.

Also, there are many options in FS9 and FSX to do much better 3D gauges rather than using flat 2D gauges as I have in this example.

If you use 3D gauges, essentially you do not need the added planar for the panel background, just the gauge faces.

You can setup a material (one or more) to contain all the gauge faces used in the 3D bezels or faces behind the panel/gauge holes in the panel face.

Fr. Bill has detailed such options in his white paper that you may find at FSDeveloper.

Thanks very much, this is an enormous help. I found Fr. Bill's paper and will take a look, I'm still messing with animations but look forward to making a VC.

For playing some less common video formats I find this program works really well: https://mpc-hc.org/.
 
Thanks very much, this is an enormous help. I found Fr. Bill's paper and will take a look, I'm still messing with animations but look forward to making a VC.

For playing some less common video formats I find this program works really well: https://mpc-hc.org/.

Thank you; I hope the video is helpful to show the basics required to get the VC started.

I will check out this player; looks interesting. :)
 
Thank you so much for this tutorial, this made quick work of the panel I've been kicking around for over a year. And I never used lithunwrap before, this is going to make texturing so much easier. I may actually finish the Fox this year.
:redfire:
 
Thank you so much for this tutorial, this made quick work of the panel I've been kicking around for over a year. And I never used lithunwrap before, this is going to make texturing so much easier. I may actually finish the Fox this year.
:redfire:

That's great to hear. If I can help in any way with similar video tutorials, just ask.
 
Got another quicky question for ya- my FS stock animation parts (rudder, ailerons, etc) work fine in the external model, but their clones (rudder01, r_aileron01, etc) in the internal model are completely stationary. Do the external stock animation part names not work in the internal model ? I don't see a name for these external parts in the tagtool for internal parts.

Do I need to keyframe these in the internal model ?

edit NVM, forund a reply from lionheart on FSDeveloper with the answer:
To apply an existing animation to a part in a VC, you simply name it the parts name tag. This is only for FS9. For FSX, its an entire new ballgame.

The part must be named 'exactly' as its spelled, and must have a number on it if there are more then one, so say lever_gear would be named on the part lever_gear_01 and not lever_gear01 nor lever_gear_1. Must be (usually) 01, 02, 03. We just found out you can use A, B, C, as well.

BTW- I also figured out how to flip faces independent of the normal- I didn't realize that the mirror tool can be used on individual faces.
:D
 
Last edited:
Got another quicky question for ya- my FS stock animation parts (rudder, ailerons, etc) work fine in the external model, but their clones (rudder01, r_aileron01, etc) in the internal model are completely stationary. Do the external stock animation part names not work in the internal model ? I don't see a name for these external parts in the tagtool for internal parts.

Do I need to keyframe these in the internal model ?

edit NVM, forund a reply from lionheart on FSDeveloper with the answer:


BTW- I also figured out how to flip faces independent of the normal- I didn't realize that the mirror tool can be used on individual faces.
:D

MDK,

Always a good idea whenever naming animated parts in the exterior model to use this convention so that when cloning for the interior model you do not have to go through to correct the names. rudder_01, l_aileron_01, etc. Gmax will continue using the convention once set.
 
I'll keep that in mind when I clone. My trim wheel seems to spin backward in my VC, could I use the '_reversed' suffix I see on some of the the stock animation names to reverse the animation or should I invert the X axis on the part as it's currently aligned to world ?
 
I'll keep that in mind when I clone. My trim wheel seems to spin backward in my VC, could I use the '_reversed' suffix I see on some of the the stock animation names to reverse the animation or should I invert the X axis on the part as it's currently aligned to world ?

Just rotate the pivot in (Affect Pivot Only) Local Coordination mode.
 
Hey Milton,

Do the luminous and Bright values in the CFG file effect items in the VC, or are they limited to the 2D cockpit ? If they don't work in the VC, can I position a cabin light within an item in the panel and creatively use transparency to get a moving, backlit dial in the VC ?

I REALLY need a backlit radio dial card in the VC.
 
Hey Milton,

Do the luminous and Bright values in the CFG file effect items in the VC, or are they limited to the 2D cockpit ? If they don't work in the VC, can I position a cabin light within an item in the panel and creatively use transparency to get a moving, backlit dial in the VC ?

I REALLY need a back-lit radio dial card in the VC.

Negative; that is for the 2D gauges only.

To back-light any VC gauge, you must have a Self Illumination texture tagged in the material slot for the vc gauge background. See the attached.

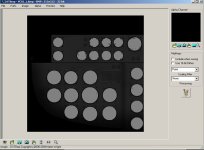
To create that self illumination texture in this way demonstrated, see the vc01_L.bmp attached from my Mallard just released. You can find that in the texture folder. This is simply the vcbackground with the gauge placement areas highlighted, the texture is then flipped vertically. The texture must have a black alpha channel to make the illumination come on with any light (except landing lights), the name must end with _L.bmp (and be the same name as the vc planar with the _L added), and the texture is placed in the texture folders.
This technique high-lights the whole gauge area including the moving needles.

Of course, you can use the aircraft.cfg effect vclight as a general cockpit light but that is not gauge back-lighting.
 

Attachments

  • liemap.jpg
    liemap.jpg
    79.4 KB · Views: 0
  • litemap2.jpg
    litemap2.jpg
    53.8 KB · Views: 0
Last edited:
Negative; that is for the 2D gauges only.

To back-light any VC gauge, you must have a Self Illumination texture tagged in the material slot for the vc gauge background. See the attached.

To create that self illumination texture in this way demonstrated, see the vc01_L.bmp attached from my Mallard just released. You can find that in the texture folder. This is simply the vcbackground with the gauge placement areas highlited, the texture is then flipped vertically. The texture must have a black alpha channel to make the illumination come on with any light (except landing lights), the name must end with _L.bmp, and the texture is placed in the texture folders.
This technique high-lights the whole gauge area including the moving needles.

Of course, you can use the aircraft.cfg effect vclight as a general cockpit light but that is not gauge back-lighting.

So THAT'S where I've been going wrong with my AVRO 621 panel. I had the Alpha RED and only got panel lighting with Landing lights :dizzy:

Thanks for helping me out too, Skipper :)
 
Negative; that is for the 2D gauges only.

To back-light any VC gauge, you must have a Self Illumination texture tagged in the material slot for the vc gauge background. See the attached.

To create that self illumination texture in this way demonstrated, see the vc01_L.bmp attached from my Mallard just released. You can find that in the texture folder. This is simply the vcbackground with the gauge placement areas highlited, the texture is then flipped vertically. The texture must have a black alpha channel to make the illumination come on with any light (except landing lights), the name must end with _L.bmp, and the texture is placed in the texture folders.
This technique high-lights the whole gauge area including the moving needles.

Of course, you can use the aircraft.cfg effect vclight as a general cockpit light but that is not gauge back-lighting.


I see. So basically I have to build a VC version of my instrument to get a backlit dial card. That's disappointing. I had hoped I could put a lamp inside the instrument and have it shine thru a semi-transparent dial card.
 
So THAT'S where I've been going wrong with my AVRO 621 panel. I had the Alpha RED and only got panel lighting with Landing lights :dizzy:

Thanks for helping me out too, Skipper :)

LOL If you want red-lit nite gauges, make the gauge holes dark red; keep the alpha black :)
 
Back
Top