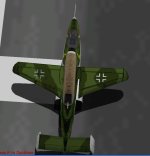
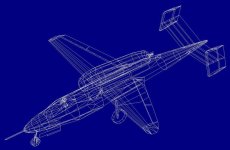
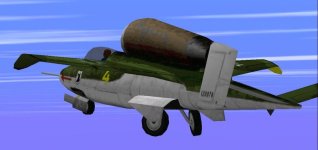
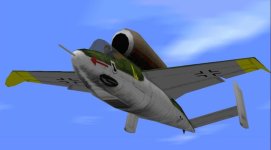
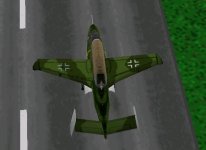
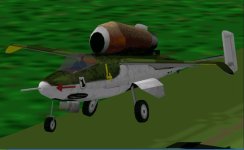
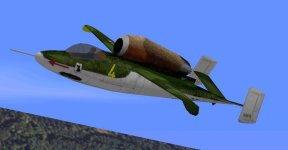
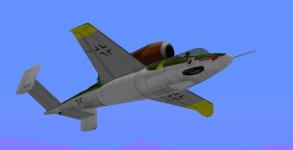
Heinkel He-162 "Spatz", 1944

aleatorylamp

Charter Member
Hello Smilo,

Nice to hear from you - I hope you are well!

Thanks for your motivating answer - OK, so I´ll proceed with the tweaking and the upload.
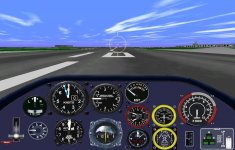
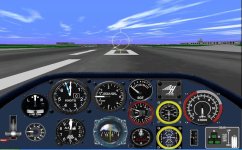
Despite "only" being a jet, it is, however, quite a curious bug. It has a single-spool Turbojet, and apparently that means that Power read-out is given by the N2 output RPM. Thus, I modified the default FS Bell Helicopter RPM gauge and put in the red "keep out" RPM zones. Further, I modified the bitmaps of some other gauges and also found some BMW gauges, and it adds atmosphere.
For want of other older-looking metric gauges, I had do make do with what there is - Knots instead of Kph, and have provided a panel which looks like but is not the same as the original.
The jet engine parameters have also been tweaked for the different RPM values to give more realism.

I´m working a some bleedthrough issues, and I hope to upload the model soon.
It´s quite a performer, and should be fun to fly.

AND: It shoots too!!
Cheers,
Aleatorylamp
 

Attachments

  • Spatz panel.jpg
    Spatz panel.jpg
    81.6 KB · Views: 10
.air file settings: BMW 003A-2 turbojet

Hello!
This is the turbojet engine on the Heinkel He-162-A2, and incidentally, also on the twin-engined Me-262 fighter, so this may be of interest to Ivan later on!

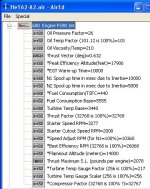
Here´s a little description of what I´ve learnt about how to set up a turbojet in a jet .air file, specifically for the BMW 003A-2 single-spool, Axial flow turbojet.

The Bell helicopter N2 rotor gauge provides a convenient RPM readout for this single-spool turbojet.

I have doctored the outside ring with adequate red and grey areas to indicate permissible operating RPM. The red area is above 9500 RPM and below 6000 RPM. The I took some other default gauges and coloured them so that they look like those in the real cockpit of the He-162-A2 in the Museum, and the resemblance is there!

Anyway, to the nitty-gritty:
Keeping the Speed Adjust RPM and Best Efficiency RPM parameters at B737-400/lear45 default values of 9137 and 32768 is not really any good because it will give erroneous engine RPM all round, and Thrust values do not coincide with RPM numbers.


A correct S.L. Thrust readout of 1760 flb at the reference maximum of 9500 RPM (where the upper red zone begins), is obtained by setting "Thrust Maximum S.L. pounds per engine" to 2078 flb. Then, with "Best Efficiency RPM" set to 26068, the correct 1760 flb at S.L. will be displayed for 9500 RPM.

In flight at 500 ft, the thrust lever position for 9500 RPM must be at 92% power, i.e. Key "9" and three taps on "F4".

Documentation indicates that idle RPM is at 3500 RPM, with an output of 120 lb thrust. This is set with "Speed Adjust RPM". Unfortunately, the .air file only shows 120 flb at 3000 RPM. A more correct 3500 RPM idle setting, shows a thrust of 353 flb., which may however be preferable, so we set "Speed Adjust RPM" to 10360.
Alternatively, if the more correct 120 flb idle power is preferred at the slightly incorrect 3000 rpm reading, "Speed Adjust RPM" would be 9270, and consequently "Maximum Efficiency RPM" must adjusted to 28206.

During flight, engine RPM must never be lower than 6000 RPM, otherwise blowout will occur, and the normal practise minimum was 6500 RPM. In flight, wind-mill starts were also pòssible at sufficient speed.

Restly speed and thrust readouts are also correct for all of the different altitudes, with small throttle lever adjustments, so it looks like the power curve adapts quite well.

At altitude where the air is cooler, it seems that the aircraft could be flown with RPM in the red zone. Here it appears that 11500 RPM were normal, with 640 flb thrust and 559 mph, but the readout here is a bit short at 10500 RPM.

Parameters for Oil temperature and pressure and EGT have been adjusted to give best approximations on the gauge readouts.

Cheers,

Aleatorylamp
 

Attachments

  • Jet parameters AirEd.jpg
    Jet parameters AirEd.jpg
    61.5 KB · Views: 10
Hello again,

Just a short clarification on the "RPM" gauge for the He-162-A2 Sparrow - (also known as the Salamander), and its small discrepancies at idle speed and overspeed:

Max. 9500 RPM of the BMW Turbojet more or less conveniently coincide with the 95% readout of the output turbine (N2) on the Bell Helicopter N2 Gauge.

However, S.L. idle RPM has to be adjusted as it is higher than on normal turbines, and then also, maximum RPM at high altitude can go up to 11500 RPM, so it is difficult to decide where the correct 100% RPM lie, as well as the perhaps 105% for short-time overspeed, for that matter. Apart from these adjustments, it could also be a problem with the speed scale on the dial, whose needle % RPM and not really true RPM. Hence the discrepancies at low and high RPM mentioned in my previous post.

Should anyone find this annoying, and could perhaps have a suggestion as to an improvement here, I would welcome this!

As for the rest of the model, I´m improving bleedthrough issues.
For some odd reason I had the dorsal turbojet in a forward and rear structure in Body-Main, although it is really a good candidate for Canopy-High wing! Then, for the shoulder-wing set-up of this model I have to try the wing/fuselage templates to eliminate momentary bleedthrough there.
Apart from this I discovered a small problem with an extra out-of-plane vertex on a rudder panel that caused momentary disappearance on un-accellerated graphic cards, and that is solved too.

So, if all goes well, very soon I´ll be able to upload this rather curious looking, futuristic for its time, WWII fighter!
Cheers,
Aleatorylamp
 
Shoulderwing/Belly bleedthrough

Hello,
Bleedthrough problems are holding up the production line, and it´s going to take a little longer.
By eliminating moving control surfaces, I have managed to eliminate all sorts of different problems, specially in the tail section. Also, the forward fuselage and cabin sections, have been re-grouped and cleaned up, including the dorsal piggy-back engine.

However, being a shoulder-wing aircraft, the wing has problems at the root because the rather paunch belly shines through when seen from quite vertically above. Then, from below, the wingroots shine through the body, and the flaps also create problems at the flap-root, as they are very close to the fuselage.

Now I´m trying out different combinations, separating cut-out components for the beginning of the wing and the flaps, and re-grouping them in different places, but only with limited success. Sometimes something works when seen from above, but not from below, and vice-versa, even when doubling certain components and grouping them into two different places.

Anyway, I hope to be able to make it clean enough for a decent upload with a little more time.


Cheers,
Aleatorylamp
 
Hello Aleatorylamp,

Have you thought about using Wing / Fuselage Templates?
It seems to me that is the intended use of such templates.

- Ivan.
 
Hello Ivan,

Thanks for the suggestion, and yes, they´re in. It took me a while to get them to work properly, but I managed!
Now they are vertical, flush with the wingroots and belly-side portuberance on each side, glueing the main part of the wing.

Due problems to the flaps and aft wing-root, I separated the mid section of the fuselage into two components, using the aft one to glue the trailing-edge wing-roots, and that seems to work nicely except for the gear doors - these are in Wing Low left/right, so I have to move them somewhere else. There are also a few other small issues under the turbine but should not be difficult.

It´s slowly getting better. I cleaned vertices on wings, roots and flaps, and re-arranged textures and fuselage components to avoid a split in the middle of the wings but rather at the leading edge, and that of course helped as well.

All in all, the model is much, much cleaner and better than at the beginning, so I´m almost there once I fix the wheel-doors and wells.
Cheers,
Aleatorylamp.
 

Attachments

  • Spatz-pic.jpg
    Spatz-pic.jpg
    58.1 KB · Views: 8
Wheel-door SCASMing, perhaps?

Hello Ivan,

So... It´s all done except for the momentary wheel-door bleedthrough through the wing-roots... I can´t think of anywhere to put them so that they won´t interfere. Anywhere other than Wing Low left/right, makes it worse. With retracted undercarriage everything is OK.
Here are some screenshots. So... the only fault is the gear-door bleedthrough. (on the ground, top-view Screenshot)

Update: Unless of course, perhaps one could SCASM it:
Maybe knowing what the SCASM text referring to the 3 pieces comprising each wheel-door looks like, perhaps the corresponding lines can be placed somewhere equivalent to being covered by the wing and wingroots... One would have to know the text for the wingroot and the wings too, presumably? Not a piece of cake, I guess...

The .air file came out quite nicely, I thought. Perhaps I should just upload it like it is, because I can´t really get it any better.
Then, If there are any improvements possible, I could upload an upgrade.

Cheers,
Aleatorylamp
 

Attachments

  • Sparrow1.jpg
    Sparrow1.jpg
    87.1 KB · Views: 1
  • Sparrow3.jpg
    Sparrow3.jpg
    30.6 KB · Views: 0
  • Sparrow5.jpg
    Sparrow5.jpg
    66.1 KB · Views: 0
  • Sparrow7.jpg
    Sparrow7.jpg
    35.9 KB · Views: 0
  • Sparrow9.jpg
    Sparrow9.jpg
    30 KB · Views: 1
Last edited:
Hello all,

Eventually this topic has become more extense than I had initially expected, so the posts are being transferred from the Conspicuous thread to this one with Smilo´s kind assistance.

I am still working on the wheel-door bleedthrough, and hopefully an upload may happen soon.

Although jets are for kids...this German WWII wooden jet was quite fast and as per an english pilot´s evaluation, not bad at all. Enclosed, you will find a copy of this! It makes a nice read, even for people who prefer propellers!

Cheers,
Aleatorylamp
 
Hello Smilo,
Thank you very much indeed for all the moving!
I´m still trying to find a way to fix the gear-doors bleeding through the wing-roots. We´ll see!
Cheers,
Aleatorylamp
 
Wingroot as good as possible

Hello all!

Got it at last! With the wingroots on the Heinkel throw-away wooden jet, finally the situation is now quite a lot better than before:
Seen from above, there is almost no bleedthrough of the wheel-doors through the wing-roots at all. Very satisfying!
Parts count is rather laughable... 102.9%!

The improvement was achieved by duplicating the wing-root components (only their top surface, to prevent them from bleeding through the fuselage sides when seen from below). I also duplicated some parts in the different components corresponding to wing-root, aft wing-root, flaps and flap-root.

Here´s a screenshot. I´m still trying to eliminate some hairline cracks, which is a bit difficult because all vertices are already lined up, so it probably won´t be very long for this little toy to be uploaded!

I´ll try and clean up the textures on the belly before, though!

Cheers,
Aleatorylamp
 

Attachments

  • wingroot.jpg
    wingroot.jpg
    22.6 KB · Views: 8
Last edited:
Hello Aleatorylamp,

Here are a couple ideas if you are still messing around with the design. (I never really ever finish with any of my designs.)

Try putting the landing gear parts into the Center Gear or Left / Right Gear Groups. That should cure the bleed from the top. There may be other side effects of course which I can't predict without being able to mess around with the AFX myself.

Also, if you find that you are very low in Parts count, consider throwing extra Parts into Wing Tips and other tight curves. That is where they will make the most difference in appearance.
Some designs are just very low in Parts count and we are lucky when that happens.

- Ivan.
 
Hello all!

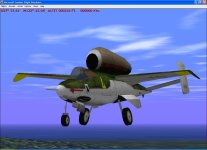
I have just uploaded the Heinkel He162 Sparrow. Here´s the link:
http://www.sim-outhouse.com/sohforum...id=18&id=21752

Have fun - The model is so fast it will probably be quite difficult to hit a slow bomber... but from a distance perhaps. I don´t know. Remember there are only a total of 240 rounds in the 2 cannons!
Any criticism for improvements will be welcome...

Hello Ivan,
After numerous test with landing gear, (in gear centre they were terrible), the best place for them was gear left/right, but not the doors - these had to cover the black wells grouped in Body Main. The wheel-door bleeds through the wing-root prevented a release before now, because I wasn´t going to allow that! Ha ha, no way!

Then, with some duplication I managed to eliminate most of the problems both seen from above and also seen from below.
In fact, it took about two weeks of different tries to get things as good as they are now.

As nothing is ever definite, if I ever find a better way, I will definitely publish an improvement. For the moment, I am quite satisfied, although, as always, I indeed welcome any further suggestions!

Also, I hadn´t thought about rounding things off even more... I´ll see if any more rounding off can make any improvements. Then I will release an improvement! The source AFX, PCX and SCX are included with the upload.

Anyway, the turbojet engine parameters in the flight dynamics may be interesting for when you do your Me-262. Also, the N2 helicopter engine gauge I doctored up the dial for, will give you the correct RPM readings... (I hope...)

Anyway, Have fun!


Cheers,
Aleatorylamp
 

Attachments

  • Spatzpic0.jpg
    Spatzpic0.jpg
    42 KB · Views: 0
  • Spatzpic2.jpg
    Spatzpic2.jpg
    32.3 KB · Views: 0
  • Spatzpic4.jpg
    Spatzpic4.jpg
    22.8 KB · Views: 18
Hi :wavey:

Just gave a spin from Ripe to your Spatz, yesterday. I was not looking for bleeds, just general looks and first impressions. Nice little bugger (or birdie)! Take-off was easy (1 increment of flaps, full throttle). Did a few gentle moves and it was quite responsive in all axis. I know that, because of CFS1 lack of control over stress situation, you can pretty much throw any aircraft the way you like, but I flew it the way it was intended to be flown; with respect and very gently.

The only "no-no" manoeuvre I tried was inverted flying. According to Capt. Eric "Winkle" Brown, it should cut-off after 3 seconds. But I flew for about a minute, even climbing doing so to increase negative g, without problem. I suppose, as much as I can remember, that jet AIR files are still "FS98 style"?

On landing, I made a big hole in runway 360 at Ripe. I only had one increment of flaps and was still flying around 100kts on touch-down. If you have a few pointers to "live another day", especially on landings, I'm all ears!

Although I was not looking for bleeds, I stumbled on one while having a look from the outside; the engine bleeds through the pilots' head from front POV.

I was a bit surprised to learn that this bomber interceptor only had two 20mm cannons, a MK108 with 30mm geschossen shells would seem more appropriate. Any idea why this caliber was preferred?

Good job aleatorylamp :applause:
 
Hello Hubbabubba,

Thank you very much indeed for your feedback! That´s very useful! I´m glad that in general, the Sparrow is acceptable. Your good works are very motivating.

As regards the momentary transitional bleeds, apart from the head/engine one, there are a few from the sides where some small dark bits and pieces of the flaps shine through fuselage sides, and then the engine-base becomes transparent at the back for a moment. But it does so agains similarly coloured background of the wing, so it mostly goes unnoticed.
I´m still investigating whether these bleeds can be improved, but I don´t promise myself very much, but at least this revised-for-CFS1 version as considerably fewer bleeds than the previous FS98 one had in CFS1.

The A2 Version of the Spatz had 120 20 mm rounds for each cannon, and the A3 had 30mm rounds, but fewer, I think only 100, so I decided to go for the one that had more.

As regards the non-conking-out of the engine in inverted flight, I don´t know whether this can be programmed into in the FS98 jet .air file. I didn´t find the gravity aspect which CFS1 engine parameters have.

The plane is a bit difficult to land, I agree, although that is not intentional on my part. I believe the intention is to do so with full flaps on the threeshhold or just before touchdown - I can´t remember off hand but it´s somewhere in the approach and landing checklist.

However, should that not be enough, I could try and play around with the flaps parameters a bit and see if I can improve that.


After Ivan´s suggestion of making the wing-tips a bit rounder (at the moment they have 5 triangles for the curvature, but seen from above it only looks like 3!), I´m thinking of publishing an upgrade with a different livery, mabe an A3, which could possibly include some little bleedthrough improvements if I can manage it, and then the more powerful 30mm cannon and maybe revised flaps if that were necessary.

Anyway, thanks very much again for the feedback. The British pilot´s report, I found very illustrative, as it de-bunks the ill fame this little bird had acquired, apart from the fact that is is also very funny to read!

Let´s see what I can do!

Cheers,
Aleatorylamp
 
Two sites that may help;

HERE and HERE. Both are in French, but I will gladly translate if you ask. A lot of information and pictures, even a few videos!
 
Eeeeek, A Jet!

Hello Aleatorylamp, Hubbabubba,

I downloaded and did a quick check-out of the Volksjaeger.

The package as a whole looks pretty good though of course I have a few comments.
(I always have a few critical comments.....)

I did not find any large bleeds.
There are a few sparkles where panels don't quite match up but you already know about those.

I find it a bit odd that the Canopy Glass is so dark, especially from the inside view.
It looks like the same pilot from the Me 109E, but I can't confirm the detail because he is hard to see.
This is your design choice though. I am just noting it because it makes flying from the V-Cockpit more difficult.

There should be a comment in the Check List to set the Parking Brake before engine start.
The momentary extra thrust at startup is enough to significantly move the aeroplane.

The stability of the aeroplane is very low but I believe that is intentional.

The landing gear parameters for the AIR file should be altered to make the aeroplane more difficult to explode when bounced.
At the moment, a very short drop will cause it to explode.

The Drag of the aeroplane appears to be way too low.
I tried to do a check for clean stall speed and could not get the aeroplane to slow down if the engine was running.
Even with the engine off, I found that the aeroplane would not lose speed easily.

I did not fly it for long, so that is about it for this quick review.
I should also read the Pilots Report to see what else to look for.

- Ivan.
 
Hello Hubbabubba,
Thank you for the additional information.
Interesting stuff indeed, and the browser translated with no gibberish.
I hadn´t seen the landing-gear sequence - fascinating! I knew it extended by gravity and retracted hydraulically, but hadn´t actually seen it working.
Also, some nice details in many of the pictures. I´d seen the second page in English somewhere, and also the cockpit pictures from the restauration of the Berlin unit, but none of the rest of the pictures of the restauration process itself. Very good!
Is there anything specific that you meant to point out?
Cheers,
Aleatorylamp
 
Room for improvement

Hello Ivan,
Thank you very much for your comments and patience for the trials you did.

As regards the sparkles, I really zoomed in on the blueprint to make the parts for aileron (non-moving) and flap parts, but for the moment haven´t been able to improve vertice alignment.

Air files are not my strong point, and after entering area and span for the wing, the restly wing parameters, to adjust the airfoil for lift and drag, have always been a bit of a dilema for me.
I needed low drag on the plane to get the high speed with the power available, but managed to compensate it with higher flap drag for slowing down the plane for landing. I´m sure there´s a better way, which I haven´t found yet!

Then, I´ll try and increase the landing bounce to reduce the likelyness for an explosion.

The movement of the plane on start-up is probably because of the necessarily high idle-speed. Engine-start also rocks the plane! Perhaps it shouldn´t do so, although spool time was a bit faster than on modern jets. Then, spool time parameter adjustments don´t seem to have very understandable results.

If the canopy glass is too dark, it can be lightened - probably it will get a little more milky, but that won´t be a problem, and regarding stability, this can be djusted as well. I don´t remember which .air file I used - probably the Lear jet one. With the small wimgsa, initially it came out too unstable, so I suppose that can be corrected a bit more.

I just saw that the He-162 units with the more powerful 30 mm cannon were the A0 and A1 models, (not an A3), but these only had 50 rounds per cannon, so I went for the A2 with 120 rounds for the 20 mm cannon.

Yes, I used your pilot for the Sparrow instead of my original monkey-head - I thought he would be more fitting.
I´d used him for the Curtiss AT-9 Jeep and I think for other planes since. Should I have used someone different?

Anyway, so there´s still work to be done on the Sparrow! No matter, as these things keep us builders busy!

Cheers,
Aleatorylamp
 
With a name like "Memorial Flight", one would expect an English version somewhere.

HERE it is. Not obvious at all. I had to backtrack to "home" then get there as the English version is on an entirely different site. Happy to be of some help.

Side comment; that a/c appears to be remarkably "clean" in lines, so drag should not be too great. Air spoiler/break were to be a common fixture in all future jet designs but were still limited to a few diving fighter/bomber in that period. In the pictures of the cockpit I found on these two (now three) sites, the red handle on the left marked LandeKlappen appears to be build to serve that purpose as a pilot could pull hard on it if necessary.

Germans would use the term LandKlappen usually for drag-inducing flaps while tak-off/landing flaps were named simply Klappen.
 
Hello Hubbabubba, hello Ivan,

Thanks Hubbabubba once more for the wealth of extra detailed photos. I dad seen a different site with about 15 photos some time ago, but this one has an endless collection of incredible details. The aircraft is truly amazing for its time. Thanks too for the comments on the drag, or lack of it, and the kind of flaps.

I was thinking about the instability, Ivan, which I think I´ll leave the way it is because of the heavy turbojet on the back, which does seem to have been an issue.

Then, I still have to think about how to tackle the general Drag issue. So, from the clean lines it can be deduced as having been rather low in reality, but perhaps it´s too low on the model. The problem is the way AirEd identifies Angle of Incidence and Angle of Twist, and then FDEdit has them the other way around, I think, and calls Twist as Wing Eficiency. Then there´s the Oswald factor i.e. the Induced Drag thing. This is rather confusing, and then, increasing Angle of Incidence seems to reduce Drag! So, some more testing is in order here.

There are also some now quite obvious details to be corrected on the model:
a) The shape of the inverted winglets - they should be more elongated.
b) The lower central instrument I´d taken for a compass on all the other photos I´d seen before, is in effect an artificial horizon. I always wondered why there wasn´t one. Silly! Another contradiction on the non-metric instruments on my panel is that although the Checklist speaks of MPH and Knots, the airspeed indicator is in Knots! I couldn´t find an MPH one that would go up far enough. Maybe i should get the default jet airspeed gauge and re-do the dial in MPH. Although in reality, it should be KPH, but that won´t mean much to users. The RoC instrument would have to be in metres per second too... Panels always give me a headache, that´s why I usually prefer just adapting default instruments, but in this case it was more complicated because of the N2 RPM gauge.
c) The landing gear sequence from the video in the other source Hubbabubba sent the link to, shows how the main gear comes out, one after the other - that can be done in the .air file too.

This, and some other improvements, together with the .air file corrections Ivan mentioned, will be included in a future update, which I will slowly be preparing. I knew that the model was not perfect, but the only way I could get any further was to upload it to see what feedback I could get, for which I´m very grateful!

I´d actually not expected there would be so much interest as this birdie has no prop! However, Smilo´s initial encouragement, Ivan´s comments about the Orion´s turbo-props and the meniton of his future Me-262 work, as well as the feedback coming from him, has obviously changed the somewhat!

Well, more days will provide more pots of soup, as they say here!

Thanks again, and cheers!
Aleatorylamp
 
Back
Top