Exercise Eleven
Basic Animation - Flaps, Ailerons, Rudders, Tires, and Props
Links to earlier tutorials
Resources Kit for exercises includes GMax starter calibration box, 3-views, pictures.Exercise One - Using cross sections
Exercise Two - Nose work
Exercise Three - Windshield and Air Intakes
Exercise Four - Blending the Wing Root to the fuselage
Exercise Five - Adding nose area amenities
Exercise Six - Cloning and Mirroring Halves, Cutting Doors and Windows
Exercise Seven - Creating the interior of the fuselage
Exercise Eight - Creating the vertical stabilizer
Exercise Nine - Creating the rudder
Exercise Ten - Building the wing strut
Aircraft parts animation for fs2004 and fs2002 are quite varied and less complex than for true fsx modeling. the focus here is on animation nametags as recognized by makemdl, the compiler that builds fs2004 models.
If you do not have the fs2002 or fs2004 makemdl sdk, then you are operating partly blindfolded. the sdk lists all possible animation nametags available, categorizes fs animated nametags versus key frame animated nametags and helps with the pivot axis to use. the following are peeks at the content.
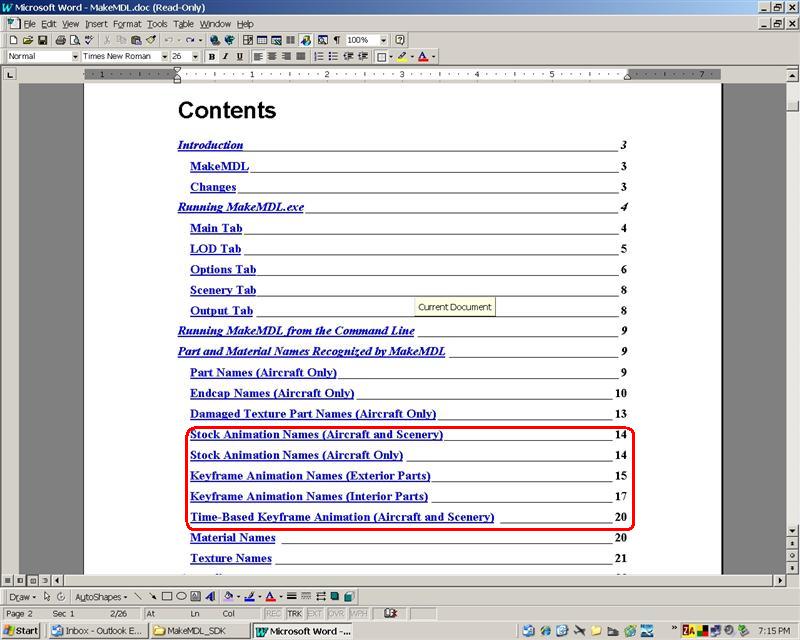
You can see the list of names are categorized by stock, keyframe, and time-based. we will focus here on stock animation names.
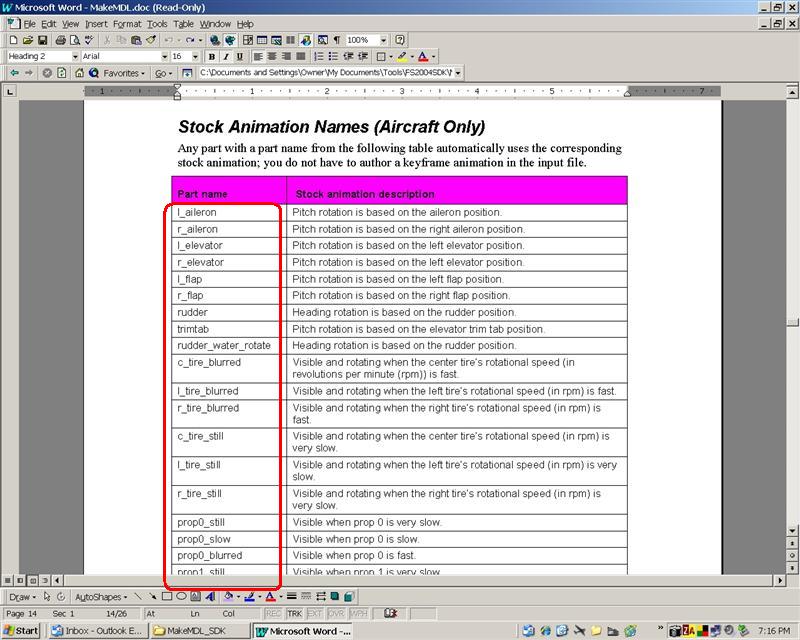
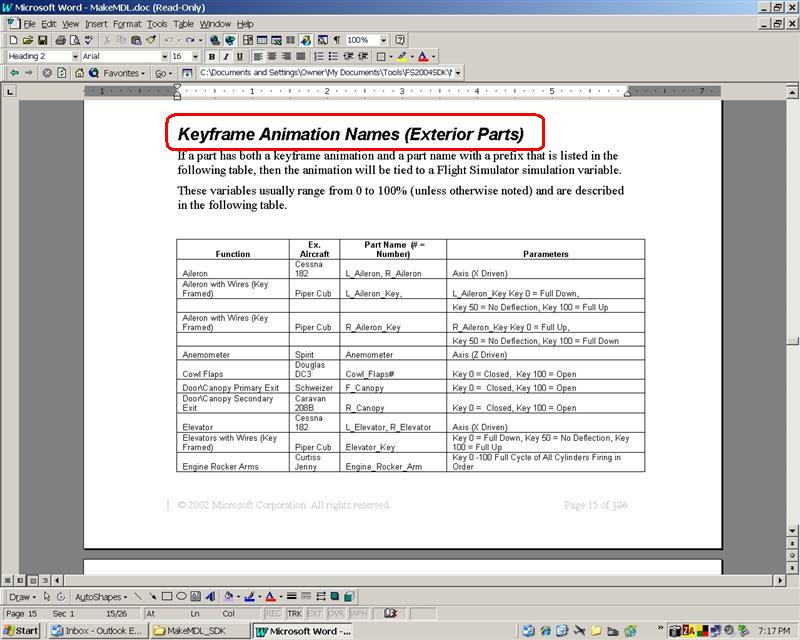
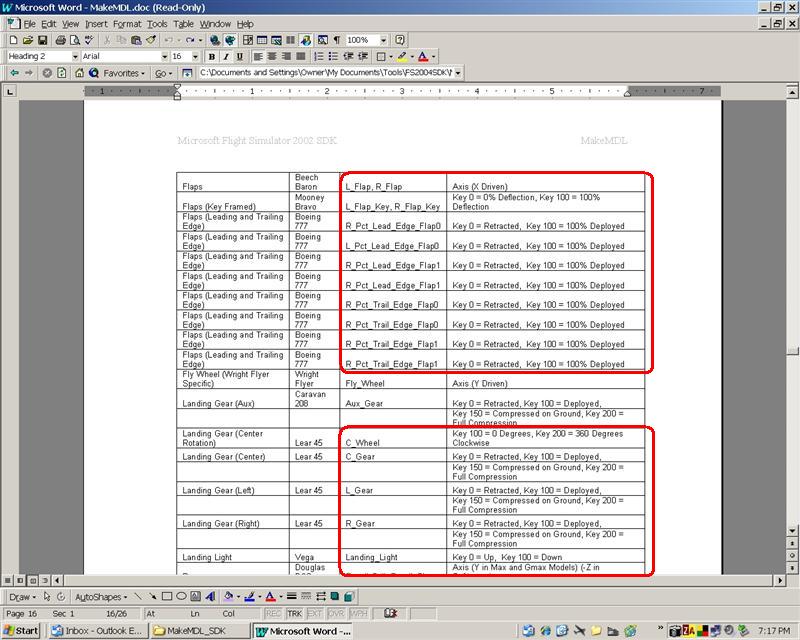
This exercise focuses on a few of the standard nametags for flaps, ailerons, rudder, tires, and props. most of these are fs, not keyframe animated. just name it correctly and place the pivot and fs will animate it.
Stock animation parts have three components: the precise name, pivot orientation, and pivot alignment and placement. nametags must follow conventions, rotations use a specific pivot axis that varies by nametag, and alignment/placement is important to the pivot base and rotation integrity.
Let's look at the right flap name r_flap, and fs animated nametag.
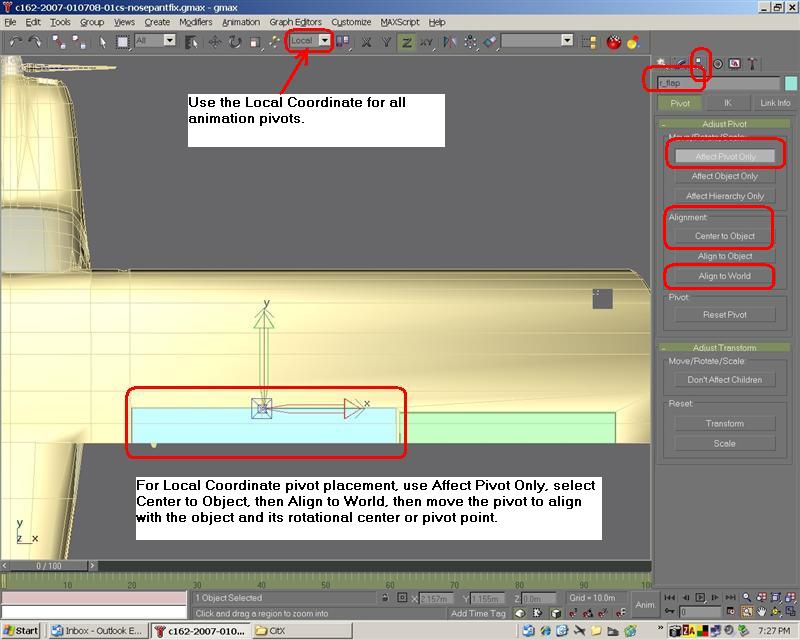
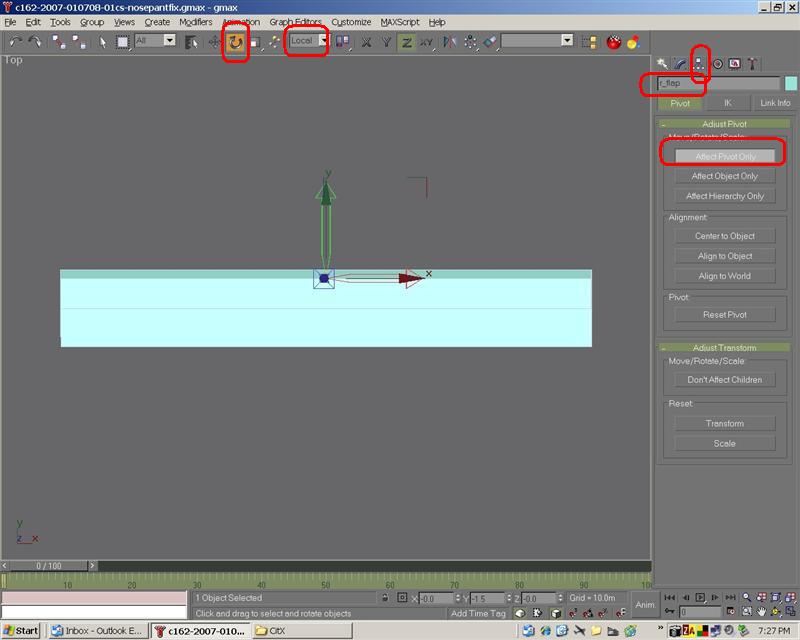
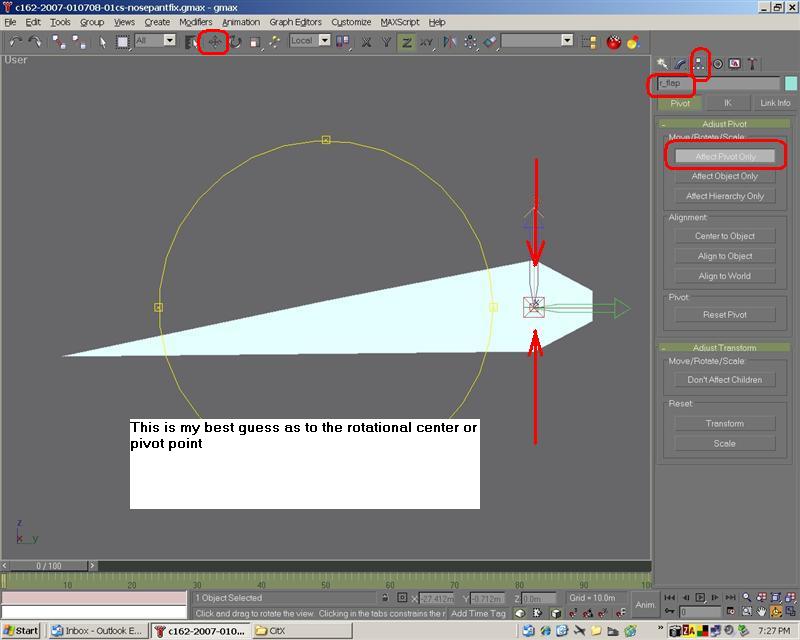
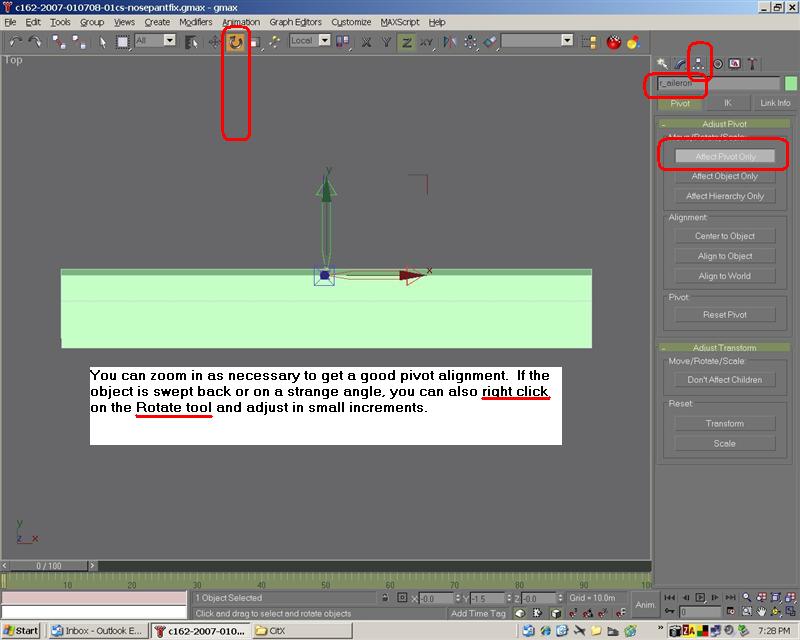
Placing the pivot is critical if proper animation is to be achieved. a 1/2 degree error is very visible. take you time and get perfect alignment on all axes. zoom in for better views. ensure you are using standard viewports (left/right/top/bottom/front/rear) for best placement accuracy. use the rotate tool dropdown (right click) for smaller than .5 degree rotations of the pivot.
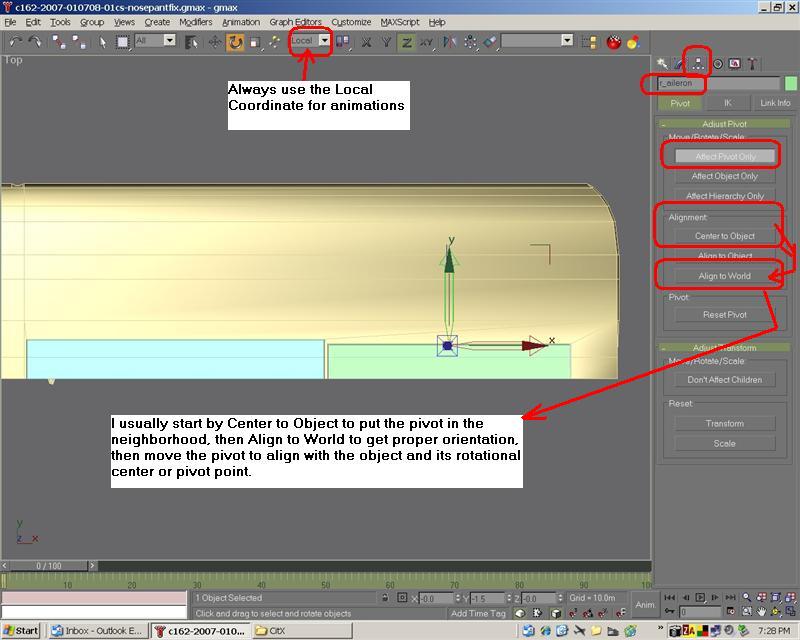
Showing the right aileron (r_aileron)
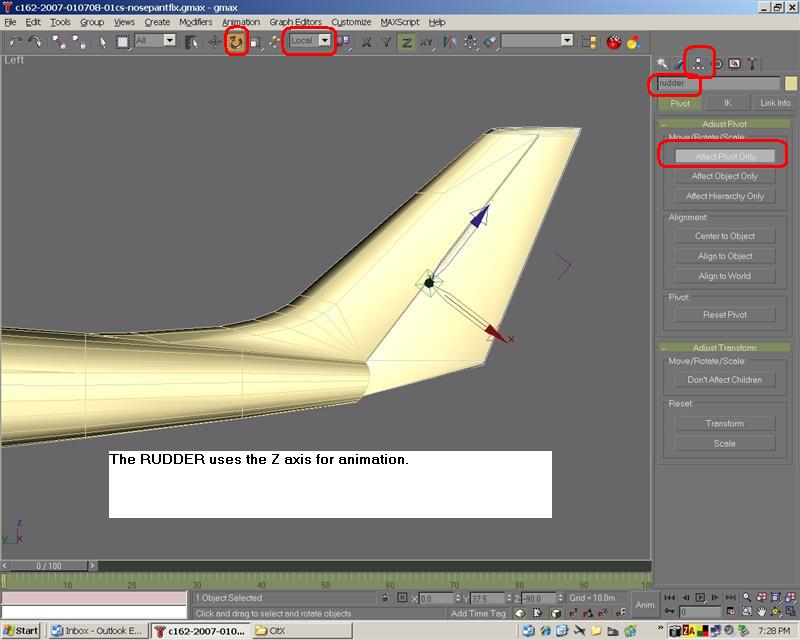
The rudder
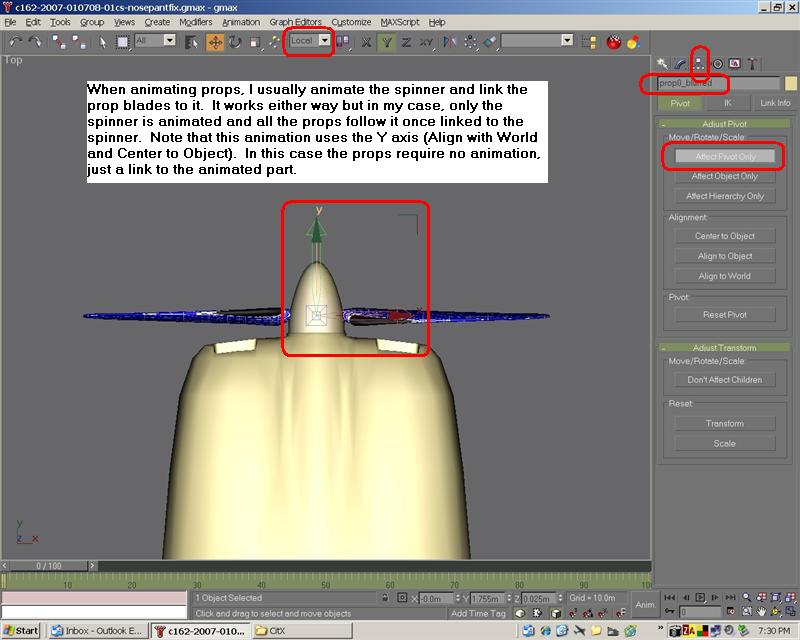
The props and spinner
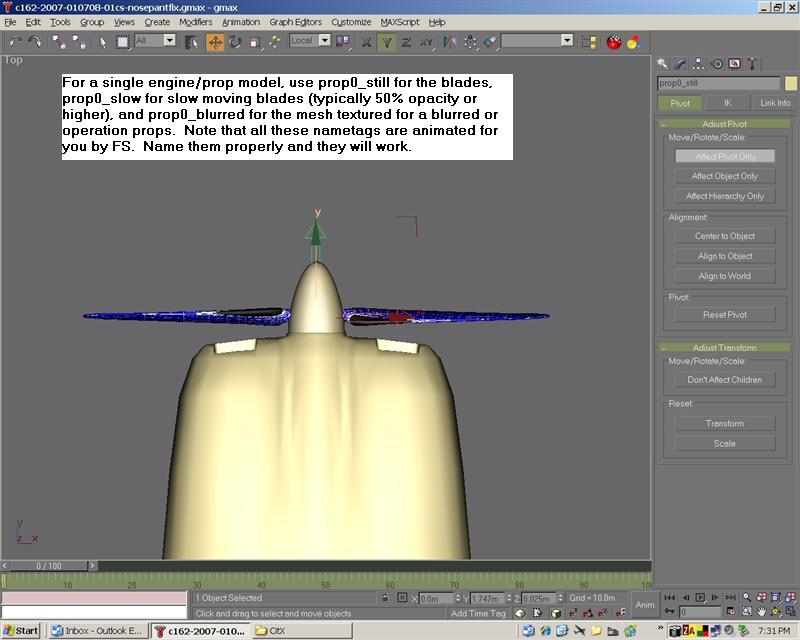
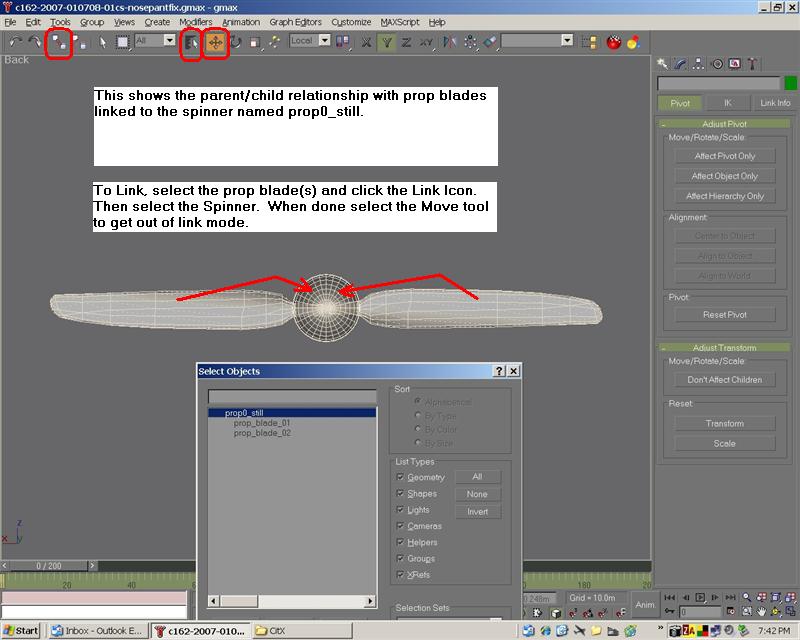
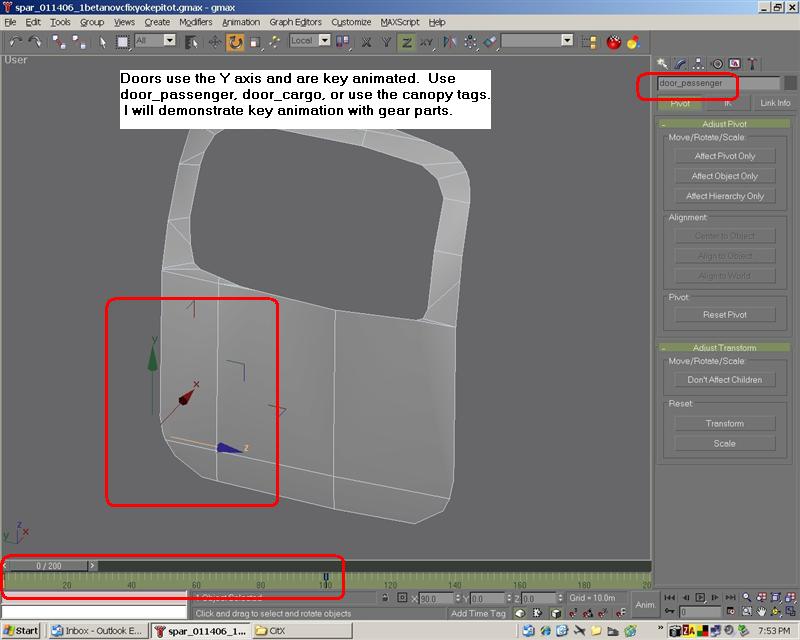
Keyframe animations
An example of the d18s gear
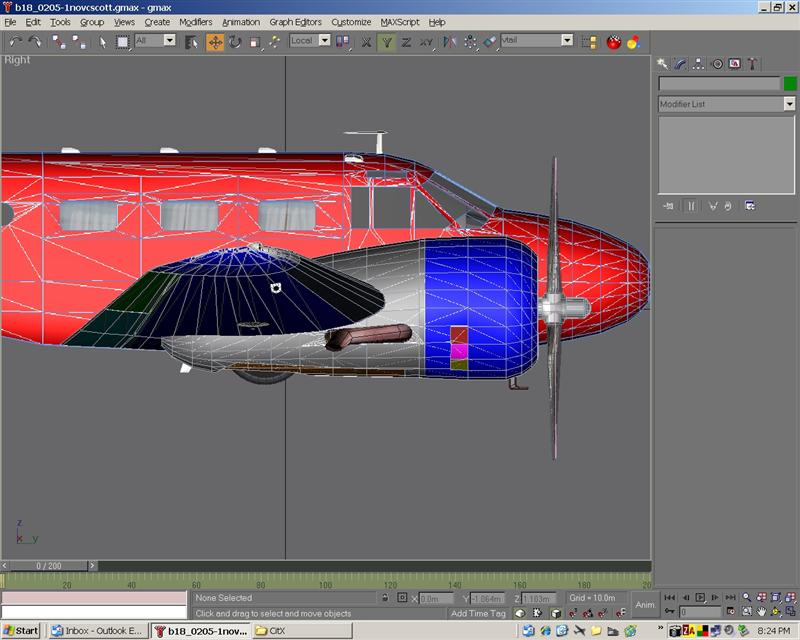
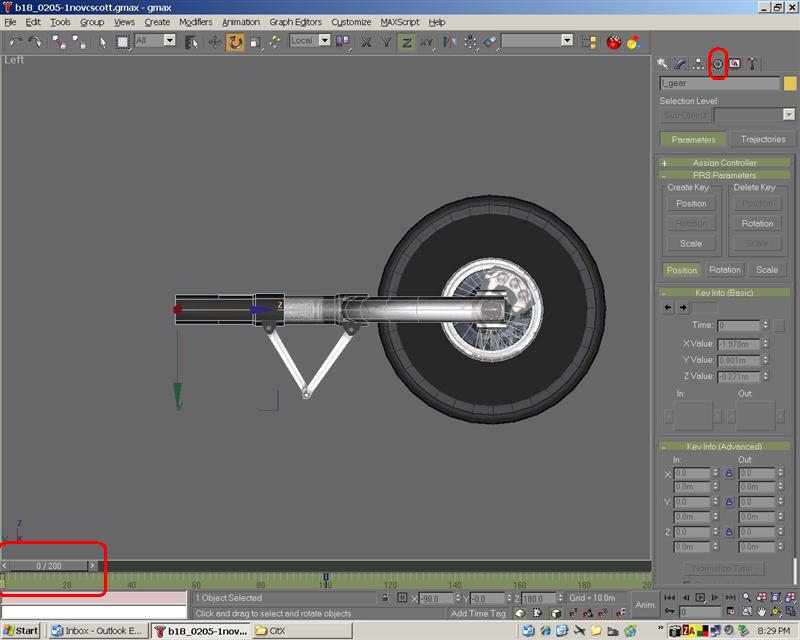
The left gear retracted at frame zero
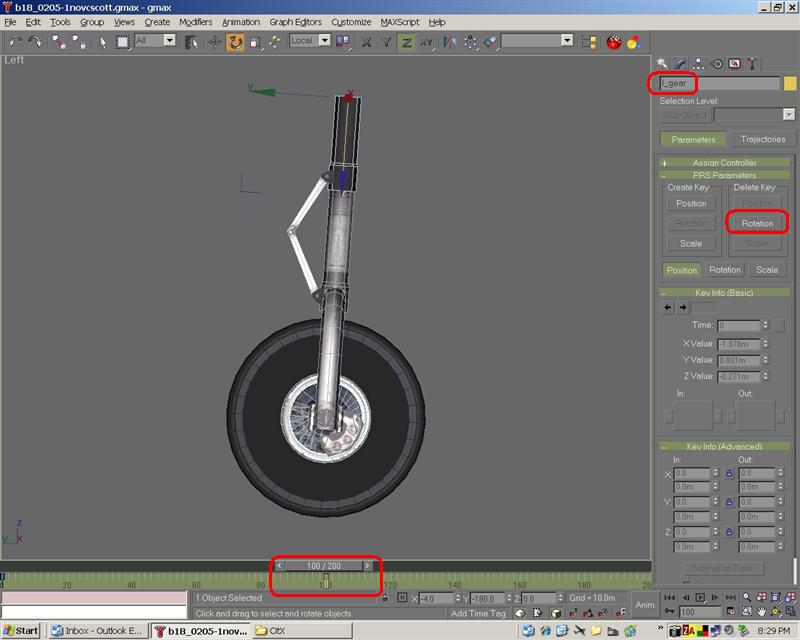
The gear extended at keyframe 100
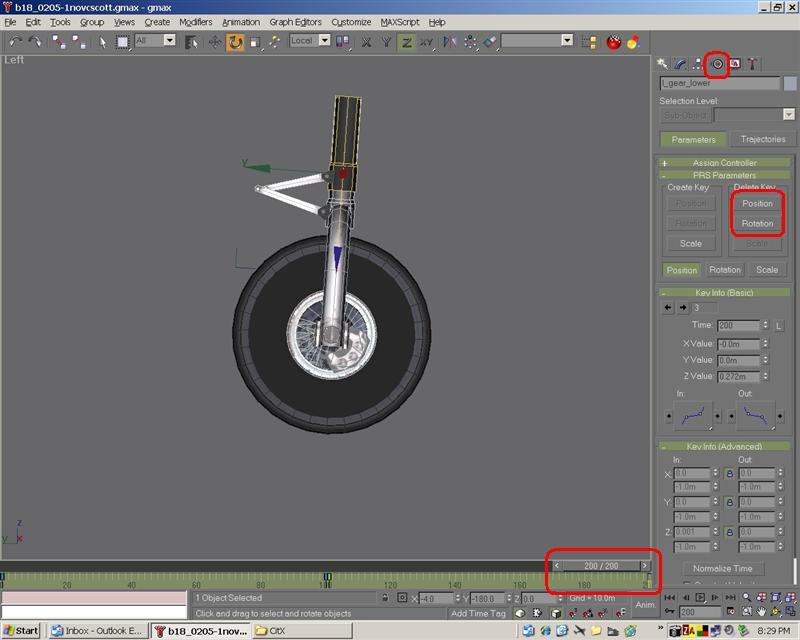
The gear with suspension compressed at keyframe 200
Now, this is how it is done. we will start at the top of the hierarchy, the top gear animated to extend and retract from the wheelwell. remember with most animations, at keyframe 0, the objects are closed or retracted or positioned as if in flight.
Let's build and animate the primary gear assembly starting with the top of the gear assembly.
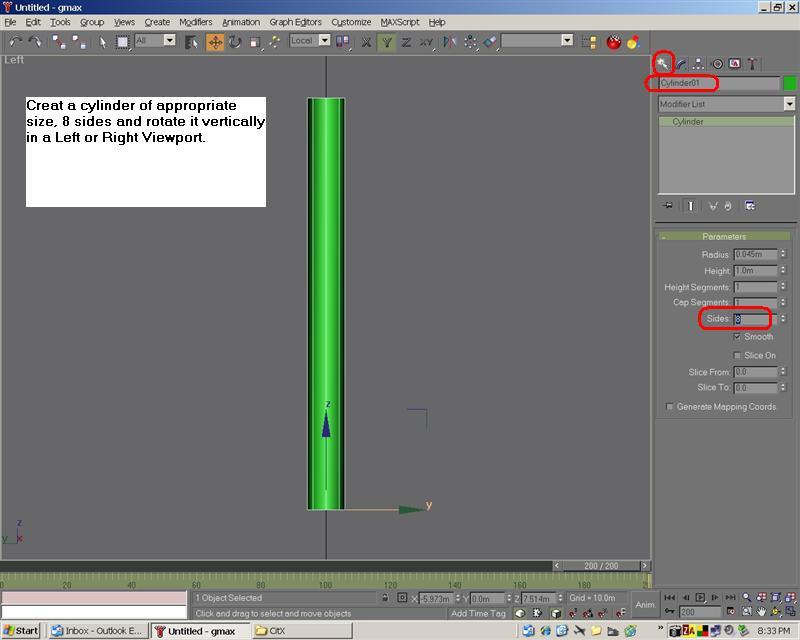
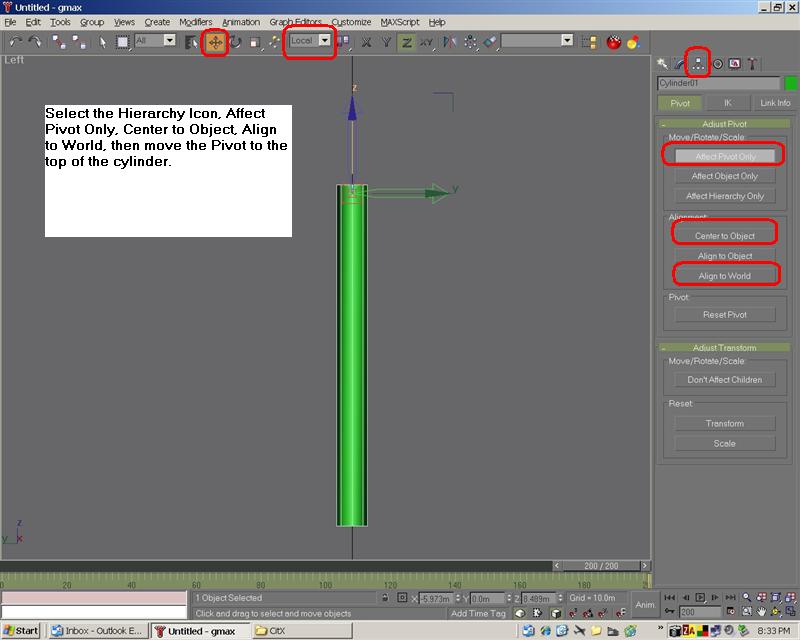
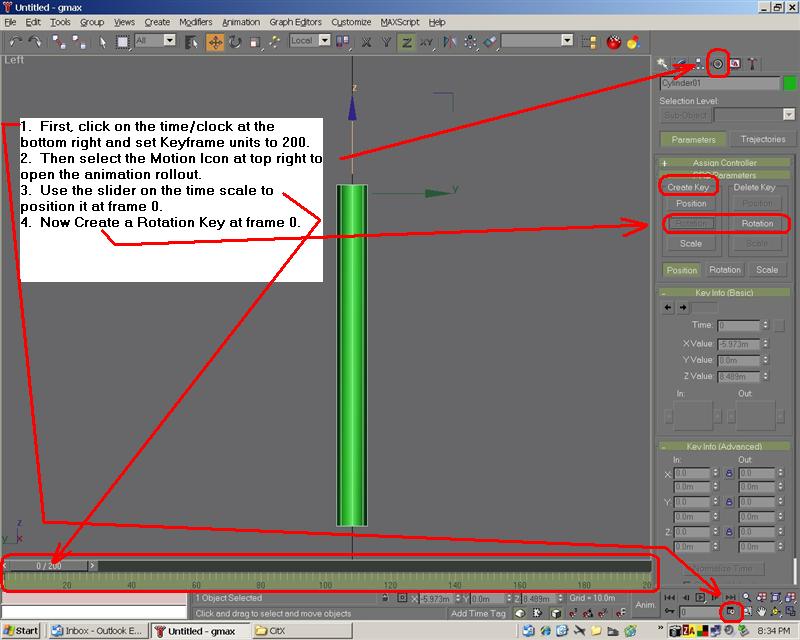
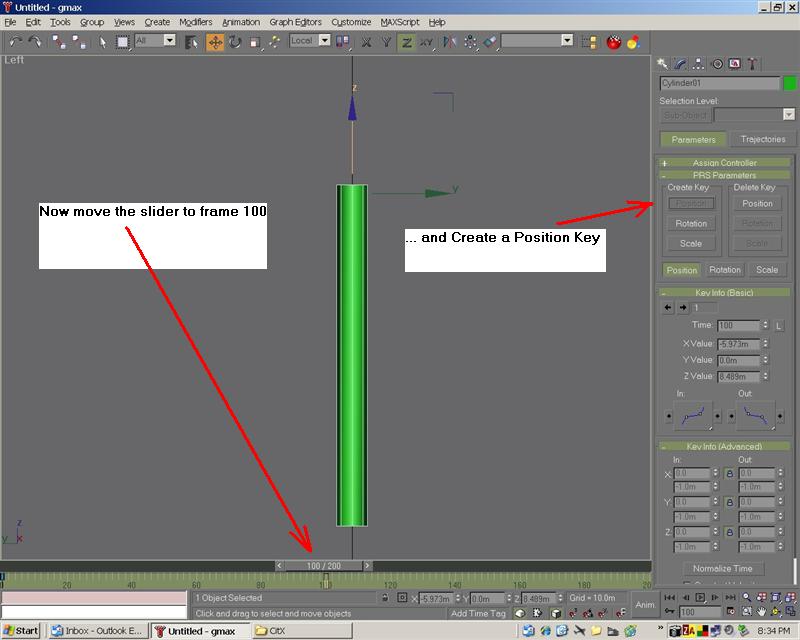
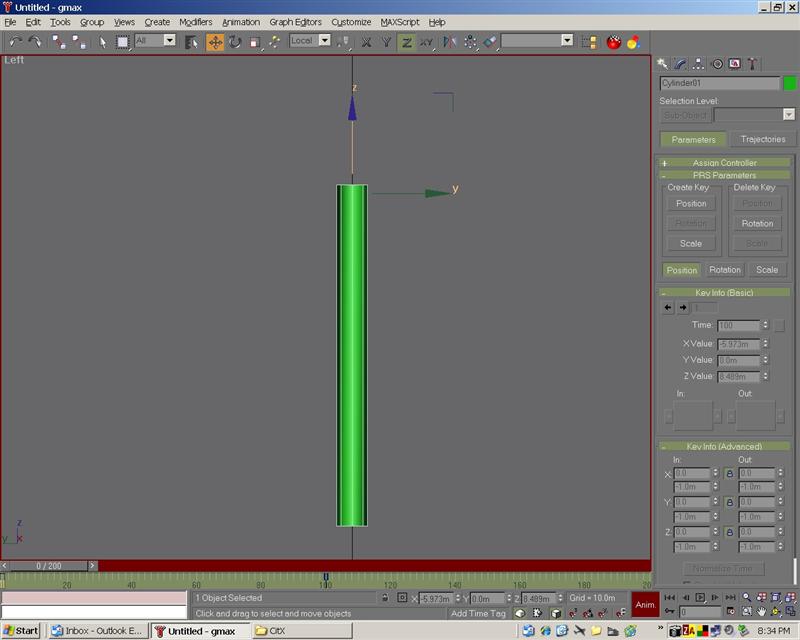
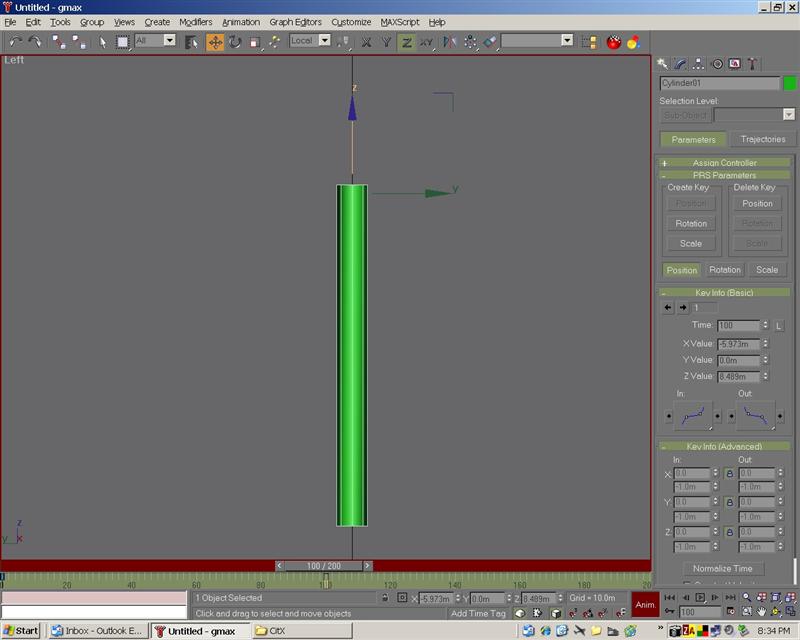
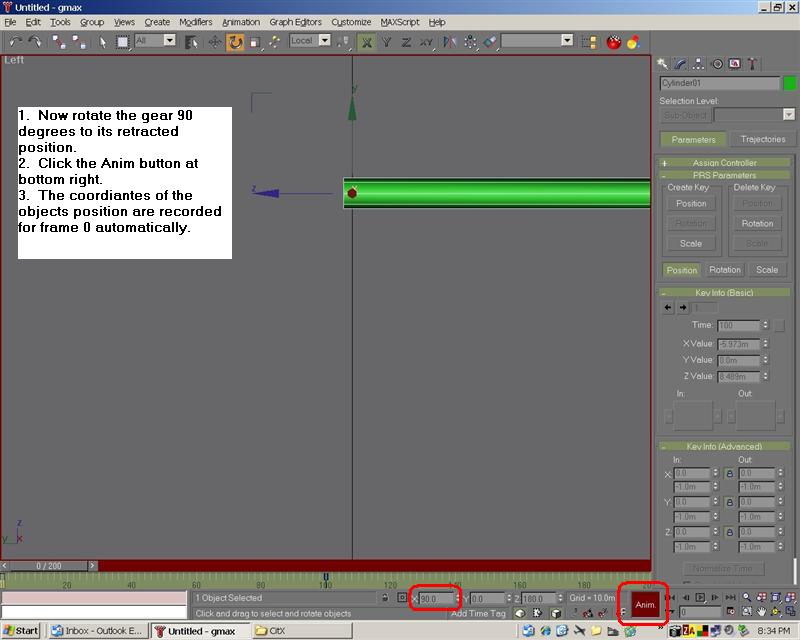
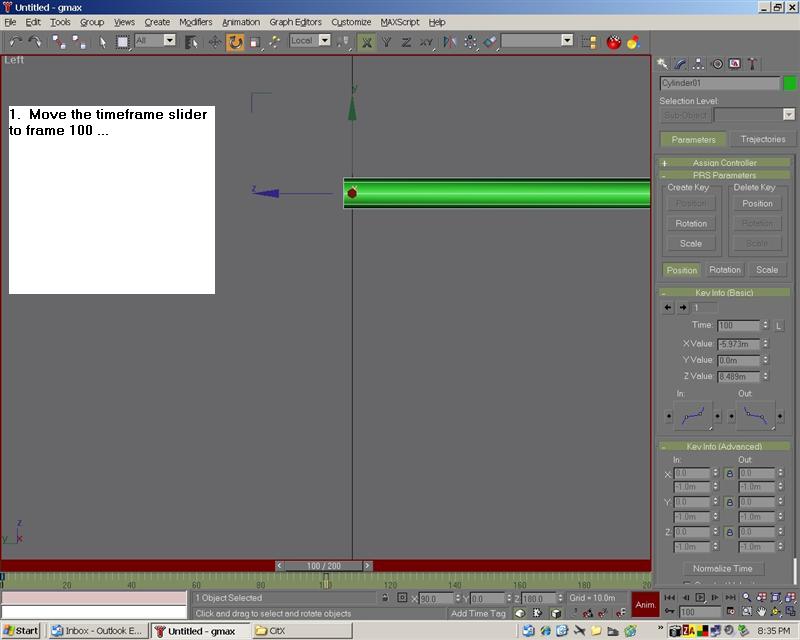
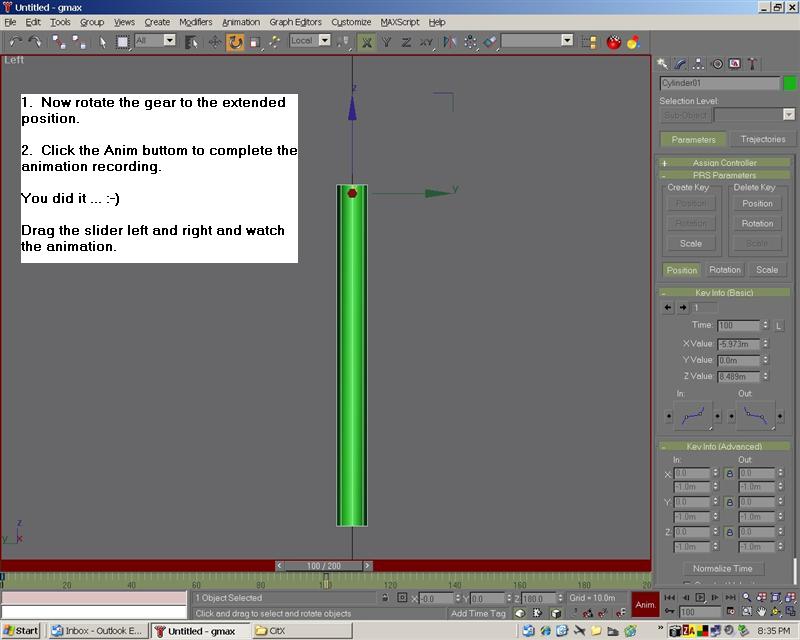
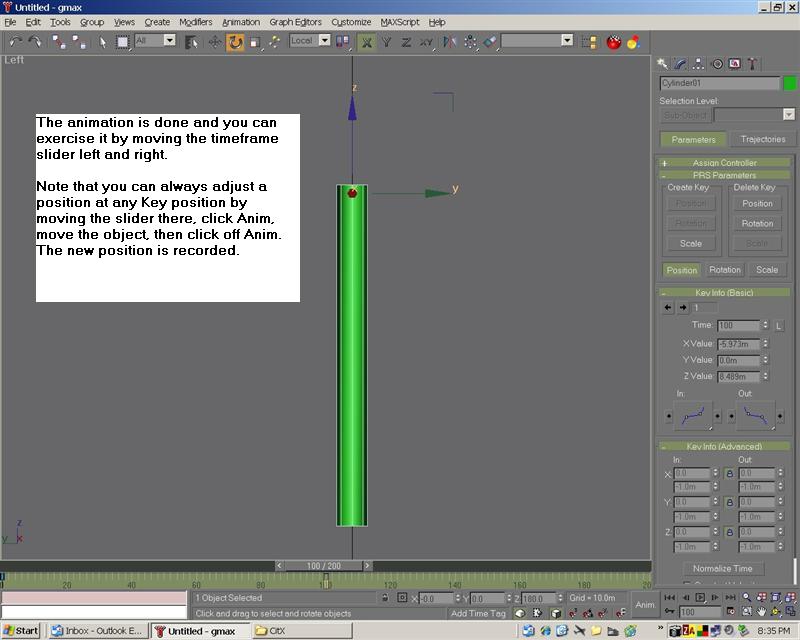
Now, let's add the suspension or lower gear part and animate it.
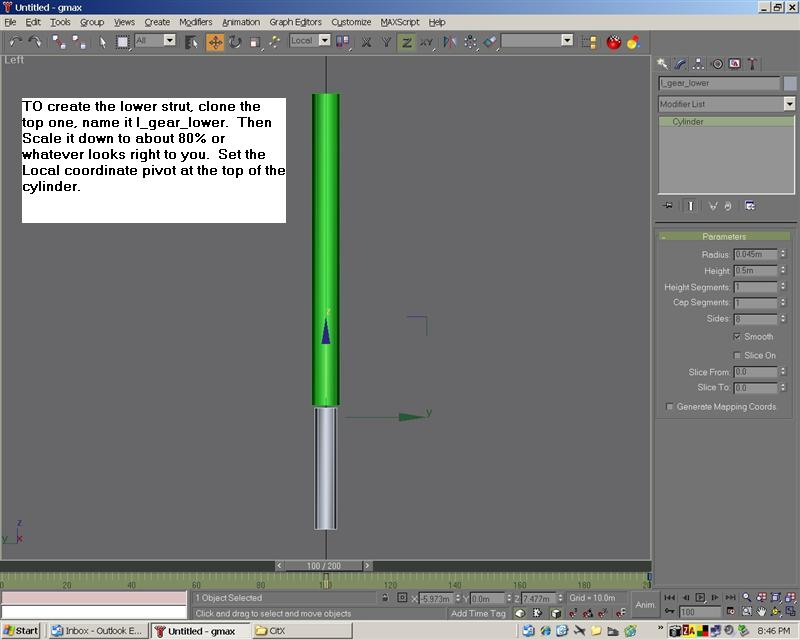
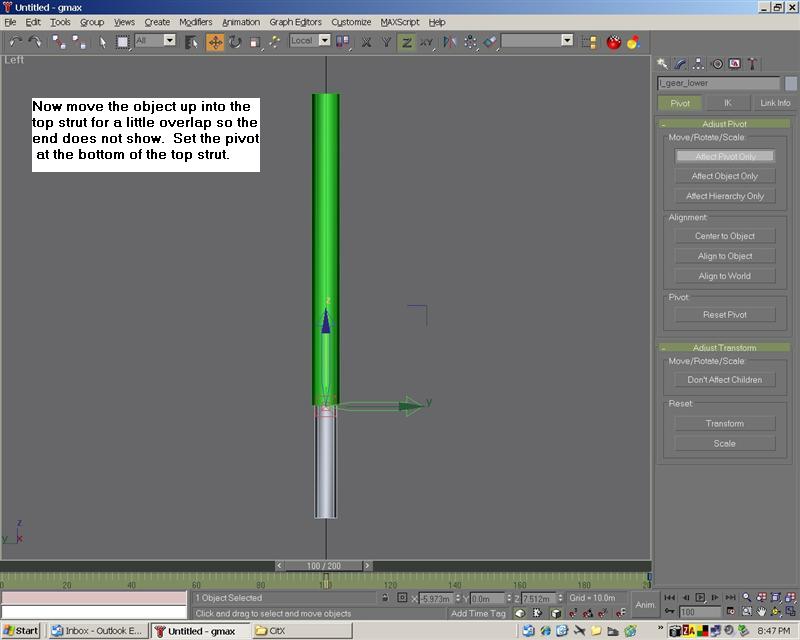
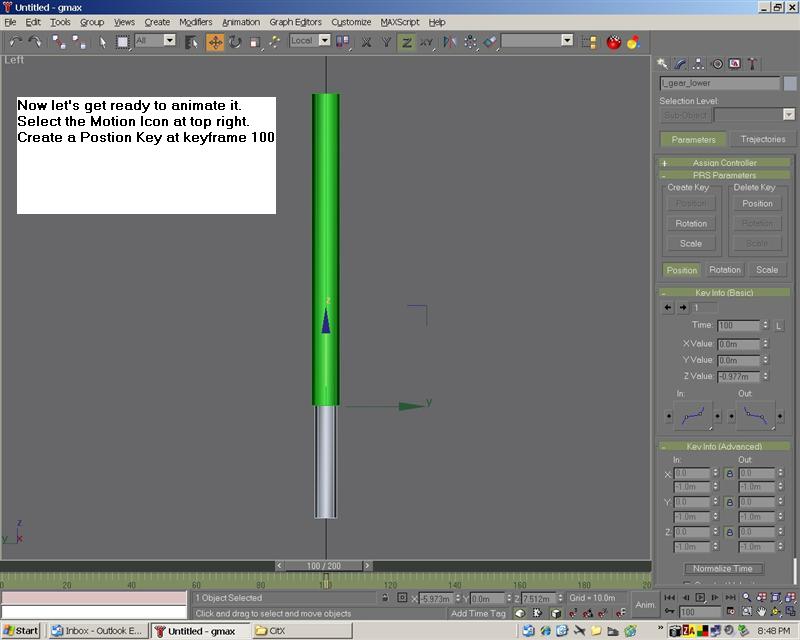
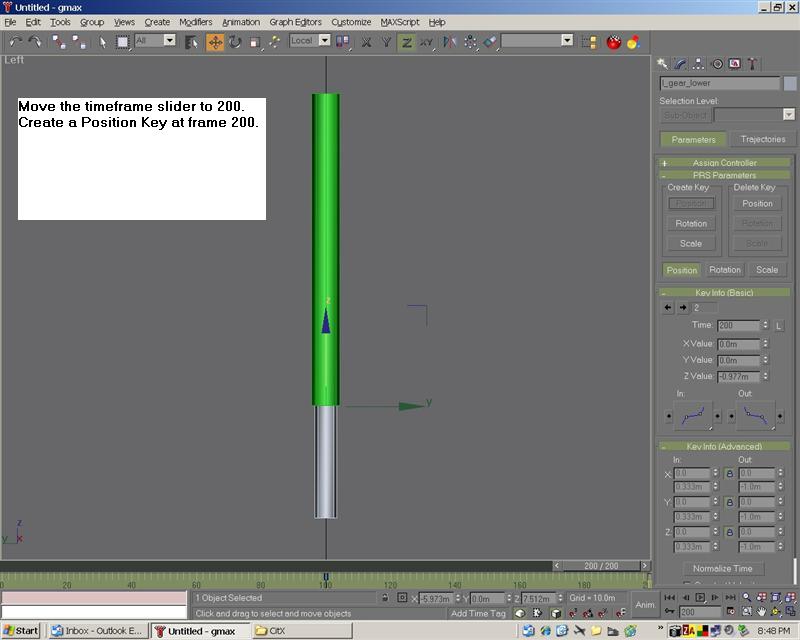
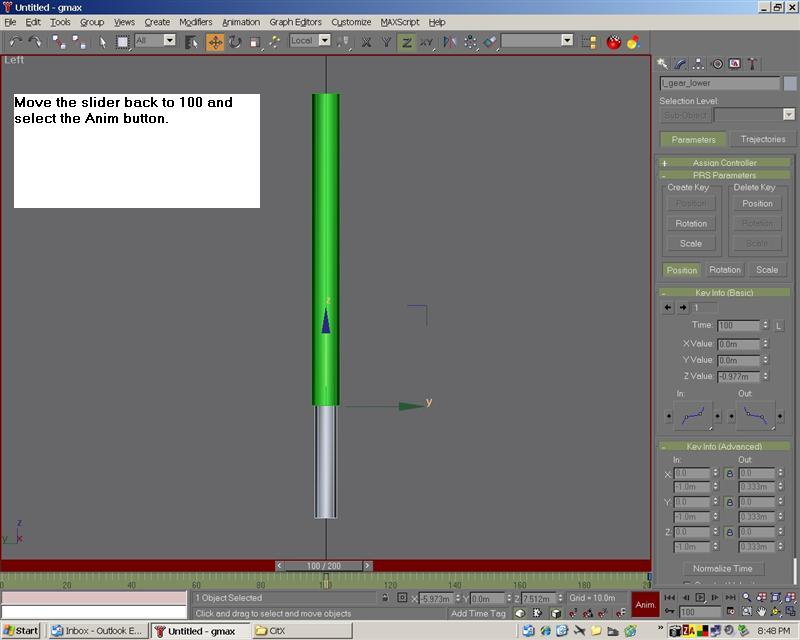
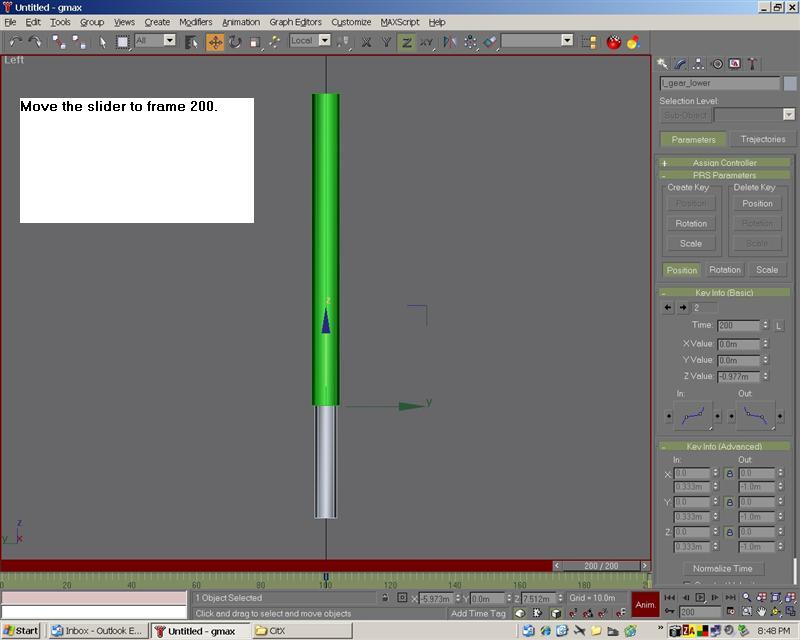
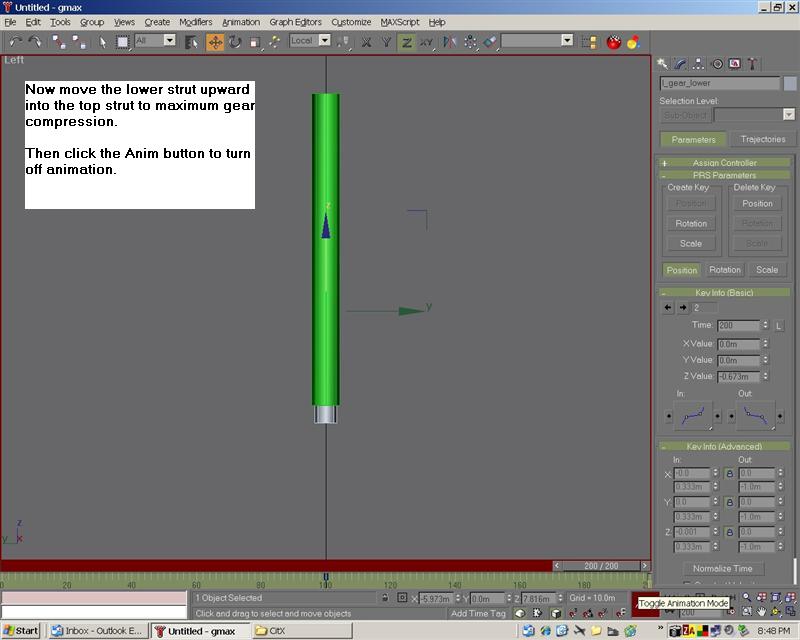
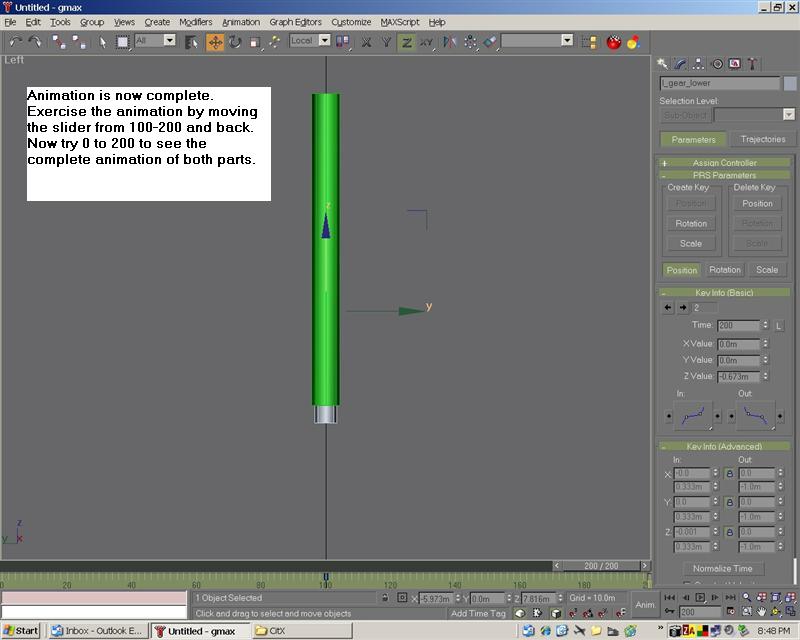
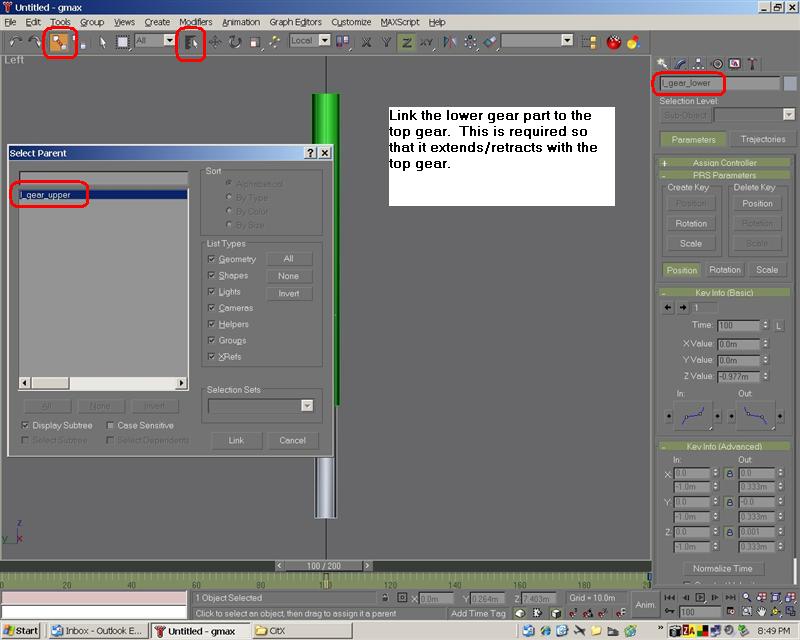
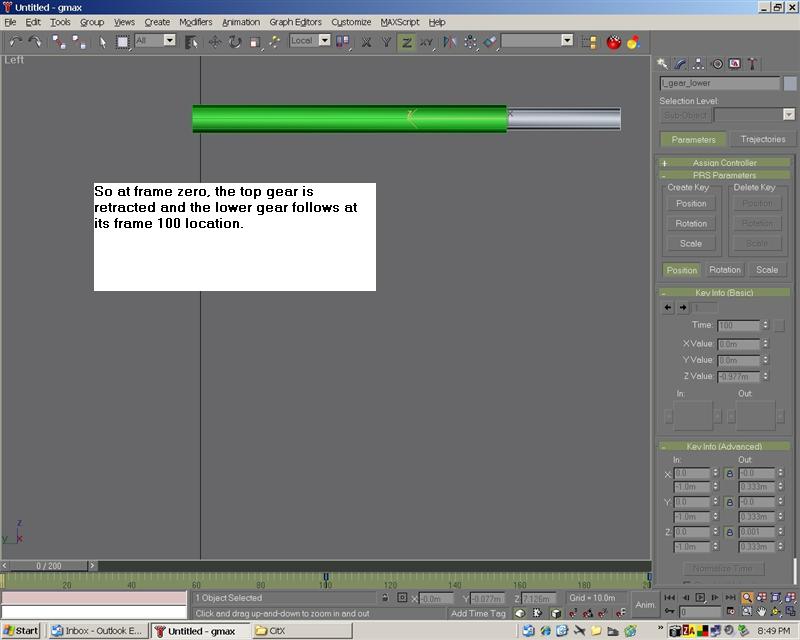
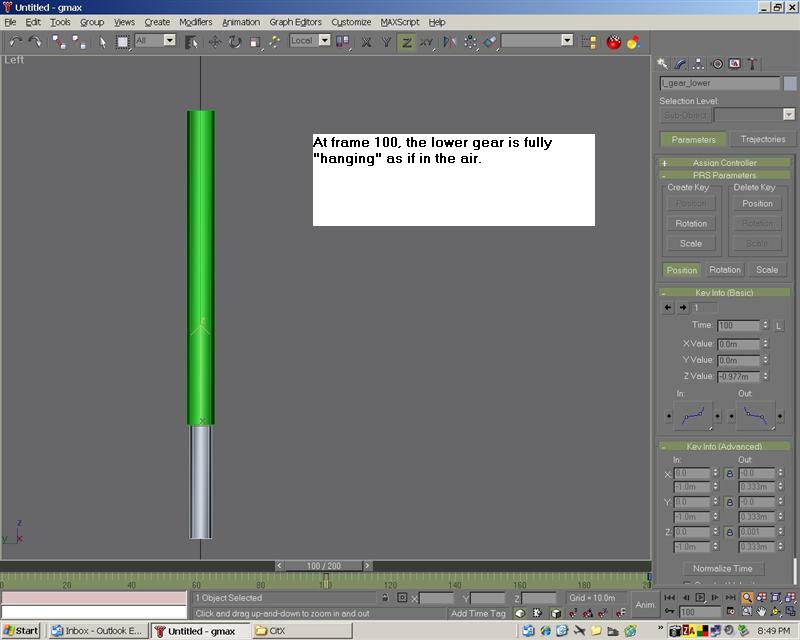
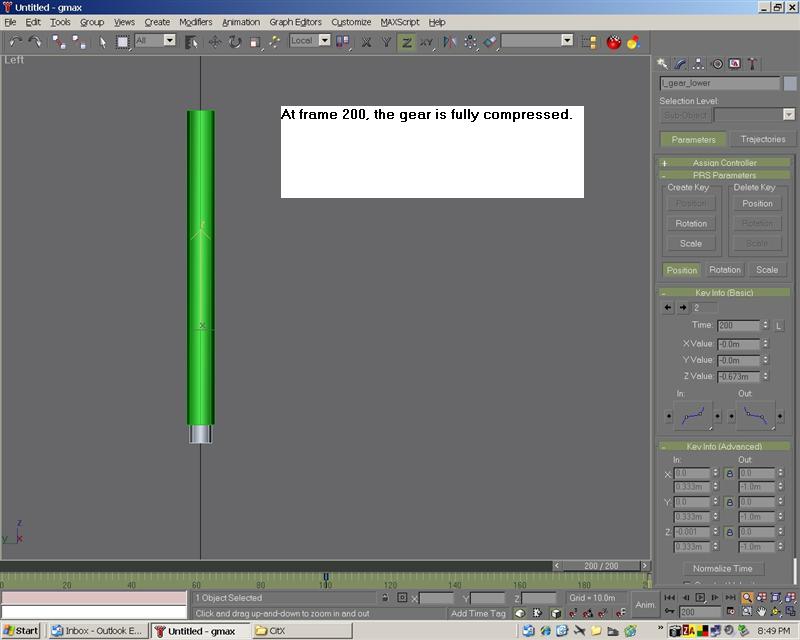
With any kind of rotation you will need rotation keys (at the start of animation) as with the top part of the gear in extension and retraction, and position key at the end of the animation. with the lower gear straight line up and down movement, you need only use the position keys on each end.
This concludes the exercise eleven
Press on with the next step.