Mapping Exercise Three
Exporting maps, creating templates, applying to model
Objectives
 Export the mapping via md3 to Lithunwrap
 Create a texture bitmap template
 Apply this texture to the model
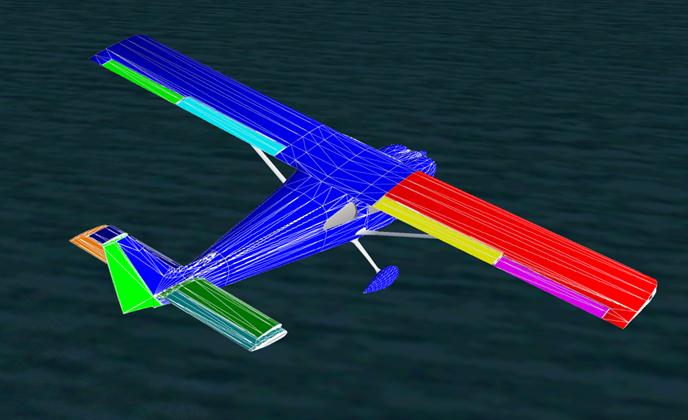
fig. 1 - Exterior model mapped as shown in fs2004
Overview
This tutorial, part 3, will show how to export that map to create a template and save it. The texture template will then be applied to the model in GMax.
Time to export
Open your GMax project and select the wings named selection or select all the wing parts we have previously mapped.
Once selected, open the file menu and export selected.
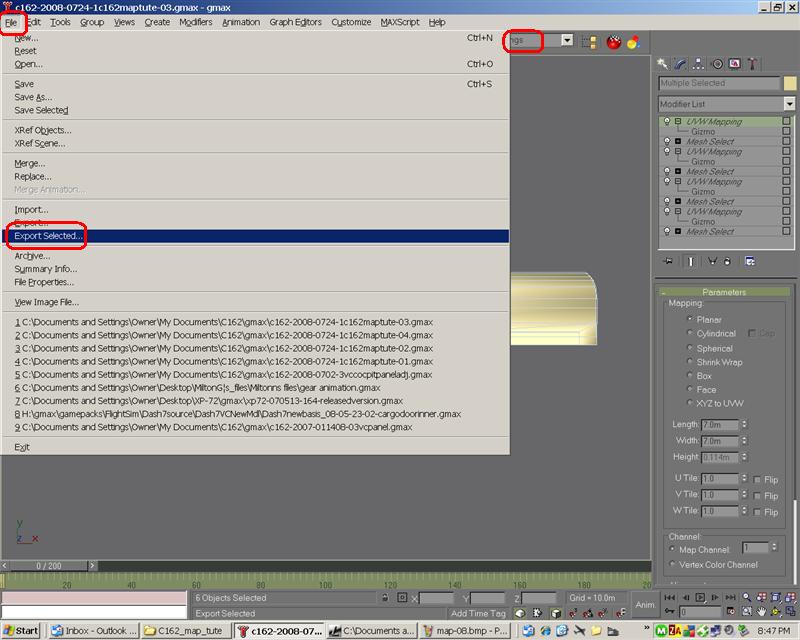
fig. 2 - Exporting the mapped objects
Browse to your UVW/md3 folder, assign a filename like twings and save as type quake iii (*.md3). If you do not see this file type as an option then you have not installed the tempest Quake III plugin into the proper …GMax/plugin folder (files there should include tempest.dlo and md3exp.dle.) save the file.
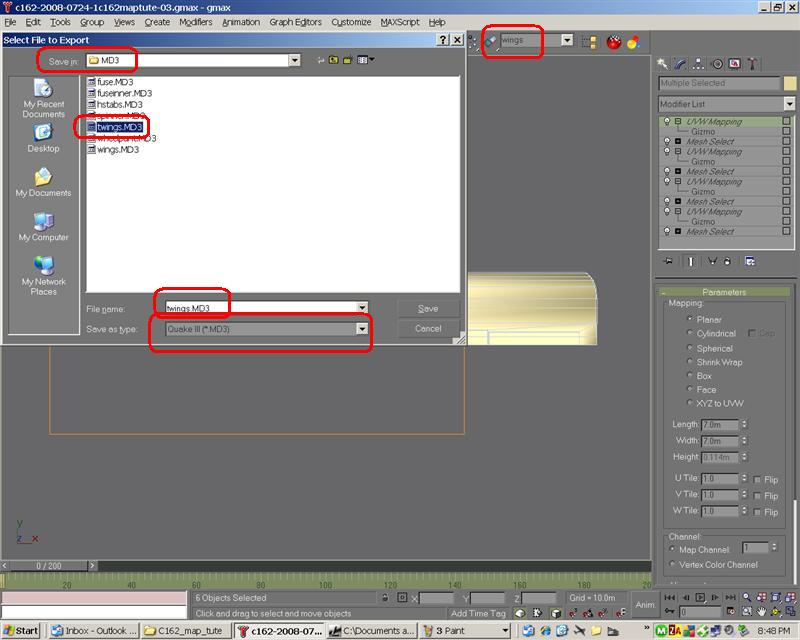
fig. 3 - Selecting the folder and assigning a name
The plugin needs some basic information to proceed. put a zero in for frames and export now.
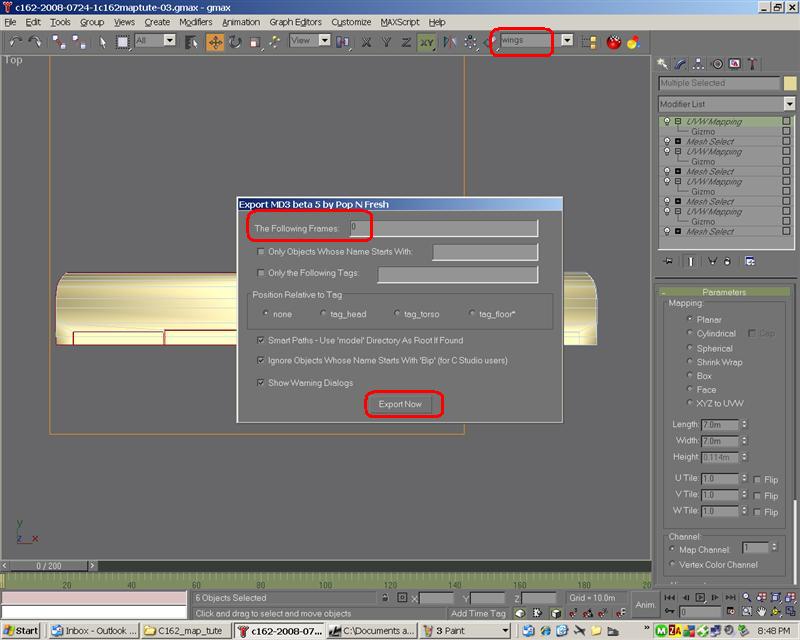
fig. 4 - md3 response is 0
These correspondence errors can sometimes be ignored and you will have no issues with the map. It is good cause to go back when done and weld co-located vertices and examine normals and look for rogue polys.
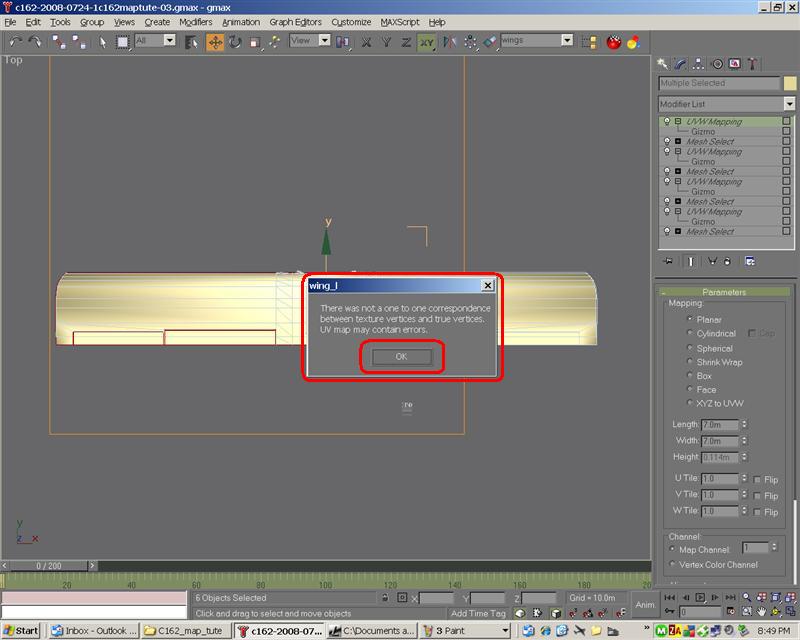
fig. 5 - md3 cautions - okay
The GMax/md3 export is done (just minimize GMax) and now you must open Lithunwrap. It's good to have a shortcut on the desktop for this.
In Lithunwrap, we will open the md3 file as shown; file/model/open and browse to where you exported the map.
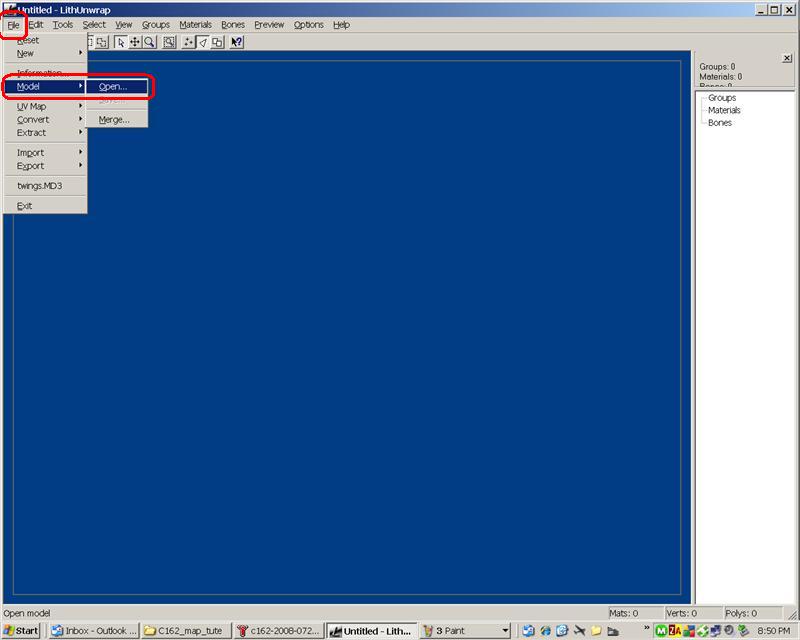
fig. 6 - Open Lithunwrap and open the md3 file
Here we browse to our md3 folder and select our exported "twings.md3" file.
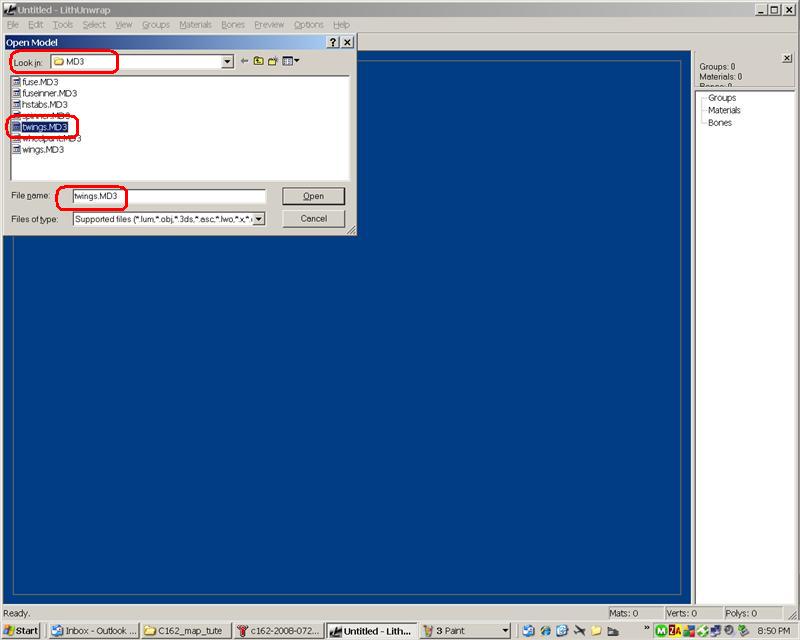
fig. 7 - Browse and open the md3 file
Now we tell Lithunwrap to import a quake 3 arena md3 file
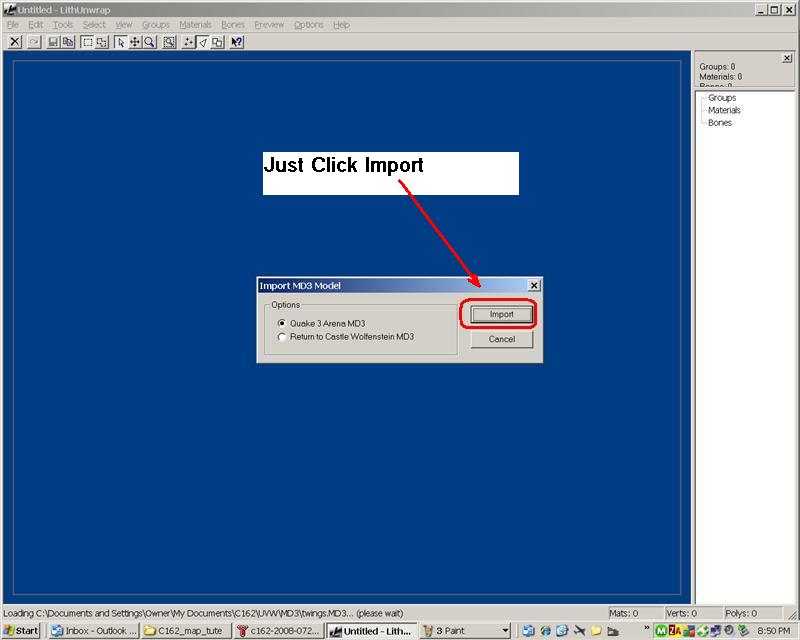
fig. 8 - Import the md3 file
Just click import
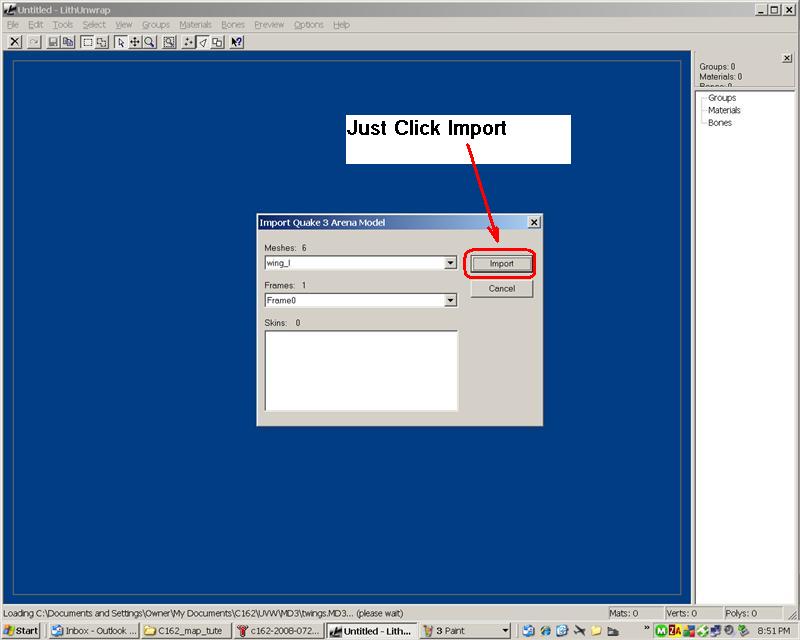
fig. 9 - Import the md3 file
Lithunwrap now presents the imported mesh. Here you are looking for four self-contained meshes with no weird lines crossing the 4 wing map surfaces. If the mesh looks strange with lines going everywhere, then we have missed polys in the selection process.
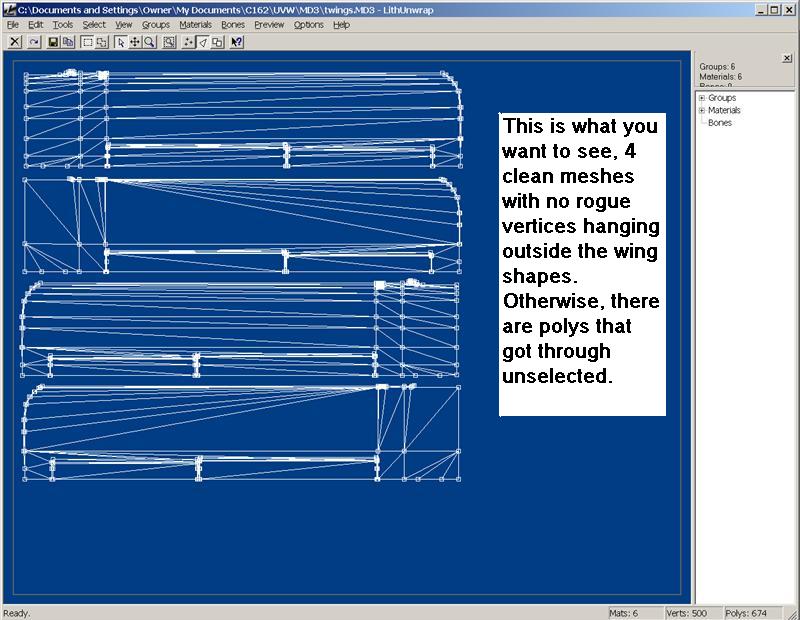
fig. 10 - Lithunwrap presents the imported md3 mesh
Now to create a UVW map or template, we select file/uv map/save.
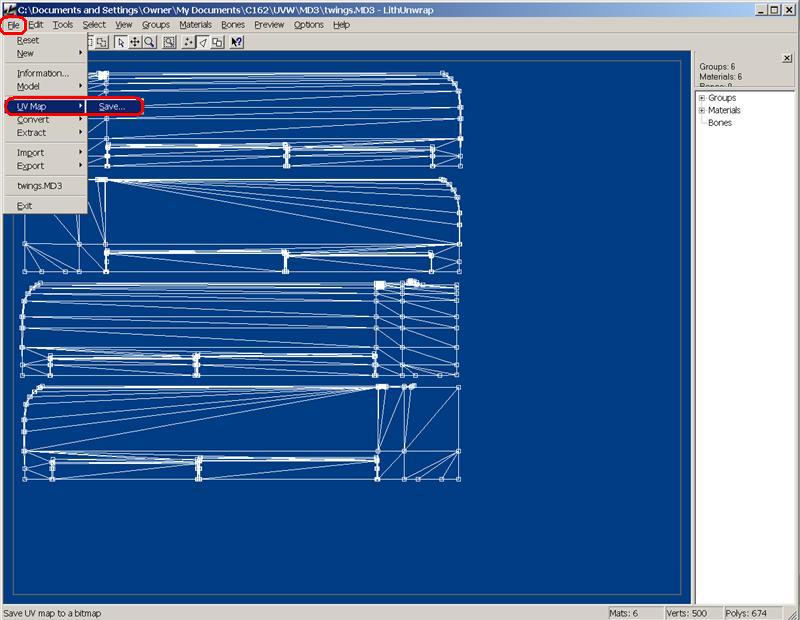
fig. 11 - Lithunwrap creating a template texture
Browse to your UVW folder to save your texture.
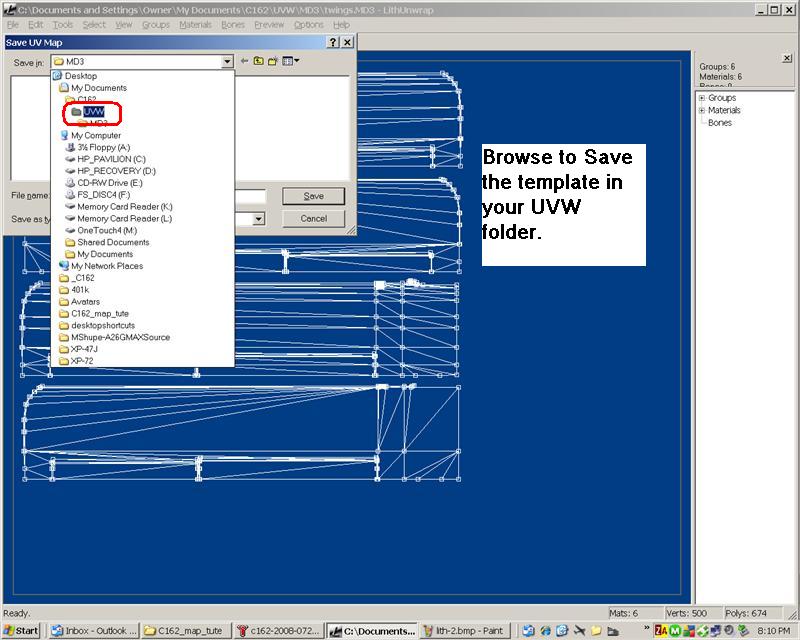
fig. 12 - Lithunwrap creating a template texture
Assign a file name and save.
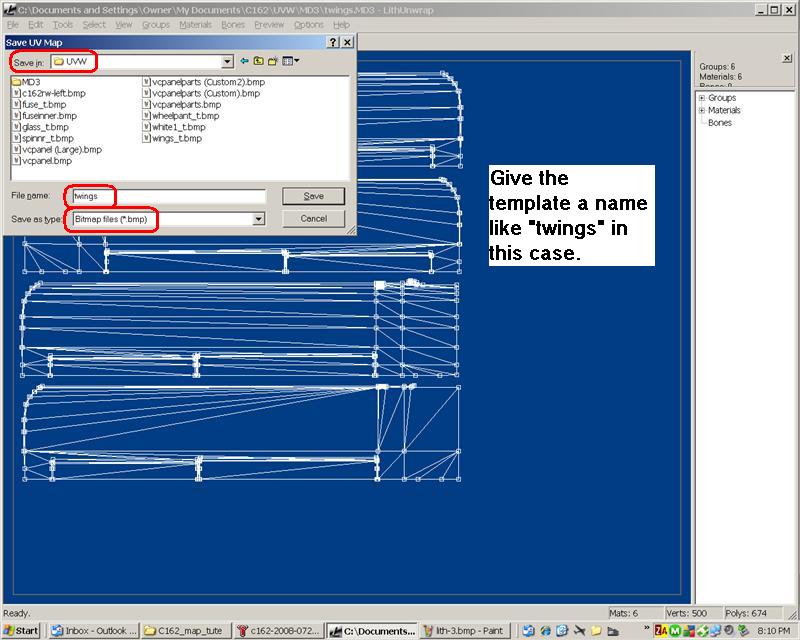
fig. 13 - Lithunwrap creating a template texture
Here you determine the texture size and type. Lithunwrap assigns appropriate colors and gives you options to not use fill colors. Recommended selections are shown.
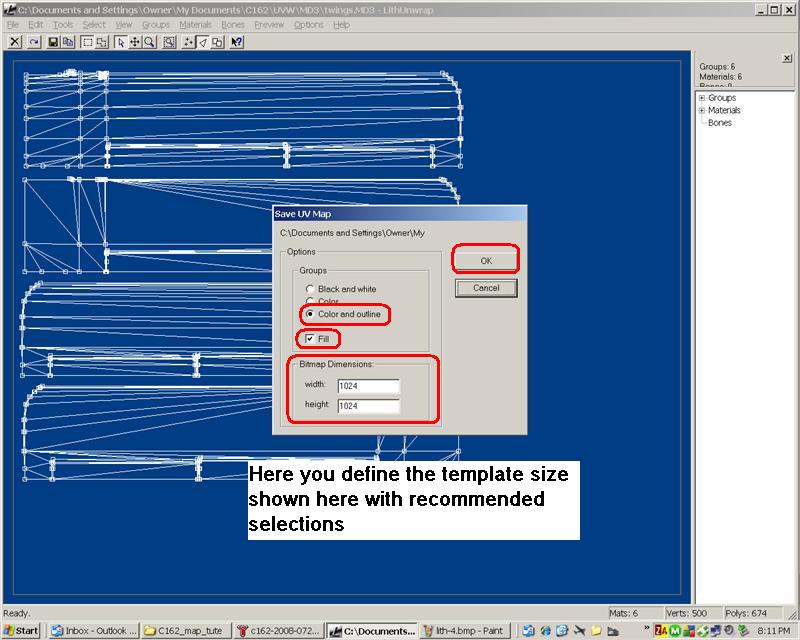
fig. 14 - Lithunwrap creating a template texture
With the texture template saved, we now (minimize Lithunwrap and) jump back to GMax so we can get it applied to the model.
Create a new material in the material editor, select standard.
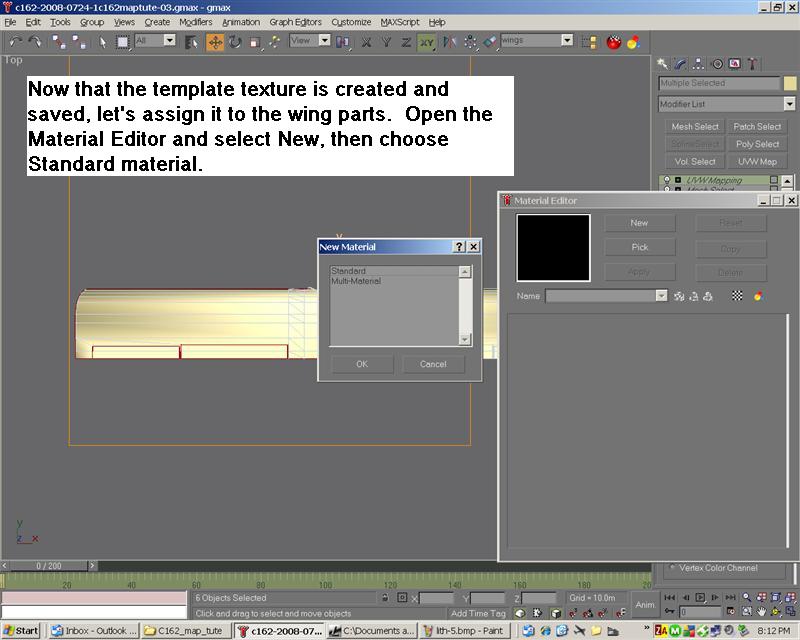
fig. 15 - Creating a new material and assigning a texture to it.
Select bitmap and browse to find the texture we created.
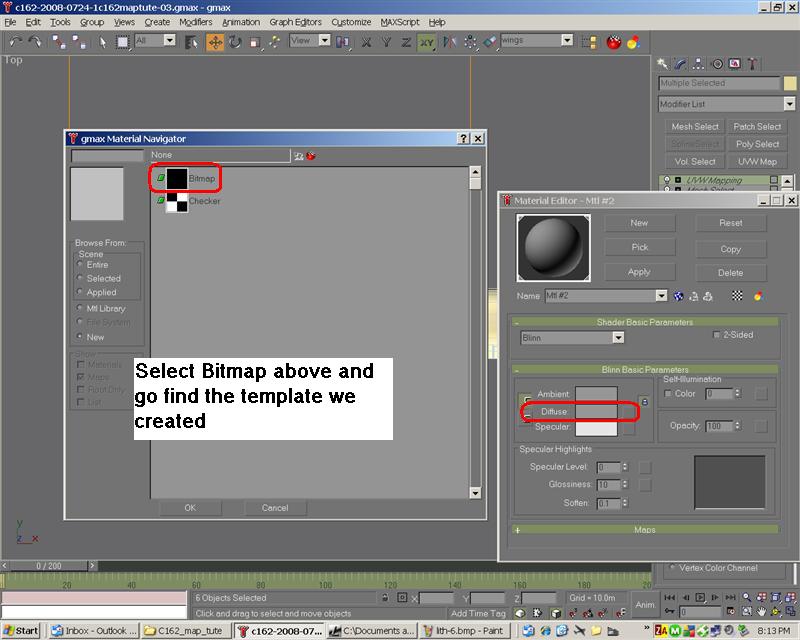
fig. 16 - Creating a new material and assigning a texture to it.
Drag the texture to the editor and apply it.
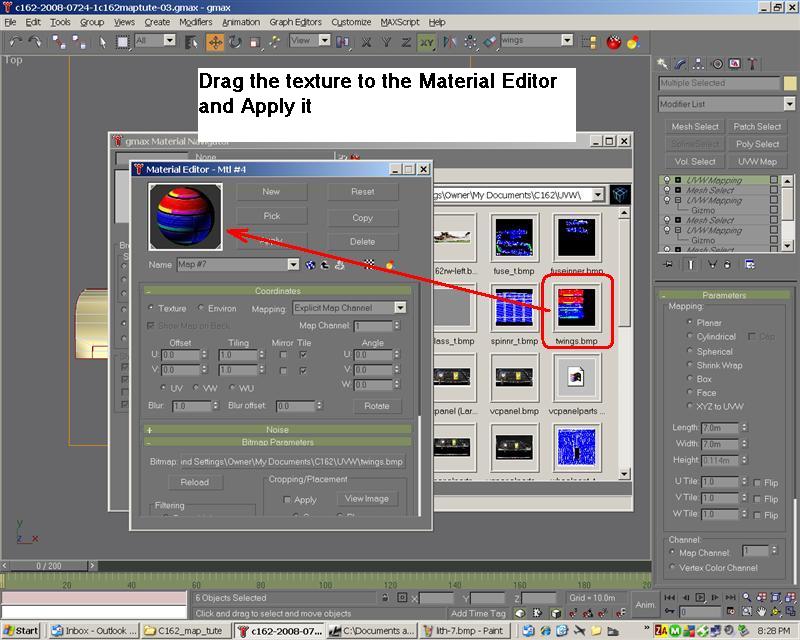
fig. 17 - Creating a new material and assigning a texture to it.
Once the texture is applied to the material, it should show in the viewport. If not, select the blue/white button in the material editor (show map in viewport is the help tool text).
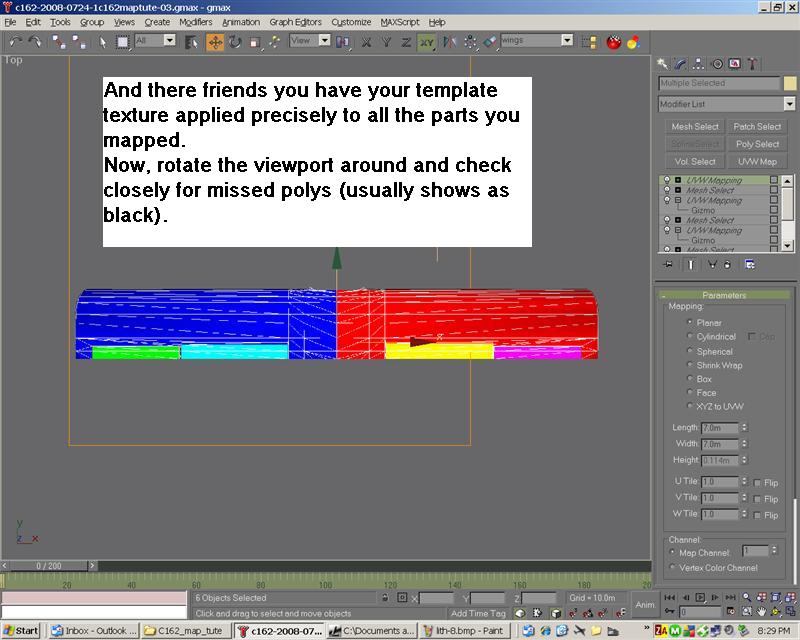
fig. 18
And there you have your newly mapped wing parts textured and ready.
The next tutorial will demonstrate converting that texture for use in fs2004 using DXTBmp and Imagetool.
Have Fun
Milton Shupe
7/26/2008
Press on with the next step.