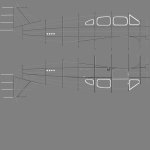
Recently I posted Paint Kits for the AC 500/560 and Blue Shrike. Never any responses to those two threads, but close to 80 downloads combined. So I'm curious. . .did anyone actually plan on using those to do liveries? lol. I haven't seen any posted anywhere so like I said. . .just curious!
-
There seems to be an uptick in Political comments in recent months. Those of us who are long time members of the site know that Political and Religious content has been banned for years. Nothing has changed. Please leave all political and religious comments out of the forums.
If you recently joined the forums you were not presented with this restriction in the terms of service. This was due to a conversion error when we went from vBulletin to Xenforo. We have updated our terms of service to reflect these corrections.
Please note any post refering to a politician will be considered political even if it is intended to be humor. Our experience is these topics have a way of dividing the forums and causing deep resentment among members. It is a poison to the community. We appreciate compliance with the rules.
The Staff of SOH
You are using an out of date browser. It may not display this or other websites correctly.
You should upgrade or use an alternative browser.
You should upgrade or use an alternative browser.
Just Curious
- Thread starter falcon409
- Start date
lol, I doubt that Willy, lol You have really advanced to a point where your liveries are quite outstanding and the paint kit work you did with the F-80 series a while back was excellent. I lack the skills necessary to go much farther than simply doing paint kits. It's easy to draw straight lines and add lines of rivets to match, even doing graphics is pretty simple once you decide what you want. Where I fall short is in being able to produce the necessary bumps and specs and then being able to manipulate those to produce a more realistic appearing final product.I downloaded the 500/560 more or less for "educational purposes". You do great work and I might learn something new.
johndetrick
Charter Member
I plan on doing one or two repaints. But I'm a little busy at the moment.
Craig Taylor
SOH-CM-2025
I'm currently flying the AC500 with my Air Hauler company. I plan on using your paintkit to teach myself how to paint, once I settle on a livery scheme. Thanks for all your hard work! 

lol, I doubt that Willy, lol You have really advanced to a point where your liveries are quite outstanding and the paint kit work you did with the F-80 series a while back was excellent. I lack the skills necessary to go much farther than simply doing paint kits. It's easy to draw straight lines and add lines of rivets to match, even doing graphics is pretty simple once you decide what you want. Where I fall short is in being able to produce the necessary bumps and specs and then being able to manipulate those to produce a more realistic appearing final product.
Ed, I appreciate the kind words. But don't put your work down either. Your T-33 paint kit provided a lot of inspiration for what I did with the F-80 and even with what I'm doing now. If I can get near your level of detail, I'm a happy camper. My thoughts are if the detail is there, then the rest will come together.
Bump maps are pretty easy with the plug ins for PhotoShop and Paint.net. I use Paint.net and did my first one a couple of weeks ago. Still need to just sit down and tweak it a bit, but it works great. As for specs, I looked at what I felt really worked, took a few apart with DXT/bmp to see how the spec alpha was done (there's apparently a few different schools of thought on that) and then mucked about with it (all those Gee Bee paints).
I use Paint Shop Pro and the Photoshop plugins don't work. . .so I tried GIMP, but with that I couldn't get the plugins to install, kept kicking out error messages. I haven't tried Paint.net because I assumed since it was strictly a single layer program (no layering option) that it was no good either.. . . . .Bump maps are pretty easy with the plug ins for PhotoShop and Paint.net. I use Paint.net and did my first one a couple of weeks ago. Still need to just sit down and tweak it a bit, but it works great. As for specs, I looked at what I felt really worked, took a few apart with DXT/bmp to see how the spec alpha was done (there's apparently a few different schools of thought on that) and then mucked about with it (all those Gee Bee paints).
Guess I should give it one more try to see if I can get something to work. Would like to be able to do bumps and specs but thus far, even with some good advice, they have eluded me, lol

patful
Charter Member
I use Paint Shop Pro and the Photoshop plugins don't work. . .so I tried GIMP, but with that I couldn't get the plugins to install, kept kicking out error messages. I haven't tried Paint.net because I assumed since it was strictly a single layer program (no layering option) that it was no good either.
Guess I should give it one more try to see if I can get something to work. Would like to be able to do bumps and specs but thus far, even with some good advice, they have eluded me, lol
Here's the paint.net PSD plugin, works great: https://psdplugin.codeplex.com/
I use Paint Shop Pro and the Photoshop plugins don't work. . .so I tried GIMP, but with that I couldn't get the plugins to install, kept kicking out error messages. I haven't tried Paint.net because I assumed since it was strictly a single layer program (no layering option) that it was no good either.
Guess I should give it one more try to see if I can get something to work. Would like to be able to do bumps and specs but thus far, even with some good advice, they have eluded me, lol
LOL, Paint.net is what I learned how to do layers with and while I have Paint Shop Pro X and 2 different versions of Photoshop, I never really learned to use those as I can do what I want to (so far) with Paint.net. There's so many plug ins for it, it's very flexible. But yes, it does do layers very well. I think the confusion is in that they state that the original idea was just to "improve" MS Paint and ran with it from there.
LOL, Paint.net is what I learned how to do layers with and while I have Paint Shop Pro X and 2 different versions of Photoshop, I never really learned to use those as I can do what I want to (so far) with Paint.net. There's so many plug ins for it, it's very flexible. But yes, it does do layers very well. I think the confusion is in that they state that the original idea was just to "improve" MS Paint and ran with it from there.
Willy: How about working up a Paint.net tutorial if you agree??? Or if one exists for Flight Sim painting, point us to it.
Layers ??
 Educate us.
I'll give that a try next. Right now I've been trying to get my head around the bump/normalmap process in GIMP. I think I produced a normalmap using the plugin (no idea for sure as it all looks the same to me) but after that I have no idea where to go next. I have a tutorial that someone sent me a long time ago that utilizes a batch file using ImageMagick and dxtex, but when I drop the bitmap on the batch file it gives me errors saying it can't find a file or directory and I'm clueless as to what the heck it's looking for.LOL, Paint.net is what I learned how to do layers with and while I have Paint Shop Pro X and 2 different versions of Photoshop, I never really learned to use those as I can do what I want to (so far) with Paint.net. There's so many plug ins for it, it's very flexible. But yes, it does do layers very well. I think the confusion is in that they state that the original idea was just to "improve" MS Paint and ran with it from there.
I still contend that while I know you and others say producing a bump map is simple. . . .it isn't for someone who hasn't done it before or for someone who runs into problems like this with no background in how to correct something they don't understand in the first place. Repetition is the key of course, but you have to start with a single successful product first and getting that is proving impossible.
Willy: How about working up a Paint.net tutorial if you agree??? Or if one exists for Flight Sim painting, point us to it.
Layers ??Bump maps ??
Educate us.
Keep in mind that I'm pretty much self-taught over going on 20 years of doing repaints without a clue how to actually do them. But I did pickup a lot of handy tricks along the way.
Here's a basic PhotoShop tutorial courtesy of Tom Gibson at California Classics. This was one of my early reads on the subject
http://www.calclassic.com/repaint.htm
I couldn't get my head around layers until a little over a year ago when Nigel explained to me it was like laying transparencies on a projector. By turning the separate layers on and off you remove them from the picture. But with a paint program that does layers, you can modify the layers however you want. Before Nigel told me this, I'd been "faking" the layered paints by using varying levels of opacity and brush effects. Once layers clicked in my pea brain, I was like "How could I be so dense?". Off and running since. And I can't thank Nigel enough for his pointing me in the right direction. Although he does use PhotoShop, but we all can't be perfect. j/k Nigel is a great guy and I can't say enough good things about him.
Using the Paint.net plug in for bump maps, I take my texture sheet and turn off all the layers except the panel lines and rivets layers. I've found it best for me to do lines and rivets in separate layers so I can alter one without effecting the other. Lines tend to show up better than rivets and I'll adjust them around to where they're about equal. Back to the bump maps. Once the only layers that are on are the lines and rivets, I'll do a new background at a RGB of 128/128/128 which is about as neutral as it it gets for the next steps. I'll adjust the brightness on the rivets to where they are pretty much pure white. Light colored goes high in a bump map. Panel lines will go dark as dark = low in the bump map. At this point I'll run it through the bumpmap tool. The output will have a blue background. I'll convert to dds and then try it in the sim. This first pass will be high highs and deep lows, but it give me an idea on where to take it next. From this point it's just adjusting the brightness on source layers. Darken the rivets until they are how you want them and lighten the lines. It's going to take some tries to get it where you want it.
Almost forgot, Paint.net calls the plug in "normal maps" or something like that. To find the tool, on the top horizontal menus it's , Effects/Stylize/Normal Maps Plus. Click on that and you'll get something like this. I just used the normal bmp for the F8F fuselage to get this. But it gives an idea on what it'll looks like
The Spartan source file I did for the fuselage (raw and un-adjusted): On this one it's not just the rivets that I made high spots. The window frames, rudder ribs and some access panels as well.
Finished bump map (well, not so finished, as the lines are too deep and the high spots need shaved down a bit.
The lines and rivets still need toned down on it. I ran into other issues with it that pretty much have me stopped on that repaint.
Now Specs, I know what's going on there somewhat, but how to explain it as I did a lot of googling on those to find out what's little I do know although I suspect quite a bit more.
Attachments
Postbaer61
Bluebear
Very good explanation, Willy.
I'm also interested in bump and spec mapping and found some
tutorials on the FSDeveloper.com for bump mapping and specular mapping.
http://www.fsdeveloper.com/forum/resources/creating-bump-normal-maps.184/
http://www.fsdeveloper.com/forum/resources/creating-specular-maps.186/
but I hav'nt tried it yet.
I loaded a bump from my Carenado 337 to see what it looked like in DXTbmp and noticed that it also used what appeared to be a grayscale version of the bump map as an alpha. I converted my bump to a grayscale, saved as a bitmap and loaded it for the alpha. I loaded the airplane into P3D and while the rivets and lines are way too heavy on the bump. . .it does show. I'll just have to play with the settings now and find a happy medium.I've noticed when playing around with it on the Spartan, that it doesn't show well on dark painted areas.
I also have a question which may seem dumb but. . .when I save the actual texture to dds format from the paint program, do I turn off the rivets and lines layers and just merge everything else. . .allowing the bump map to be the only thing providing the rivets and lines?


