• There seems to be an uptick in Political comments in recent months. Those of us who are long time members of the site know that Political and Religious content has been banned for years. Nothing has changed. Please leave all political and religious comments out of the forums.

    If you recently joined the forums you were not presented with this restriction in the terms of service. This was due to a conversion error when we went from vBulletin to Xenforo. We have updated our terms of service to reflect these corrections.

    Please note any post refering to a politician will be considered political even if it is intended to be humor. Our experience is these topics have a way of dividing the forums and causing deep resentment among members. It is a poison to the community. We appreciate compliance with the rules.

    The Staff of SOH

  • Please see the most recent updates in the "Where did the .com name go?" thread. Posts number 16 and 17.

    Post 16 Update

    Post 17 Warning

Another Duck?

Looks good Paul!
That object in question, might actually be a flex lamp?

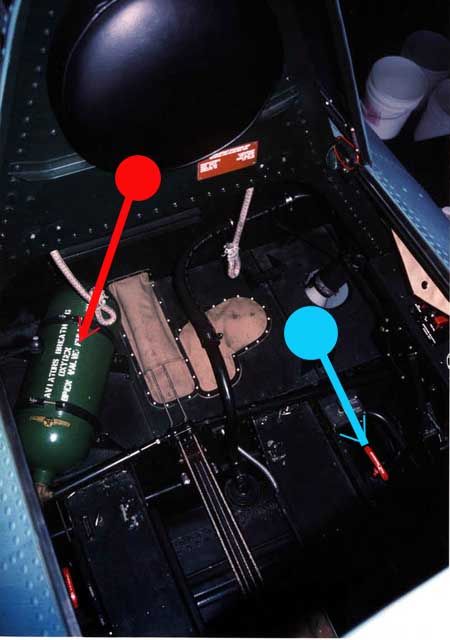
It does indeed look very nice! I think Tim is right in that its electrical in nature- though there is a light forward in the shot. The flex lights in question had a swaged ring construction so they'd flex- put a few into the Westphalia. O2 plumbing in the Ducks day tended to be copper(Pre-war) then steel, and O2 bottles tended to be zinc-chromate or green, not sure a duck would get high enough. Braided steel like that is usually electrical conduit-don't recall the AN number off hand. It looks for all the world like a gyro head, but why in the heck would they've put it in the cockpit, so thats probably not it. Auto pilot bits? Did a Duck have an auto pilot? Black was the color of choice for instrument bits, auto pilots, gyros, radios ect. Hence 'Black box' Mysteries! Its like attempting to devine the purpose and capabilities of Soviet gear from propaganda and May-day parade photos whay back when. Dang-it. I know I've see that before!
 
Thanks for all the input on the object in question. I was finally able to pin it down from your suggestions and some digging, I think.
<o:p></o:p>
Yes OleBoy I did pick up a maintenance manual for the -4 and -5 and pilot manuals for the -4, -5 and -6
<o:p></o:p>
The pilot’s manual has this to say.
<o:p></o:p>
Oxygen Regulators & Shut-Off Valves
---------------------------------------

Pilot’s Cockpit – Regulator on left hand shelf. (bingo)
Cylinder shut-off valve accessible through cut-out in floor.

There were also regulators and valves located for the navigator and a passenger (usualy the camera operator).

<o:p></o:p>
I'm thinking it’s a continuous flow oxygen regulator. The one pictured is probably a type A-6 or A-7 used in the mid to late 30’s but by 1941 the A-9A manual continuous flow oxygen regulator became the standard. How does that sound to you guys and gals? Now if I can only find a picture of this beast or a reasonable facsimile to model from.
<o:p></o:p>
BTW, I can’t pin down the service ceiling for this aircraft. I have seen everything from 25,000 ft to 27000 ft. The manuals make no statement on this. The aircraft served primarily as PHOTO RECON, SAR and ASW so high altitudes wouldn’t have been suitable for these missions.
 
<o:p></o:p>
The pilot’s manual has this to say.
<o:p></o:p>
Oxygen Regulators & Shut-Off Valves
---------------------------------------

Pilot’s Cockpit – Regulator on left hand shelf. (bingo)
Cylinder shut-off valve accessible through cut-out in floor.

There were also regulators and valves located for the navigator and a passenger (usualy the camera operator).

<o:p></o:p>
I'm thinking it’s a continuous flow oxygen regulator. The one pictured is probably a type A-6 or A-7 used in the mid to late 30’s but by 1941 the A-9A manual continuous flow oxygen regulator became the standard. How does that sound to you guys and gals? Now if I can only find a picture of this beast or a reasonable facsimile to model from.
<o:p></o:p>.

::preening:: :) :)

Sounds dead on to me. Steel wire mesh is still used today on high pressure systems ( and looks really cool on 428 hemi head engines too :) ), and cylinders are still commonly used with any portable gas system. Given the size of the nut on the top of that cylinder, i'm wondering if that isnt the oxygen bottle itself?? since the regulator is mounted remotely, there wouldnt be a need for one on the top of the bottle. Instead there would only need be a pipe connecting the bottle to the regulator. The location for it would be logical then. With as much as those weight, the closer it is to the pilot, the more balanced the plane stays. also, it eliminates most of the build up of moisture in the air line between the bottle and the regulator.

doing a quick cross check, i'm even more convinced thats actually the oxygen bottle there.. These are about twice the size of the one in the cockpit, but, that screww head on the top gives it away..

View attachment 49395
 

<o:p></o:p>
BTW, I can’t pin down the service ceiling for this aircraft. I have seen everything from 25,000 ft to 27000 ft. The manuals make no statement on this. The aircraft served primarily as PHOTO RECON, SAR and ASW so high altitudes wouldn’t have been suitable for these missions.

I wouldnt worry too much about that. If the MAC and lift is set up correctly in the flight model, its service ceiling will become painfully evident ( the plane will get sluggish and be unable to hold itself at that altitude or above )..
 
Paul I concur with the O2 bottle call. Probably painted dark green, somewhere around RGB value 58/105/1.
 
One of the things I always find helpful, is that if you cannot find a better photo of the part installed on a certain aircraft, to search through photos of the next closest-to-type aircraft. In the case of the Grumman Duck, the closest aircraft to it is the F3F, and after that, the F4F. I wasn't able to come up with any quality photos from the cockpit of the F3F showing such a bottle/canister, but I was able to find some superb photos from the cockpits of F4F's, showing what appears to be the same, or at least near-the-same bottle as seen in the photo of the Duck cockpit. As this bottle is the oxygen bottle in the F4F, also positioned behind and to the side of the pilot's seat, I am highly confident that what you see in the Duck cockpit is yet another oxygen bottle (though with a different connection setup). As TARPSBird has mentioned, these particular bottles were always green (in contrast to larger types, such as those that could be seen in aircraft like the B-17, which were painted yellow).

Looking forward to seeing this aircraft as it progresses to completion - excellent work thus-far!

017-5.jpg


F4F_Cockpit.jpg
 
Thanks much, now I have a solid base to model (the object in question:kilroy:) on.
<o:p></o:p>
I’ll have to say I’m quite flattered, I didn’t think my Duck would generate this much enthusiasm it being my first serious endeavor at modeling for FS, hopefully I can live up to the expectations.
<o:p></o:p>
Currently I’m trying to finalize the exterior model. I’ve spent the last three days modeling the tail gear (see pictures). I’m satisfied with it except for the return springs which I have no idea how I will make them and just might leave them off, but that thought rubs me the wrong way.
<o:p></o:p>
I need to correct the counter balance on the main gear since I have that totally wrong but that won’t be a problem.
<o:p></o:p>
I need to refine the arrestor hook and model an exterior version of the 30 caliber BAR which I have started in the VC.
<o:p></o:p>
The engine which I modeled many years ago looks like crap compared to the rest of the model so I trashed it and will start modeling another soon.
<o:p></o:p>
The exterior textures are all on two 2048x2048 sheets. I have been trying to keep within these two sheets since I understand that anything more will greatly affect the frame rates. I have also been trying to keep the textures reasonably designed (PSD) for ease of repaints.
<o:p></o:p>
The last thing on the exterior, which I am dreading, is modeling a pilot and navigator. For some reason I don’t feel confident about modeling people.

View attachment 49423

View attachment 49424
 
meh.. youve got courage, and it shows, and your pretty darned good at modeling too.. I cant speak for the others, but i'm happy to help out as I can. Its selfish really.. I wanna fly this one day ..:)


Oh DUhhh.. I just thought of another piece of reference material for you. a movie called Murphies war. It's centered around a duck.. Stars Peter O'Toole
 
Springs are a bitch.

The only thing worse than springs are cables that go around a wheel to turn them 90 deg :).

Or chain drives.

For the springs you may be able to get away with making two tubes, textured appropriately, each about half the length of the total spring. Then you just push one end of the tube into the other to close the spring. It's not perfect but does get the job done though with the minimum of polys. See attached pic for example.

Or you can go really nuts (see second pic). With the second pic I was able to get away without compressing the spring but letting the hooks inside the springs move instead. The pic shows the tail wheel in full deflection.

For your situation I guess you could model parts of the spring and have them move into each other. It would take a very keen eye to pick out what was happening and I rather miserable soul who would complain about it.
 
Looking at your work anthony31 is quite humbling especially when I can recognize the Bing carburetor and K&N air filter.
<o:p></o:p>
Murphy’s War! It is one of my favorite movies which I have watched at least 7 or 8 times. I keep a link to the Youtube flight scenes in my Duck work folder to watch when ever I get frustrated.

 
The only thing worse than springs are cables that go around a wheel to turn them 90 deg :).

Or chain drives....


I don't know which modelling tool you're using, but I've had gratifying results animating chain - individual links - with a Path Constraint in gmax; same would go for 3ds Max.
 
First, great modeling! Its looking really good, and thats coming from someone who has been doin this for over 10 years.

Second, let me teach you a professional secret. This will get you through many rough patches that just seem like there are no solutions. Say this phraise too yourself over and over. "Horse shoes and hand grenades". Say it about 10 times, and when you get stuck on something, say it again. What does it mean? Quite simply, you only need to get close enough! Dont fret over modeling spring loops or chain links!!!!! Nobody will notice!

I did this sort of thing when I first started, and nobody once said "Wow, nice spring!!". When I stopped, nobody said "Were are the springs?". Also, those sort of detail chew up frame rate for something that will never be seen. They eat massive ammounts of polygons!! Same thing for coiled wires.

Ultimatly if you need to do chain links, path deform will be your best friend. If you need help using it, let me know and I will walk you through the steps.

Keep up the good work, and remember, "Hose shoes and hand grenades"!!!!
 
I have been concerned about frame rates and some of this model primarily in the VC will be eliminated because it ether can not be seen or isn’t that noticeable, I’ll know more once I’m back in it again. If it’s flyable on my system which is not to very fast then it should be OK for others. I am modeling for a computer display model as well. Later I hope to build the carb and fuel system with removable panels just for display (delusions of grandeur :sleep:).
<o:p></o:p>
Your absolutely right Gibbage, “Horse Shoes and Hand grenades” but that also means “Almost doesn’t Count”.
<o:p></o:p>
Did somebody say “loan me a pilot”? I just might take you up on that Roger when the time comes. I have played with some figures using bones to place them in position but like I said I just played.
<o:p></o:p>
Back to the spring, I tried your sliding tube method anthony31. Let me see if I can figure out how to post a vid.
<o:p></o:p>
To answer your question hairyspin I use 3ds Max, I started with FSDS and at the time never could get the handle on gMax but when I tried 3ds Max it all came together (self taught). On this spring I used the Create Panel/Dynamic Objects/Spring and made three springs which I converted to polys and made two hooks. Then I just pushed them around using Auto Key till it looked decent.

[video]http://lpad.horizon-host.com/images/spring.avi[/video]

 
Back
Top