• There seems to be an uptick in Political comments in recent months. Those of us who are long time members of the site know that Political and Religious content has been banned for years. Nothing has changed. Please leave all political and religious comments out of the forums.

    If you recently joined the forums you were not presented with this restriction in the terms of service. This was due to a conversion error when we went from vBulletin to Xenforo. We have updated our terms of service to reflect these corrections.

    Please note any post refering to a politician will be considered political even if it is intended to be humor. Our experience is these topics have a way of dividing the forums and causing deep resentment among members. It is a poison to the community. We appreciate compliance with the rules.

    The Staff of SOH

  • Server side Maintenance is done. We still have an update to the forum software to run but that one will have to wait for a better time.

New panels and reticles by Stockplane!

Ciao Stefano,

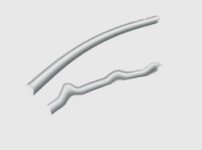
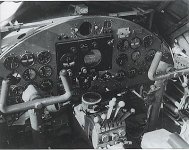
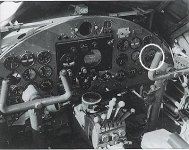
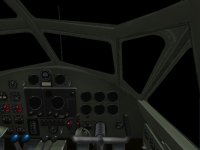
Following to the advise by Manuele, if what you are looking to do is something like this:

19085258128_14c306a040_o.jpg


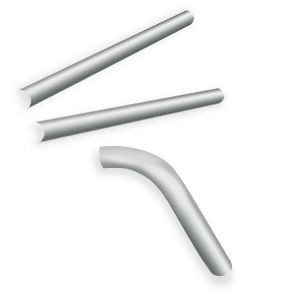
then, using PSP, you need to get familiarized with working with nodes... First, you convert the object to a vector object.

1 On the Tools toolbar, select the Pen tool .

2 On the Tool Options palette, click Edit Mode button .

3 Click a vector object.

The object's nodes appear.

4 Click the node.

The selected node appears with a solid gray fill.

You can also,

Select multiple nodes

Hold down Shift, and click the nodes.


Select all nodes on a contour

Double-click one node. If the object has only one contour, this selects all nodes in the path.


Select all nodes in a path (all nodes in the object)

Right-click a node, and choose Edit Select All.


Select the next or previous node on a contour

Hold down Shift, and press [ or ].


Deselect a selected node

Hold down Shift, and click the node.

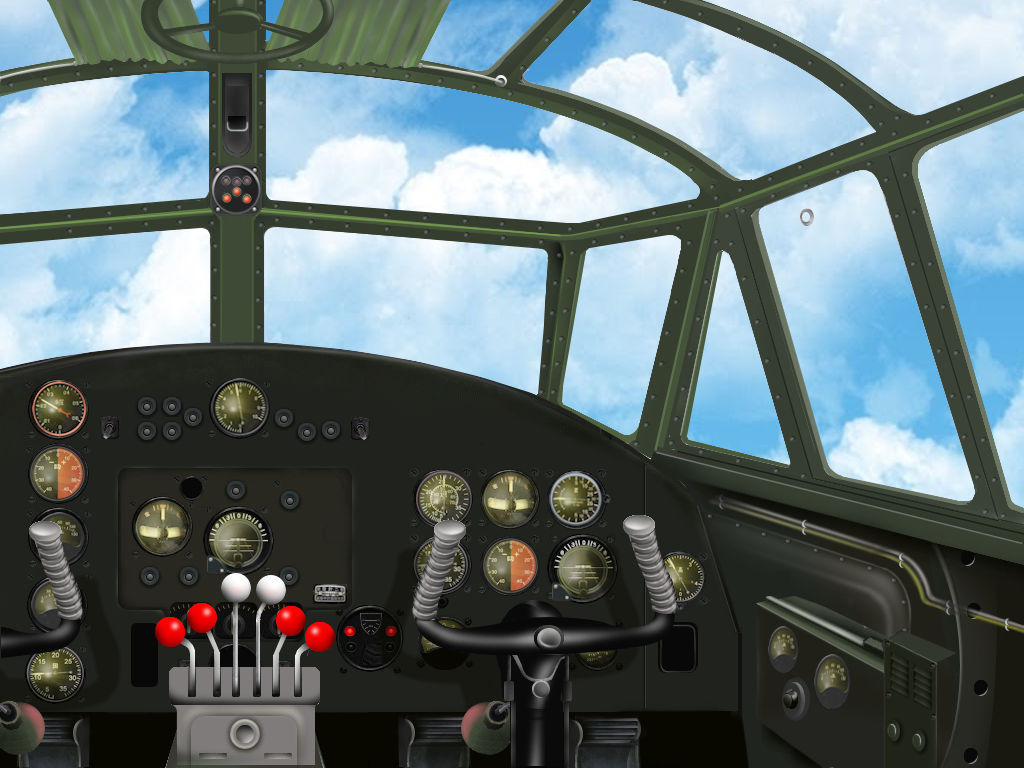
Then you can deform the object to your desired shape...

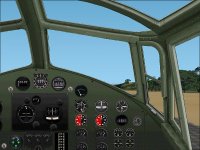
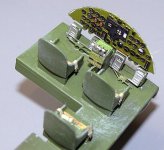
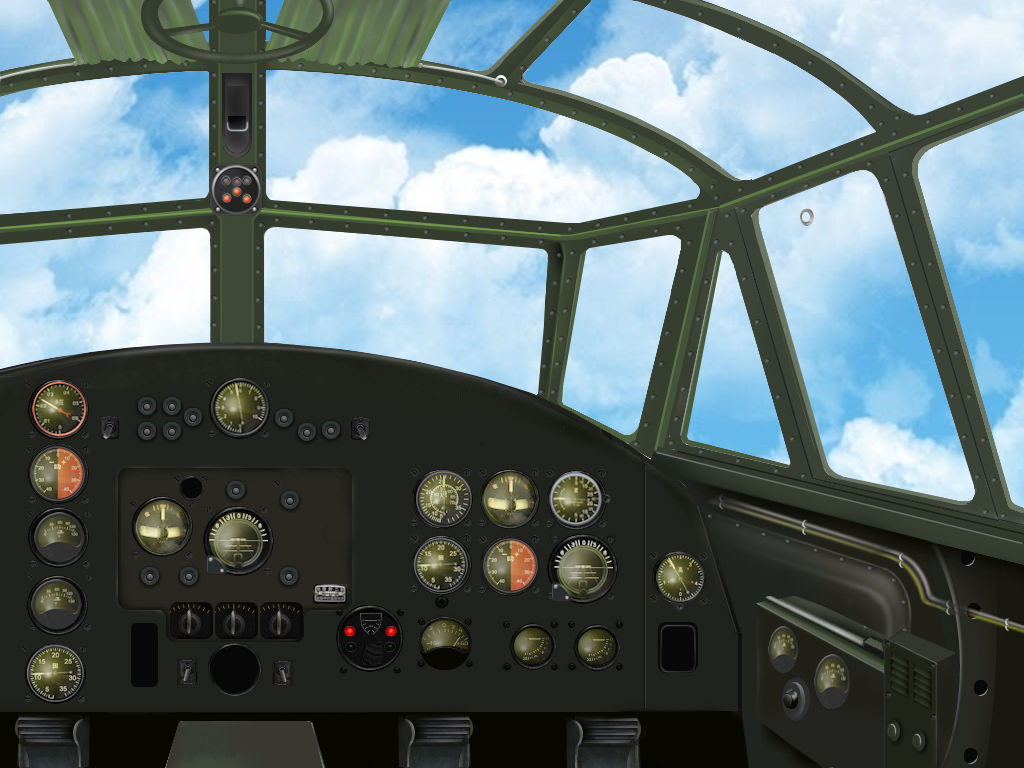
Ecco, qui un WIP redo che sto faccendo dal tuo panel for the Ki 43 III...
nel medessimo, ho cambiato la prospettiva usando questo tipo di operazione....

Non e difficile, ma ci vuole un attimino di attenzione al dettaglio...
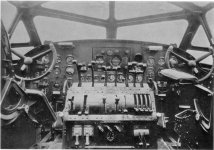
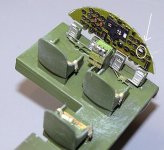
To wit:


18650492734_0726ddda7b_o.jpg


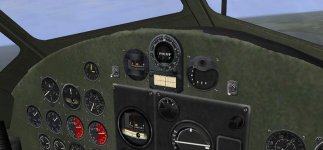
IMHO la parte piu dura e' in somma, la voglia di finire e "pubblicare"... inquanto i lavori finiscono un po' meno precisi dal previsto...

Carlos
 
Hallo mvg3d also i had never investigate about japanese cockpit and were was the pilot and co-pilot, but i not have understand this question about the Betty.

The only thing that is possible do is put the right section at Window00 and the left at Window02, if the problem isn't it sincerely i have not understand what you want.

Thank to Gaucho for the rapid lesson, i this days i try some test about, good repaint of Ki-46, you are really great. :applause::applause:

I presume that the silence about anemometer gauge means that there is not one around.

Cheers

Hi Stockplane,
I simply supposed the Betty's main pilot was on the right seat because the only AH gauge was mounted on the right side of the panel.
About the "silence", we (I & KH) are working on NEW Italian gauges, just today he sent me some bmps to modify, but I still not opened the zipped files he sent me because I forgotten them in my PC at office ......

:wavey::wavey:
 
I forgot...!

Hallo mvg3d also i had never investigate about japanese cockpit and were was the pilot and co-pilot, but i not have understand this question about the Betty.

The only thing that is possible do is put the right section at Window00 and the left at Window02, if the problem isn't it sincerely i have not understand what you want.

Thank to Gaucho for the rapid lesson, i this days i try some test about, good repaint of Ki-46, you are really great. :applause::applause:

I presume that the silence about anemometer gauge means that there is not one around.

Cheers


I forgot an even easier to use tool... the WARP MESH tool...

it is far more intuitive... and nodes are preselected... also there is
the warp mesh brush, probably more precise.... to wit:

Cheers,
G.
 

Attachments

  • tubes 2 warp tool.jpg
    tubes 2 warp tool.jpg
    12.4 KB · Views: 3
New Panels

I read in one of the old Monogram Aviation Publications series on Japanese aircraft that some of the Japanese bombers with dual controls had the aircraft commander/pilot in command in the right seat. The author was Robert Mikesh, a curator at the NASM/Smithsonian. I'll see if I can find the actual reference. The co-pilot would stand on his seat and direct the taxiing on the ground while stuck half out of the cockpit greenhouse.

Steve
 
Oh, this is easy!

...if the problem isn't it sincerely i have not understand what you want....

Hi stockplane,

it's very simple, look below, I just copied your screenshot and did an horizontal flip to it. That's the right pilot seat, obviously now every label is mirror-like reversed.

All you have to do is take your work, do the same thing and place the instruments according to the right side of the Betty panel as shown in Hisato Nakada's photo. Manuele pointed out to you that the presence of the attitude gauge on the right side, missing on the left side, confirms the right side is the main pilot, or aircraft commander, seat.

Done! :running:

Cheers!
KH
:ernaehrung004:
 

Attachments

  • Betty_pilot_seat.jpg
    Betty_pilot_seat.jpg
    55.4 KB · Views: 6
Oh Kelty, our Good had made the Word in six day and you want make a new cockpit in 30 sec!!!:mixed-smiley-010::mixed-smiley-010:

The black box at the center of cockpit between the two seater is inamovible it is a rack with the two gyros instruments product in Japan under german license and is present i many bombers type always the same,
as you can see in the images attached below (also Il-2 SAS had make panel for Betty in the same unique way),
one image is of the G5N1 Shinzan with the last type of this rach, the second the il-2 cockpit, the third is a photo of a G4M2 Betty ( the unique difference between G4M1 is that two instrument at the left and right of the compass are missing ), the last image is a kit fotoincision fot a 1/48 plastic model of the Eduard.

There are other many images of japanese bombers ( also the Nell, the Lily etc) with it and all are identical, the disposition of the black box and the instruments are always the same.

And also in the right seat ( in all models of Betty ) the attitude is in the identical place as you can see in the images.

For the dubts about the pilot and the co-pilot i have write to my spanish friends that have a japanese friend civilian pilot, his father had flow in the WWII on the Betty, i have ask for your question, i hope they reply me prompt, if i have the his reply, as i hope, i post it for you.

Believe Kelty, the instruments are in the correct position, only that (as for italian) not all are are of the correct type series but very closed.

Cheers:wavey::wavey:
 

Attachments

  • G5N1 Shinzan.jpg
    G5N1 Shinzan.jpg
    98.3 KB · Views: 0
  • G4M1-1.jpg
    G4M1-1.jpg
    51.5 KB · Views: 0
  • G4M2.JPG
    G4M2.JPG
    36.4 KB · Views: 0
  • G4M2-2.jpg
    G4M2-2.jpg
    78 KB · Views: 0
Hi Stockplane,
Where is Your problem with the Autopilot and the other gauges ?
With just a little "know-how" in Photoshop (or Paintshop)......

BETTY.jpg

The ONLY thing to do is to place the right gauges in the right places.....

P.S. : I don't changed the gauges with the right ones, I only mirrored Yours (the Kelti's complete mirroring was only indicative).

:wavey::wavey::wavey::wavey:
 
Hallo mvg3d, if for you is more usefull an alternate right panel as you have made i can post it in this day,
but the your positions of the gauges in the right place notexist in the reality.

See with carefull the image in the my last post or find another images of the Betty cockpit i have no see this disposition at all.

This is a site about, (one of many ) and see by yourself.

http://gunsight.jp/a/english/hunatu05e.htm

Cheers
 
....The black box at the center of cockpit between the two seater is inamovible it is a rack with the two gyros instruments product in Japan under german license and is present i many bombers type always the same.....

I ONLY mirrored the Autopilot panel, as I wrote, Kelticheart mirrored the WHOLE panel bitmap ONLY for demonstrate his/our suppositions.
I DON"T WANT to make the Betty's panel, it is Your job.
I also specified that the gauges in the panel MUST be changed with the real ones and, of course, repositioned as in the original.

:wavey::wavey::wavey::wavey:
 
Dear mvg3d, as i said in other post, i am not interested preserve my little jobs, anyone has the possibility to modify, inplement and so on, any my panels and mods, the important thing is that at the end these works will be usefull for all community members. Also if someone want improve these i am happy, because for the moment i am not a great painter. The only thing i ask is that the final work is in tuning with the related plane as aspect.

My intervention were only for clarity about the reality, but any mod is wellcome.

Cheers.
 
Woah!

Hold your horses, the two of you! Un attimo di calma!

First of all, Stockplane:

I do not expect a new panel in lesser time than the Lord created earth. I do not want a new panel at all from you, I just wanted to spare criticism to your beautiful work for a silly, yet historically sound, detail. Ti volevo aiutare, non criticare.

There's no fiction here, the main pilot seat on Japanese bombers WAS on the right side of the cockpit, you weren't around a few years ago when this subject caused a long discussion here.

Do you want solid proof of what Manuele and I have been trying to suggest you?

Look I the attached pictures, that I took from the very same you posted: do you see where the attitude gauge, or Artificial Horizon, is located? I circled it in white for you.
It is on the right side of the cockpit panel and clearly missing from the left side.
This indicates that the aircraft main pilot, which is also, by the way, the CFS2 user, sat on the right.

Not only the attitude gauge is missing from the left side, but all of the engine gauges are grouped on the left side, clearly indicating that the left seat was occupied by the co-pilot/flight engineer/motorist.

Is it clear now?

Now, considering, as I said, that a 2d panel must be done keeping in mind the point of view of a future CFS2 virtual pilot, anyone creating a 2d Japanese bomber panel, or adapting/updating an existing one, should place the CFS2 user in the place where the historical pilot sat, that is on the right seat.
Only for love of historical accuracy, part of that difference which kept CFS2 alive for over 15 years.

What I am saying is that the original Alpha 2d Betty panel texture you worked on is simply wrong. Just like their Mavis one, again painted with the main pilot post on the left. It's not your fault, you did not paint it originally.

What can you do to avoid repeating the same mistake?

This is how I would handle it:


  1. take the whole bitmap, without gauges, do a horizontal flip or, if you prefer, turn the entire image 180° around,
  2. save the bitmap in a new file;
  3. reposition the gauges according to the great historical sources you have for the true main pilot side;
  4. since you say that the central autopilot group - resembling a Sperry MkIII autopilot - cannot be turned around - and you are darn' right here according to the photos you posted - just copy the correct one from the original file and paste it on top of it here, bringing it back to the original look;
  5. cover the gauges of the autopilot with working Japanese ones.

It does not seem a big deal to me, and you'll get high praises for having been so accurate and respectful of history.

I wrote in English to allow the vast majority of SOH members, who might be interested in this thread, understanding my explanation. If you are missing something, let me know and I will send you a PM with all of the above translated in our mother tongue.

Ciao and take it easy, man! In spite of how you describe yourself, an inexpert rookie moving his first steps in creating addons for CFS2, you are already producing beautiful output, no doubt about it! More than anything else, you showed you do not like fictional things, a trait that will be greatly appreciated by many people around here. :wavey:

Cheers!
KH
:ernaehrung004:
 

Attachments

  • Betty_main panel_ AH.jpg
    Betty_main panel_ AH.jpg
    67.2 KB · Views: 0
  • Betty_main panel_ AH_2.jpg
    Betty_main panel_ AH_2.jpg
    115.7 KB · Views: 0
Morton's 2d panel for SG's G4M1 Betty

Hi Stockplane,

the attached is what I meant. Morton designed it in this fashion for Stuart Green's G4M1 Betty, following a comment made by a Japanese SOH member, I believe Talos, because Morton had originally placed the pilot (CFS2 view) in the left seat instead.

It's still available at Morton's webpage here:

https://skydrive.live.com/?cid=7f2604cfe3f60274#cid=7F2604CFE3F60274

this 2d, 1024 x 768 panel is inside the Betty repaint pack.

The pilot's point of view is from the right seat of the airplane. As you can see many of the gauges Morton painted directly on the panel match the historical layout that can be seen in the pictures you posted.

Once installed in CFS2, this 2d panel creates for us the illusion of sitting on the right side of the Betty cockpit, the place for the chief pilot/commander of the aircraft during WWII on all G4M Betty airplanes.

I hope this clarifies my suggestions to make your nice work looking even better.

Cheers!
KH
:ernaehrung004:
 

Attachments

  • bettypanel.jpg
    bettypanel.jpg
    44.6 KB · Views: 3
Also i have this great work of Morton, probably the best Betty around, i have make the alternate panel for the Betty,and it is ready for upload, but i have write in PV at Kelticheart for a final decision, i wait his reply first.

Best regards.
 
Ki-44 panel V2.zip

437614359207842517.png

A new entry has been added to Add-Ons Library, category CFS 2 Panels Add-Ons

Description: I have find other datas and informations about Ki-44 series, in according to them I have remade his cockpit both for the first serie and the second, with new bmp panel and an implementation of the gauges.

I have also add the engine controls.

Use the first release or this according your preferences.

Best regards.

To check it out, rate it or add comments, visit Ki-44 panel V2.zip
The comments you make there will appear in the posts below.
 
Also i have this great work of Morton, probably the best Betty around, i have make the alternate panel for the Betty,and it is ready for upload, but i have write in PV at Kelticheart for a final decision, i wait his reply first.

Best regards.

No need for any decision of mine here.

Morton's panel is the historical one, other than this, it's your work and I have no right to decide anything about it.

It's up to you, do as you please.

Cheers!
KH
:ernaehrung004:
 
Sorry for delay in reply, but today is an hard day work. All right for the next week new Betty panel.


Best regards.
 
I am sorry to be the bearer of this, but...

Morton's panel (which by the way... it is the work of some Japanese aficionado) is not really very historically accurate at all...
I've researched photographs and manufacturer's line drawings... (will post immediately after this one)

This is a definitive version correcting perspective errors and overall inaccuracy of it and other
circulating panels for this WW2 workhorse. Painted on the basis of a line drawing from
the manufacturer...
Available in either a "clean version" or with additional pop-up throttle box and yokes...

18849147034_4013a55a3f_o.jpg


18851094113_ec8b9ff020_o.jpg


:wavey::ernaehrung004:
G.
 
Here is the line drawing....

Res ipsa loquitur...


:wavey::ernaehrung004:
G.
 

Attachments

  • 00000 Betty panel line dwg.jpg
    00000 Betty panel line dwg.jpg
    103.7 KB · Views: 3
Morton's panel (which by the way... it is the work of some Japanese aficionado) is not really very historically accurate at all....

Gaucho,

I did not mean Morton's panel is perfect under any aspect. It is historical as to reproducing the perspective of the main pilot sitting on the right seat instead of the left one.

Am I so difficult to understand, all of a sudden, that several explanations (including those written in Italian PMs) do not suffice?

If so, I need to fix an appointment with my physician on the double. It might very well be that my speech is being seriously affected by my age......

Before I start hating the G4M Betty!

Cheers!
KH
:ernaehrung004:
 
Back
Top