• There seems to be an uptick in Political comments in recent months. Those of us who are long time members of the site know that Political and Religious content has been banned for years. Nothing has changed. Please leave all political and religious comments out of the forums.

    If you recently joined the forums you were not presented with this restriction in the terms of service. This was due to a conversion error when we went from vBulletin to Xenforo. We have updated our terms of service to reflect these corrections.

    Please note any post refering to a politician will be considered political even if it is intended to be humor. Our experience is these topics have a way of dividing the forums and causing deep resentment among members. It is a poison to the community. We appreciate compliance with the rules.

    The Staff of SOH

  • Server side Maintenance is done. We still have an update to the forum software to run but that one will have to wait for a better time.

B26B FSX Native Marauder Painters Release Beta 1.0

Status
Not open for further replies.
Rather than starting a new topic related to Installing the B26 FSX Native Marauder base model and Version 1.1 and Version 1.2. I thought I'd ask my questions here about the install.

I do now have the required base model version 1.0 installed. I did notice in this download. There are two other folders 2048 templates for exterior, and 2048 templates for interior. I'm assuming these folders are for airplane painters use?. I'm not an airplane painter Therefore I didn't do anything with them. All I installed was the required base model V1.0.


I'm now currently looking at the download files of the required version 1.1 of the B26. I'm currently looking at the FSX installation procedure doc. of version 1.1 of this model. I'm scratching my head on this one. I'm not sure how to do the step 2 and step 3 and 4 properly reading the readme instructions, so I don't mess it up?. I'd like to get some assistance on this. it's kind of over my head being savvy, at what I'm reading and doing so to speak. I'll probably need a lot of help with this version, no dought etc.


I did also download the required the Native b26 required version 1.2 to be installed. I'm pretty sure I can handle this version, once I get version 1.1 figured out and under my belt.


George

George, thank you for your interest.

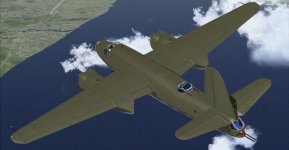
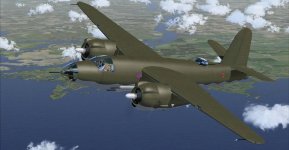
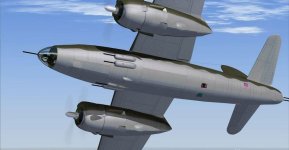
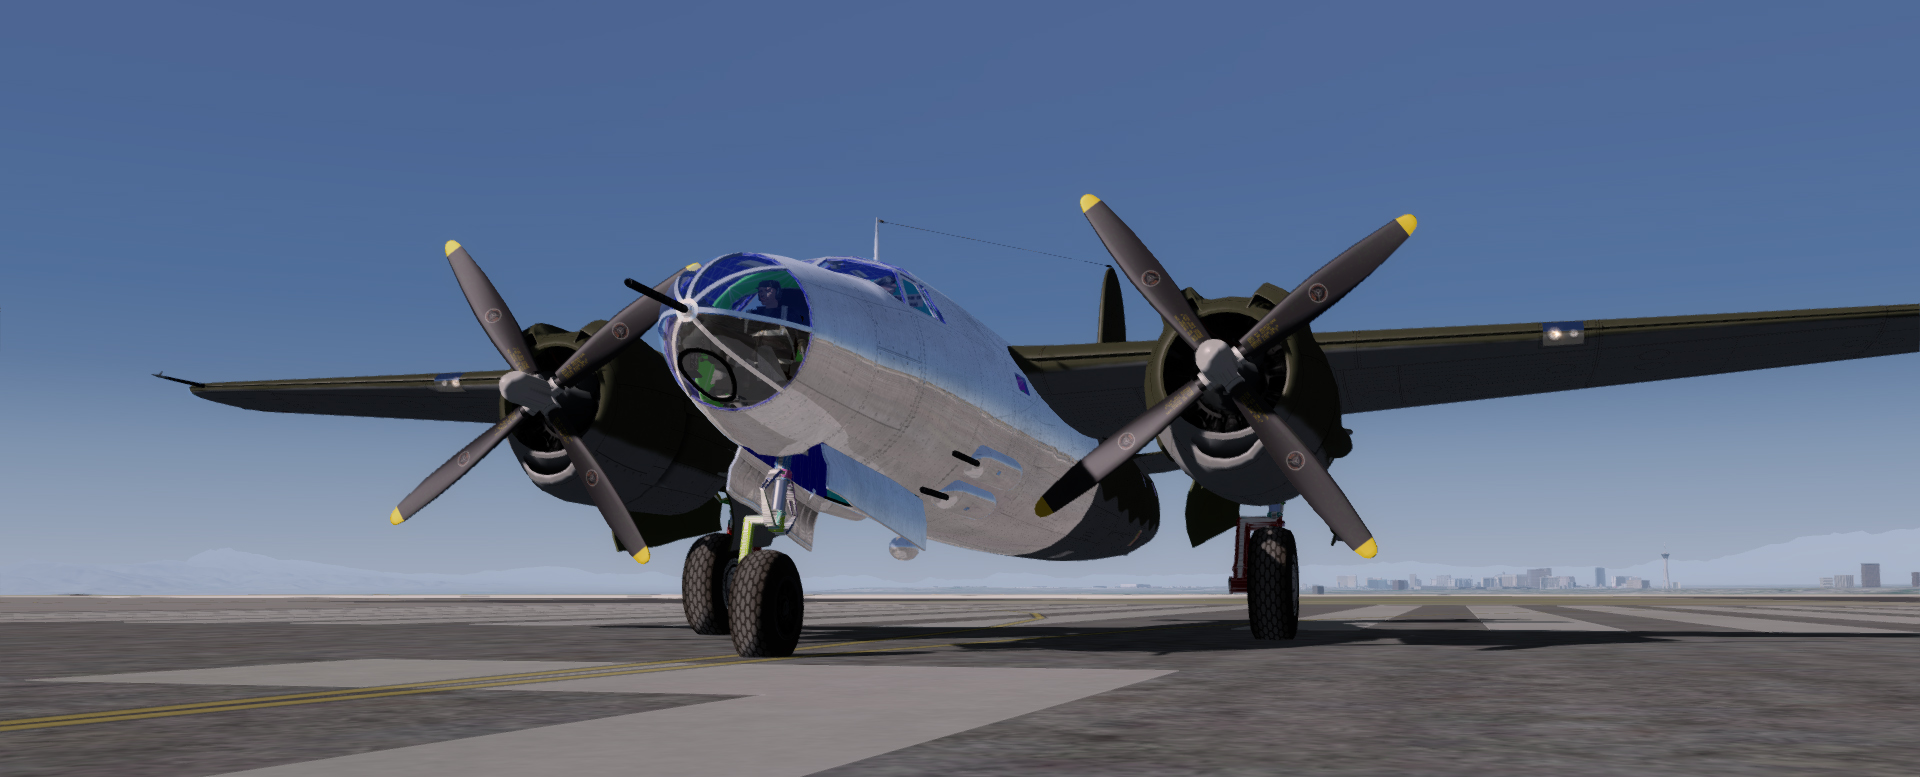
FYI, this is a painters' release and has only the multi-colored template textures.

But, if you wish to proceed .... the "texture" folder in the 1.0 package is the "common" texture folder.

2. Open the v1.1 "Model Replacement Folder":
Copy the 2 model folders to your v1.0 set up overlaying one of the model folders, and adding a new model folder.

3. Open the v1.1 "Common texture folder updates" folder:
Copy all the textures to your v1.0 common "texture" folder.

4. Open the v1.1 "aircraftcfg update" file:
Copy the new aircraft.cfg [fltsim.nn] section to your v1.0 aircraft.cfg and change the .nn to the next number in sequence (probably 01).

Hope this helps

Milton Shupe
 
B26

Thanks for the info Milton.

I think for me it would be better to wait until the B26 is completed and ready for flying so to speak. It does look like this is a still in progress plane, or still in work, by and for the builders and painters of the B26.

So. I think I'll wait for the full release of the B-26, sometime later on.


THX


George
 
Progress is slow but there is progress!

Finished (for the time being) with control surfaces.

Now applying rivets.

-2017-may-18-010_zpsmuqvahy9.jpg


-2017-may-18-009_zpssqqgynwo.jpg
 
It's looking better all the time Steve. :encouragement:
I wonder what soundset (source) will be used for it?

I really like how you textured the interiors of the nose landing gear doors, did you make it from a photo?
Because precisely I seek views to texture the interior.
Regards
Marty
 
I really like how you textured the interiors of the nose landing gear doors, did you make it from a photo?
Because precisely I seek views to texture the interior.
Regards
Marty

Hello Marty. Thank you.

Yes, I used photos . There are a couple walk-arounds on the www which have usable photos. So, using the photos I drew What I believe to be a fair representation of the that area. The rest is "smoke and mirrors"!

Here's my nose gear well as it stands currently.

-2017-may-19-014.jpg


Steve


Here are the three I used. You may already have seen them but if you can use them here they are.

View attachment B-26 Nose Gear Well.zip
 
Hello Marty. Thank you.

Yes, I used photos . There are a couple walk-arounds on the www which have usable photos. So, using the photos I drew What I believe to be a fair representation of the that area. The rest is "smoke and mirrors"!

Here's my nose gear well as it stands currently.

attachment.php


Steve


Here are the three I used. You may already have seen them but if you can use them here they are.

View attachment 50182


Hello duckie,
Thank you for your help I will watch this, good luck for the continuation of your work
Marty
 
Hey Marty, forgot to include this one. Found it in one of TuFun's links. It gave me the reference for the "holed" beams for the outboard walls.

NG WELL.jpg
 
Almost ready for bumps and specs. Cleaning up last of the rivets.

-2017-may-27-025_zpswvpzmtiv.jpg


-2017-may-27-024_zpsszybyedx.jpg


-2017-may-27-027_zpszcutsfyk.jpg
 

Attachments

  • -2017-may-27-024_zpsszybyedx.jpg
    -2017-may-27-024_zpsszybyedx.jpg
    53.5 KB · Views: 0
  • -2017-may-27-025_zpswvpzmtiv.jpg
    -2017-may-27-025_zpswvpzmtiv.jpg
    58.7 KB · Views: 0
  • -2017-may-27-027_zpszcutsfyk.jpg
    -2017-may-27-027_zpszcutsfyk.jpg
    46.6 KB · Views: 0
Almost ready for bumps and specs. Cleaning up last of the rivets.

Beautiful work there Steve. Oh the many hours of details strung to and fro to perfection. She'll bring a lot of pleasure to the masses. Thank you for sharing.
 
Thanks to Duckie's hard work, I am able to start on the bumps and aluminum skin im going to to. First test just to see how it handles in P3D. Shouldn't have any issues based on this result.

34217024044_84a707fd18_o.jpg
 
Thanks to Duckie's hard work, I am able to start on the bumps and aluminum skin im going to to. First test just to see how it handles in P3D. Shouldn't have any issues based on this result.

34217024044_84a707fd18_o.jpg

Thanks Rick. Looking forward to the first bumps to ensure all the default settings are okay with the materials. Keep us posted of your progress please.
 
Last edited:
Milton,

I have looked over the materials. A couple of items to bring to your attention:

1. If you would like to (doesn't have to be done) but there is more options if you assign each exterior Texture just a generic "Fresnel.dds" that will cover the whole plane. Enable "Fresnel affects Specular" for the exterior of the plane. This will allow some additional options for repainters to use to increase the look of realism if they choose.

2. See image. The part in RED is assigned to the MISC texture sheet. It does not have the same material settings as the rest of the fuselage parts. Meaning no refelection settings, has no alpha, spec or bump assigned to it. It will stand out if not fixed. I would make it identical to the forward fuselage settings. This one should be done. again it's up to you, you are the owner! But that is what I would do. Just my $.02. Great work by the way! This won't stop my work but eventually we'll need to have at least #2 fixed for it to look complete.


35038479806_b4c49898e0_o.jpg
 
Milton,

I have looked over the materials. A couple of items to bring to your attention:

1. If you would like to (doesn't have to be done) but there is more options if you assign each exterior Texture just a generic "Fresnel.dds" that will cover the whole plane. Enable "Fresnel affects Specular" for the exterior of the plane. This will allow some additional options for repainters to use to increase the look of realism if they choose.

2. See image. The part in RED is assigned to the MISC texture sheet. It does not have the same material settings as the rest of the fuselage parts. Meaning no refelection settings, has no alpha, spec or bump assigned to it. It will stand out if not fixed. I would make it identical to the forward fuselage settings. This one should be done. again it's up to you, you are the owner! But that is what I would do. Just my $.02. Great work by the way! This won't stop my work but eventually we'll need to have at least #2 fixed for it to look complete.

Thanks for the recommendations Rick.

Both added, and attached model and textures updates.

For misc.bmp, bumps and spec added.
For the Fresnel_Ramp, only Specular selected for all major exterior body sheet metal/fabric parts.

EDIT: see post below for attachment
 
Last edited:
Status
Not open for further replies.
Back
Top