Bump maps and textures

mongoose

SOH-CM-2023
1. If I was able to make a bump map using Gimp, I assume I would base it on the dds textures files. Once I had achieved that, what would I do with the bump map? Need a tutorial on that.

2. Textures. I assume making a 2018 texture is not just a question of changing the texture from 1024 to 2048?
 
Once you have a file in the proper Bump Map Format you need to save it with the .+nm suffix, and place it in the aircraft's texture folder (it will actually work from anywhere, but this keeps it organized).
For example:
n1k2RS_1.dds gets n1k2RS_1.+nm.dds added.

If you draw a new texture if can be any square size multiple starting from 2. 4, 8, 16, 32, 64, 128, 256, 512, 1024, 2048, 4096, etc. When you save the bitmap as a dds there are a number of different dds compressed and uncompressed formats, with and without LOD textures to choose from. If you don't have it automatically generate the LODs for you the DDS will remain square, otherwise it will become a 2x1 rectangle. If the bitmap as boundaries with sharp contrasts you may notice ugly stair-step color artifacts with the compressed file modes in the sizes below 2048.
 
OK I am having trouble with the bump mapping as can be seen from my thread on the gimp forum here

https://www.gimp-forum.net/Thread-bump-mapping?pid=9311#pid9311

One guy insists I need the original layered texture files or make new ones myself (not happening or ? necessary)
The other guy rich2005 is more helpful, but obiously I am doing something wrong. For a start I don't seem to be able to overlay one layer on another although I can merge them.

Any help or step by step instruction would be appreciated. Also I don'r see how I can use the same bump map with all the (same) aircraft unless I am meant to just save a file which is texture non specific.
 
well, the final result depends hows the current final texture skin. GIMP, Paint.NET, PhotoShop or whatelse bitmap editor or any special tool with bump/normal map procedures just makes the paint areas bumpy from the original texture, so:

if you have just the end-user skin with various camouflage patterns, decals, markings etc. they would become bumpy too. in another words, you will need to remove (retouche) such areas from the skin first and then generate the bump/normal map. or you can edit the generated bump/normal map later and retouche the problematic areas there.

if you have a layered texture source, you can save a lot time / to avoid of the retouche edits ;)
 
Well I am looking at Fouteman's aircraft updates but AFAIK he has lost all origianls as he asked me for copies of the aircraft. I am wondering if Andy has the originals for his bump mapping? What you are implying is that I would have to make a texture with just the rivets and any indented parts?:wiggle:
 
The hard way, but in some cases I can use PhotoShop to manipulate the *_s.dds file, if there is one, to get what I need.
 
That depends on if it was purpose built with just the panel lines and shading, or if it was simply done as the standard texture converted to grey scale.
 
Getting quickly back to this; what aircraft are uploaded with bump mapping? Dan's Fw190s?? Need an example for someone.

EDIT

Never mind I think I have got the Fw190s +nm files.
 
crash course for dummys

perhaps this is the best place to post this request, but could you please help me out with a step by step crash course on how to make bump textures?

this is what i understood so far:

the bump texture is an extra texture file for your aircraft. no need to mess with other files like the m3d file. the bump texure has the same name as the "normal" texture, but with suffix .+nm.dds. = myaircraft_t.dds and myaircraft_t.+nm.dds

1 - so the normal/usual myaircraft_t.dd file and myaircraft_s.dds can still be in the format i'm used to saving them (dxt 1 opaque)? so no chances here?

i've loaded my template in my usual editor, made a greyscale version of my base color with my panel and rivets layer. panel in darker shade than base layer for "depression". rivets in lighter shade for "elevation". saved this as a single layer 24 bit bitmap (full colour, no alpha channel) and loaded in gimp
in gimp i run the generate normalmap filter, was able to see elevation and depression in 3d preview and after clicking ok the greyscale image turned "blue" and elevation and depression visible.

2 - so far so good (isn't it???), but so what comes next????
 
Blue one is the good one.
Now just put it where the original airplane texture / skin is and rename the blue dds file with the +nm convention. Run the game and set Ankors Shaders on. Thats all in base.
 
Yes, as BorekS said, you can use "blue" 24/32 bit dds texture as is. BTW, it is not even necessary to place it in the same folder as aircraft, but it is a good practice.

However uncompressed texture will be huge.
Ordinary DXT compression is not suitable for these textures, but you can save it using ATI2 compression.
There should be many tools to do this, but I like AMD Compressonator 1.50 for its simplicity. There are newer versions, but they look confusing.
I can't find it on AMD site anymore, so here I uploaded it:
https://1drv.ms/u/s!AvmtwF9vPtwVgZJa4JbYOlzTFEYmTQ

It can also generate nice mip-maps with a lot of options.


And just to avoid confusion "aircraft_t.dds" is technically called "diffuse map". Calling it "normal texture" is ambiguous, because what you are creating for bump mapping is technically a "normal map" (where "normal" is a vector) :)
 
to the bumpmap/normal map creation I would have my 2c:

I am using such features for years and tested many bitmap tools to create the "common" DDS and the "bumpy" DDS files. latest few years I am totally happy with Paint.NET (free) + two related plug-ins, it does it all in a few clicks. my common DDS are DXT1 no alpha, DXT1 1bit alpha, or DXT5 for smooth (linear) transparent gradients, works perfect at all my race game add-ons and same with CFS3. it also does products much less of the awfull pixel aterfacts doe the DDS file comperssion algorythm, comparing to the other tools.

I just wanted to say there is no need to use the GIMP moloch or the PhotoShop monster software with their oversofisticated user interface for such work.
 
crash course for dummys part 2

thanks for the replies and the tools:

so some more questions as i've been reading some tutorials about bump mapping, but they're all written for other games, so here some (stupid) follow up questions:

how to export in gimp:

- create mipmaps and export file as a dds in any format. to get it working in cfs 3 i need to compress the dds file with a tool like The Compressonator 1.50 and save the file as a dxt5 image, but what subtype of dxt5?

- some tutorials for fsx suggest opening the file exported with gimp in modelconverterx and convert it to fs format. i also need to flip the bitmap. do i need to convert the file in modelconverterx and do i need to flip the texture?

untill so far i made the myaircraft_s.dds file always a bit lighter than their original greyscale. do i need to darken the myaircrafft_s.dds file or is there no relationship between the two?

as i do not have the ankor shader installed, i noticed a lot of uploads with different dates? do i need to download and install all of them, or is the upload with the latest date the most up to date versions of all required files?
 
Further to Ton's

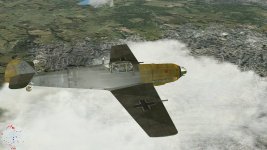
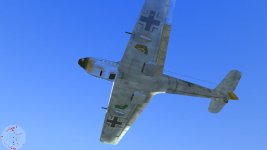
We have tried 2 versions of bump maps; onr in the MediaFire link and one here. I also have added pics from the 1st bump map but basically the same as the 2nd.

Now as one rotates around the aircraft one gets the "blue" or washed-out effect which almost looks like a specular issue to me; proably nothing to do with that!

So the ? is what's wrong?

View attachment bfexxx_1_3.+nm.rar the first .+nm


below contains the 2nd

http://www.mediafire.com/file/c88dxghpz1o28j6/105_bump_maps.rar/file


attachment.php
View attachment bfexxx_1_3.+nm.rar

attachment.php
 

Attachments

  • bumpmap 2.jpg
    bumpmap 2.jpg
    72.3 KB · Views: 1
  • bumpmap 4.jpg
    bumpmap 4.jpg
    24.5 KB · Views: 1
Back
Top