Bump maps and textures

Further to Ton's

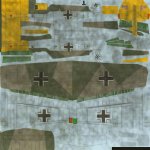
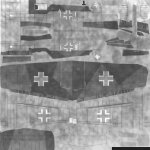
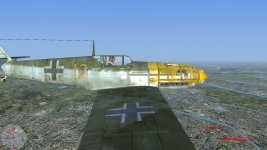
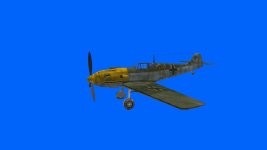
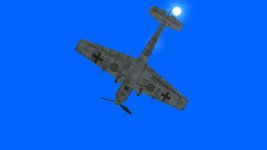
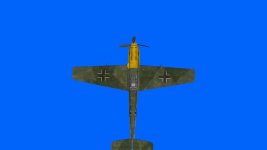
We have tried 2 versions of bump maps; onr in the MediaFire link and one here. I also have added pics from the 1st bump map but basically the same as the 2nd.

Now as one rotates around the aircraft one gets the "blue" or washed-out effect which almost looks like a specular issue to me; proably nothing to do with that!

So the ? is what's wrong?

View attachment 63887 the first .+nm


below contains the 2nd

http://www.mediafire.com/file/c88dxghpz1o28j6/105_bump_maps.rar/file


View attachment 63887

the rar files are the same, attached the second nm file, also the others textures
 

Attachments

  • bf109e_bump_test-002_nm.rar
    371.2 KB · Views: 0
  • 2048_bob_bf109e105_t.jpg
    2048_bob_bf109e105_t.jpg
    62.7 KB · Views: 0
  • 2048_bob_bf109e105_s.jpg
    2048_bob_bf109e105_s.jpg
    51.7 KB · Views: 0
You only need the latest AnKor Shader install package.

The _s file appears to be too light leading to excessive reflectivity. For a painted aircraft the average _s brightness should be in 5-8% gray range. For bare aluminum it can be 10-16%.

What's important about the starting image when creating a +nm file is the relative range of brightness values, and not how dark or light the average value is. A big variation will make the dips and bumps stand out more. A narrow range will make the effect more subtle and flat.

When checking the result of your +nm file, start with getting the base texture, and _s file to look the way you want first. Then add the +nm, and look at it from a variety of different angles and lighting conditions. The normal mapping effect is dependent on reflected light to show itself, and you may not be able to see it at all sometimes, even if it's working correctly.
 
I've downloaded the bfe105_3.+nm.dds file and I see the problem - it is in DXT5 format, but it should not be.

Let me explain step by step how you should do it with Compressonator 1.50:

- Start with "blue-magenta" image in 24 bit BMP, not compressed in any way.
- Open it with the compressonator
- First, click "Generate Mips" in the toolbar (the label to the left of this button says "Box-Filter", it can be changed, but I think the default one is ok for normal maps)
- After that, click "Compress" (the label to the left of compress should say "ATI 3Dc Compression" - this is what we need)
- In the new window choose "ATI2N" (second option) and click "Compress"
- The tool will show 3 smaller windows: Original texture on the left, Difference in the middle and Compressed on the right.
- You should visually check that Original and Compressed look almost the same and Difference is black.
- In the menu click File -> Save Compressed and save your new texture as "+nm.dds"

That's it.
You don't have to flip the bitmap in any way, swap any color channels or do anything else.

ATI2N is a special compression format, developed specifically for normal maps. It wasn't standard in DX9, but became standard in DX10 (albeit with a different name) and thus all GPUs made in last 10+ years support it.

The above is enough, but here is some extra info if you are interested. I don't want to confuse anyone with too much information :)
The problem with DXT5 compression and normal maps is that DXT5 introduces crosstalk between color channels. While this is usually not noticeable for ordinary textures, it causes artifacts for normals.
The trick to avoid the crosstalk is to move one of two required color channels into the alpha channel. It was first used in Doom 3 I think. It is supported by my shaders and as I understand it is used by FSX as well: https://www.fsdeveloper.com/wiki/index.php?title=Normal_map_creation
However for ATI2 you do NOT need to do it, and ATI2 provides better quality than using this DX5 trick while file size is the same.

Finally, you can just save the DDS texture without any compression. Something like 24-bit RGB or whatever it is called. This is also supported by my shaders, but the DDS file will obviously be larger than a compressed one.

So, in summary:
My shaders support 3 types of "+nm" textures.
- 3Dc ATI2 - good quality, created with compressonator, or NVidia tools for Photoshop, or whatever other tool can do this.
- DXT5 with Alpha "trick" - ok quality, almost any tool can save DXT5, but you have to move red color channel into alpha somehow.
- Uncompressed DDS - best quality, but large file. The file must contain 3 color channels for normal map.

One more thing.
If you are creating an "extra" specular map specifically for my shaders (+sr.dds) you can save it in ATI1N format (also available in compressonator). This is special format for grayscale images and provides better quality than DXT1. However it is NOT supported for standard "_s" textures for CFS3.

Hope it helps :)
 
hmm, I really wonder how soooo easy thing like dds textures and its normal maps you can achieve so compliacted way. I have to laugh.
 
BorekS, lol, it doesn't look too complex for me. I just offered a generic solution on how to create a suitable dds from a bitmap. I'm a programmer, not an artist :)

I think I tried a normal map plugin (not sure which one, I believe there are a few of them) for Paint.net and it worked, but I don't have it right now and can't provide any details its use.
I also used NVidia Photoshop plugin - it is good, but again it was so long ago I can't comment on it.
And GIMP is a monstrosity about which I don't know much :)
 
For the _s files sometimes I can simplify the process considerably. For a plane that's painted all over, and doesn't have paint chips or worn spots showing bare metal, I just create a texture that a solid 6% grey. AnKor's shaders use the base color's brightness to vary the reflectivity, so you will get some specular variations over the surface from that. Additionally you'll still see the specular highlights bring out the shape of the curved surfaces even when the _s is a solid shade. This actually is better than artificially forcing the upper curved surfaces to have lighter highlights, because it won't look wrong when the aircraft tilts or rolls inverted.
 
thanks, this is just what i needed to know as most tutorials were for other games with different format. the whole subject of bumb mapping is actually new for me. so enough homework to do for tonight :)

some weeks of experiments ahead, updating some old techniques :}


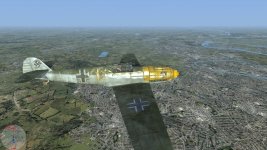
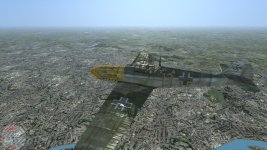
OK so with Ton testing the bump maps for his 109, we get these results. IOH, the shine is excessive (? I am again assuming specular setting??). Also I imagine the height setting of the bump map could be less?? Comments welcome.

attachment.php


attachment.php


attachment.php
 

Attachments

  • bumpmap shine.jpg
    bumpmap shine.jpg
    88.6 KB · Views: 1
  • bumpmap shine2.jpg
    bumpmap shine2.jpg
    92.3 KB · Views: 1
  • bumpmap shine3.jpg
    bumpmap shine3.jpg
    66 KB · Views: 1
Yes, that looks overbaked. Start with darkening the _s.dds file so you can see the bump mapping without the exaggerated effect. Then you will know how much to reduce the contrast when you create the bump file.
 
Yes, that looks overbaked. Start with darkening the _s.dds file so you can see the bump mapping without the exaggerated effect. Then you will know how much to reduce the contrast when you create the bump file.

ok, with a solid black (rbg 0,0,0) _s.dds file the flooding has disappeared but the diffuse map (_t.dds file) still looks horrible.
as i've been out of cfs 3 for a while, i used the tutorial on the groundcrew website for the configuration settings.
in my eto 1.5 install, with the january 2018 ankor shaders the diffuse map looks horrible (see the logo on the cowling, or the id number)

i've also installed pat pattle's bob without the ankor shaders and then the aircraft looks fine to me, see attached pics (same aircraft, copied and pasted directly from my eto install, so with solid black _s.dds file (specualar map?)

so something wrong with my eto configuration? also attached the config file
 

Attachments

  • cfs3configdatabase.txt
    41.5 KB · Views: 0
  • Image 044.jpg
    Image 044.jpg
    13.8 KB · Views: 0
  • Image 045.jpg
    Image 045.jpg
    14.3 KB · Views: 0
  • Image 046.jpg
    Image 046.jpg
    12.6 KB · Views: 0
OK so with Ton testing the bump maps for his 109, we get these results.

I can see there a very high bumpmap level mainly, which takes also effect on the specularity.

Ive noticed some people generates their +nm dds textures which are almost black images, if you look inside. thats unusable for later edits. in such case you have to recompute the normal map again with lover depth values - as the export procedure offers and try it ingame again.

but if you have the "blue" images, you can try to decrease the level of "bumpness" manually there. the main blue color is the neutral 0 height. add a new leayer up in your bitmap editor, fill it fully the same blue color and set it, lets say, 50% transparency and save it as the final dds again. this way you should got 50% smaller bumpness result basically. its not the ideal way, but for some quick tests it is good enough. from my own experience the blue normal map bumpness level for CSF3 Ankor Shaders 2018 is visually almost unnoticable at firts look - I mean the +nm texture paint, but it is getting fine result in the game.

I cant resist to not mention the Paint.NET editor again. its a lot simpler user interface (UI) comparing to GIMP or PhotoShop, which are not too much usable tools for beginners because of this, for our specular and bumpmap work, at least. I was a big fan of Paint Shop Pro by past, up to 7 series, but since it is not Jasc company product anymore, it become same UI muddle as the PhotoShop or similar monsters.
 
Last edited:
Back
Top