Conspicuous by Their Absence

Hello Ivan,
Interesting, all these experiments!

Acting on selected aircraft elements, and not on the entire build is of course better.
In my case I would have to take the wheels out of the build and stretch everything else.
For them it is obviously better to be moved into position after that - undeformed!

Of course, your program managed to cope with the offsets very well indeed!
But, in my case, I find calculating the offset corrections a bit taxing, and even worse,
writing it into the program, so instead, I find it better to work on the wheels in AF99,
although not
by trying to adjust the existing ones. The same goes for textures - it will be
easier for
me to let AF99 do that, even if I have to go through all the building list.

Adjusting wheel templates in AF99, both in the Parts Shop AND moving them back into
position in the Paint/Special Effects Shop didn´t work. They refused to stay where I
put them, despite
saving the build before compiling, so I had to rename the templates
and structures after
correcting them, and pack the build again.
That was the only thing that worked.


After that, of course, it worked OK when they were included in the stretching business,
even
though this is arguably not a good idea. It was just part of the experiment.
For future versions of the
AFX modifier, the AFX will not apply Stretching to wheels, only
Moving. ...Hopefully.

By the way, to stretch the fuselage, I suppose the wings were included, as the
fore/aft measurement change so as not to include the nose-cannon would also
have affected the wings on the drawing/plan.


Updated paragraph: I still have to experiment on the change in wingspan, which
should be 0.6 ft greater. This turns out to require a multiplier of 1.0191, the same
as the fuselage. I expect it would have to include the fuselage too, and the tailplane,
as the dimensional change seems to be overall.


Cheers,
Aleatorylamp
 
Last edited:
Hello Aleatorylamp,

I believe you REALLY need to examine the existing AFX better than you have done thus far.
It finally occurred to me why you are having such difficulties with misshapen Wheels.
........

What are the dimensions of the REAL P-39D?
What are the dimensions of EJ's AFX?

We have already agreed that the Fuselage Length is too short and you have the multiplication / stretch factor (1.0191x).
If the Fuselage is correctly shaped, then a Vertical stretch by the same amount is also in order.
That takes care of the Y and Z dimensions.

What about the X (Left - Right) dimension? How does the Wing Span compare to the Real Bird?
What kinds of difficulty would result if a complete stretch of the X dimension made the Wings too long?
In my opinion, a Wing Span that is too long is VERY easy to correct because there does not tend to be much interaction with other stuff at the Wing Tip.
All that a Wing Span change would involve would be to move the Wing Tip Parts and then snap the other Wing Top and Bottom surface Parts to connect to the new Wing Tip locations.
....So the worst case scenario is pretty easy to resolve.

But is it necessary???
Check out the actual Wing Span in the EJ P-39D model.
This is the one area I believe he really fell down.
The Wing Span is actually a bit too short.....
In Fact, it becomes VERY CLOSE to the correct size if stretched by a factor of.....
<Drum Roll please....>
1.0191x

In other words, stretch EVERYTHING by the same factor and you will not get any deformation at all and not only that, it will also correct the Wing Span at the same time it corrects the Length.
Actually the Wing Span will end up to be 0.01 feet too long one each side if I remember correctly, but that level of correction is trivial. I actually chose not to bother correcting it for such a little difference because the Wing Tip is shaped wrong anyway.
I also chose not to extend the Fuselage Length 0.01 feet because I believe it is more correct not to do so which I will describe when I begin building my own model.

- Ivan.
 
Hello Aleatorylamp,

I see you found the Wing Span issue as I was typing my reply....
Good.... This should make it easy.

- Ivan.
 
Hello Ivan,
Yes, indeed!
victorious.png
...and I heard the drum roll! Was it the Parish
Church band or have you hired your own?

Just when I got into the thread now, I was about to update my older
post again (yet again) to say that most probably the height needs
stretching too, and by the same amount, so the wheels will end up
perfectly shaped!
Bingo!

With the AFX Modifier, now that I have the wheel parts in their places,
not in the null position, I´ll just apply the multiplier to the l/r and up/dn
coordinates of all vertex and structure template lines, and it´ll do it in
one go.


Cheers,
Aleatorylamp
 
Hello Aleatorylamp,

The Drum Roll was just a bunch of pensioners at the local old folks' home who don't know the war is over.

You will find that here are a LOT of pieces that got moved around in the Assembly process in this AFX.
Some of them will not be obvious with just a 2% Stretch. It isn't just the Wheels.
You may find some odd misalignment unless you catch them all and it is pretty tedious to do that.

The Stretch of the Assembly offsets is not any more difficult than the stretch of anything else though the parsing may get a little complicated. It wasn't that bad in the AFA file, but I don't know what it looks like in the AFX.

- Ivan.
 
Hello Ivan,
Yes, OK you´re right - I just caught one: The exhaust! It was built more or less
in position, but then
aligned a bit better with a sideways shift, but it isn´t out
of position.


Update: OK I´ve done it! The program applies the multiplier to l/r, fore/aft and
u/d vertex coordinates simultaneously it takes about 1/3 of a second!
I also
found the bug that was bugging the unpacking process (yet again).

I don´t really need to process any offsets, because the program is for me to
process my own builds. The objective behind this was to remedy the situation
when I suddenly discover that a model´s dimensions are off due to bad source
information.

Also, as I map textures from within AF99, I don´t need to include texture mapping
in the program either, and right now the program does exactly what I was aiming for.

So, thanks a lot for your comments, suggestions and help!
Cheers,

Aleatorylamp
 
Last edited:
Grumman Tigercat

Hello Folks,
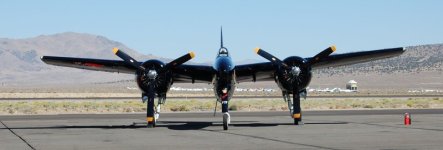
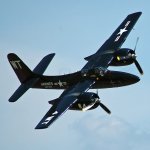
I was wondering if a new Grumman F7F-1 Tigercat would be in order.

I found the characteristics and performance certificate of this version,
which also has the 2400 Hp, engine, so it looks quite enticing for a project.

The shape is as the -3 version, of which a nice example seems to be flying,
and a -3P also seems quite similar, but not the one with the radar in the nose.
I was thinking of building the -1 one, unless of course there are any objections!:jump:
Cheers,
Aleatorylamp
 

Attachments

  • Grumman_F7F-3N_Tigercat_2007.jpg
    Grumman_F7F-3N_Tigercat_2007.jpg
    41.9 KB · Views: 0
  • F7F-3P_Tigercat.jpg
    F7F-3P_Tigercat.jpg
    48.4 KB · Views: 0
  • F7F-1_Airplane_Characteristics_Performance.pdf
    2.3 MB · Views: 0
I Tawt I Taw a Puddy Tat

Hello Smilo,
Yes, why not indeed!
biggrin-new.png

I was just being funny - instead of saying "would anyone like a Tigercat?"...

Ghandi said God made cats so that humans could caress a tiger.
tiger.png

I´m glad our little ginger-striped cat here is small, even for a cat... anything
bigger would be lethal. ...but so amiable when it wants something...

So... Grumman made us the Tigercat so we could have fun making a hot ship!

I´ve set up the conveyor belts and the Draught Dept. people are drawing the
plans, and soon the plotter will plot the template-blueprints for the 2D Mock-Up.

I´ll open a new thread as soon as they are done, and post some colour pictures
of the AF99 cardboard toy plane.

Cheers,
Aleatorylamp
 
please, don't get me started on cats.
too late...
i like birds, especially, wild ones.
when we had cats,
there weren't many live birds.
now that the cats are gone,
the number and variety of birds
has greatly increased.
to my liking, i might add.

have fun with your tiger
 
Reportedly, quite a wild thing.

Hello Smilo,
As you like wild birds, I´m sure you´ll like a Tigercat!
Having a garden or living near a forest is great for wild birds
and other animals. My brother once had a weasel visiting
- it took care of a mole that had made a mess of the vegetables.
A skunk lived under his house for a while too!

California (my heart bleeds with the news of the current fire disaster
there) is better for wildlife than here, but we have are interesting lizards
in the mountains, including rare, shiny metallic copper ones with a black
stripe down the side.

Though no garden, we have an outside patio, so our ginger cat is as wild
as can be got here in the urban surroundings.

Anyway - we are not totally off topic: The plane´s the Tigercat.
Tigers are wild, Cats sometimes too, also weasels, moles and skunks.
Birds fly, and planes do too!

So, everything here is on-topic, WILD being the operative word.
According to quite a few, the Tigercat was just about the wildest plane
in the Navy and the Marine Corps at the time, so it definitely makes for
an exciting project.

The .air file will obviously be quite a challenge. The 1st production model
Tigercat engines seem to be quite close to the engine on the P47d, so
that one could be souped up just a little to meet the specs.

Propeller size seems very similar too, but with 3 blades instead of the 4.
Ceiling was 36200 ft and Critical Altitude 19200 ft, lower than for the P47d,
so the supercharger will need a some adjusting.

WEP Power on this Tigercat was 2x2400 Hp at 2800 RPM, and at 1000 ft, it
did 400 mph. RoC was 4360 fpm. That sounds pretty darn wild, and will make
it quite fantastic to build, I´d say.

In the next few days I´ll turn the 3-views into some 2D AF99 templates for
the basic shape-layout, and to get a platform for a first draft of the .air file.
...with a new thread, of course!

Cheers,
Aleatorylamp
 
Texturing Exercise

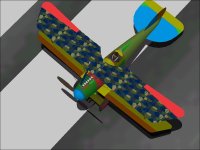
The recent work on the Smilo's Hammer Thunderbolt got me to thinking:
Many of the projects that get stalled in my shop are stuck because of textures.
Sometimes I have a certain paint scheme in mind for a project but it is beyond my abilities to do at the time.
As we learn with each project, what was impossible earlier may become just difficult but possible.

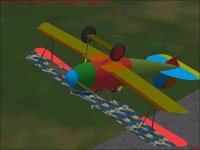
This Albatros D.Va is such a project.
I wanted it to wear the Lozenge scheme that was used by many German aircraft of the Great War.
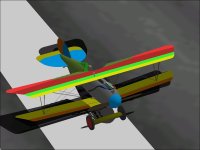
Attached are my first attempts at actually applying such a pattern to the Top Wing of the Albatros.

Getting the proper pattern printed on quality linen was difficult at first because the colours always came out just a bit different than I had expected. The most recent bolts of fabric seem to have come out reasonably well at least for the top surfaces.
My Technicians are more familiar with working in metal than in sewing and stretching and sewing fabric onto a wooden frame, but this looks like a pretty fair first attempt.
They didn't get the alignment quite right, so there will be another attempt soon.

- Ivan.
 

Attachments

  • Albatros_Untextured.jpg
    Albatros_Untextured.jpg
    48.7 KB · Views: 0
  • Albatros_RibTape.jpg
    Albatros_RibTape.jpg
    42 KB · Views: 0
  • Albatros_LozengeFabric.jpg
    Albatros_LozengeFabric.jpg
    56.4 KB · Views: 0
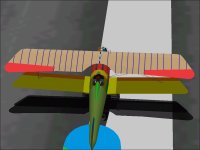
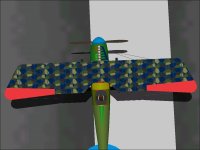
Aligning the textures wasn't very difficult. I had shifted the wrong side which is why they didn't quite match.
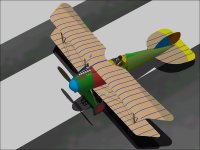
First screenshot shows the corrected upper wing surface. Covering the underside should be pretty trivial at this point.
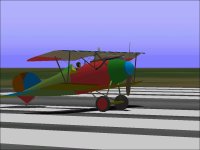
Second screenshot shows the general shape of this aircraft.
It still carries the headrest even though they were often removed in the field.
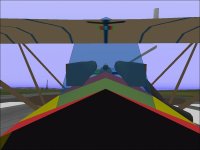
Third screenshot shows the current Virtual Cockpit which obviously needs some SCASM adjustments.
The Upper Wing should not show through the Windscreen and the Coolant Pipe to the Radiator mounted in the Upper Wing is obviously not quite connected.

- Ivan.
 

Attachments

  • Albatros_LozengeAligned.jpg
    Albatros_LozengeAligned.jpg
    45.8 KB · Views: 0
  • Albatros_RFLevel.jpg
    Albatros_RFLevel.jpg
    48.4 KB · Views: 0
  • Albatros_VCockpitFore.jpg
    Albatros_VCockpitFore.jpg
    44.3 KB · Views: 0
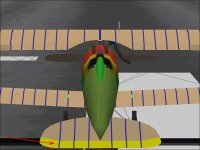
A expected, texturing the underside of the Top Wing was not difficult.
It is quite difficult to confirm that the alignment is correct through the center section because the Fuselage and Cabane Struts obstruct a direct view.
A view from the cockpit is at such an angle that the joints between each piece of fabric are hard to see (as they should be).

Next step is to map textures for the Bottom Wing and Tail Surfaces and the Ailerons.
The Wings are covered with fabric running in a chord-wise direction but typically the Ailerons were done span-wise.

This texturing method seems to have worked much better than I had expected.

- Ivan.
 

Attachments

  • Albatros_LozengeBottom.jpg
    Albatros_LozengeBottom.jpg
    46.9 KB · Views: 13
More Texturing Fun

I actually hate laying out textures.

Most of the horizontal (Top-Bottom) textures are mapped at this point.
Even the little airfoil between the wheels has been mapped.
Redoing the Lozenge camouflage will not be difficult but first there needs to be a Radiator installed and some National Insignia painted on the wing surfaces.

There seems to be a slight bit of weirdness in the Elevator textures though I know everything is the same left to right.

- Ivan.
 

Attachments

  • Albatros_PartialTextures.jpg
    Albatros_PartialTextures.jpg
    61.5 KB · Views: 0
  • Albatros_StrangeElevator.jpg
    Albatros_StrangeElevator.jpg
    52.4 KB · Views: 0
Hawker Hurricane?

A few days ago, I was involved in a forum discussion about the Hawker Hurricane.
I have at least a half dozen of them loaded on my Development Machine and thought I would just take one out for a bit of test flying to get a feel for how the aircraft behaved.

I found that I don't have even one that seems to behave well.
What is the best Hurricane that is currently available?
Is this another that has been missed over the years?

- Ivan.
 
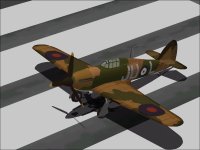
Here is what I believe to be the best one that I have found.
It is labeled RAF 111 Squadron.
The model isn't that well detailed and has a few bleeds, but it does seem to have the correct shape.
The textures seem to be a little strange with the wings and forward fuselage being completely symmetrical.

The flight model also had a few small bugs that were not too difficult to tune out.
After that, the handling seems to be fairly good though I have not tested it for performance.

There are obviously cleaner models with fewer bleeds and much better detail and textures.
So what is it that makes this the best one in my opinion?
All of the other models seem to have the Center of Gravity located very far aft, about in line with the back of the radiator.
That makes it nearly impossible to tune the aircraft to handle and behave like the real thing.
This model does have the CoG in line with the propeller axis which is a bit too high but that is less of a problem than too far aft.
Another side effect of having the model's center too far aft is that the cockpit viewpoint is ahead of the CoG and pieces of the nose such as the propeller can be seen from the virtual cockpit.
The only other model that I have found that does not have the CoG too far aft is the stock Hurricane Mk.I.

I am not quite sure why, but the RAF 111 model seems to have a pretty clean view from the virtual cockpit which might suggest that this is a SCASM'ed model.

- Ivan.
 

Attachments

  • Huricane_RAF111.jpg
    Huricane_RAF111.jpg
    50.9 KB · Views: 13
Here is an odd aeroplane that I found while looking for a better Hurricane.
It is supposed to be a Spitfire LF Mk.V.
The interesting thing is that this is a modified stock Spitfire Mk.IX with clipped wings.
The propeller is the 4 blade version from the Mk.IX which is somewhat unusual for a Mk.V and the armament appears to be 2 x 20 mm cannon and 2 x .50 cal MG in the inner gun bays which is more typical of a Spitfire with the E wing.

- Ivan.
 

Attachments

  • Spitfire_LFMkV.jpg
    Spitfire_LFMkV.jpg
    40.7 KB · Views: 13
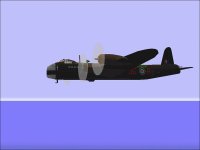
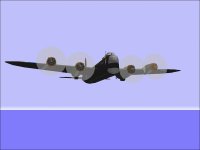
Here is a beast that doesn't have a good representative for CFS.
I was reading about the Stirling a couple weeks back and decided to have a try at making the only model I could find into a reasonably flyable aeroplane. It is actually turning out quite a bit more difficult than I had first expected.

The model is of a Stirling Mk.IV which was one of the Transport and Glider Tug versions that was built after the Stirling was no longer a first line bomber. It originally carried D-Day Invasion Stripes which I removed.
I was thinking of editing the model to correct the nose position back to a two gun turret and to add in a "Mid-Upper Turret", but my SCASM tools can't read this model.

The interesting thing about this aeroplane is that with a full fuel load and no bomb load, it is very difficult to take-off and requires a bit more runway than the typical Island Airstrip I use for everything else. This is probably because in that state, it is pretty close to its Maximum Take-Off Weight of 70,000 pounds.

This sounds kind of backwards, but if I can get a decent flight model, perhaps I will build a visual model to go with it.
This Stirling got a look mainly because I needed a good four engine bomber for testing new Gauges that are being developed.

- Ivan.
 

Attachments

  • Stirling_1.jpg
    Stirling_1.jpg
    22.8 KB · Views: 3
  • Stirling_2.jpg
    Stirling_2.jpg
    21.9 KB · Views: 0
Back
Top