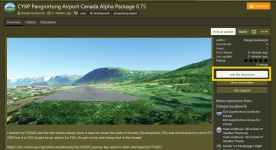
Welcome to the 4th version of the Warbirds Library. Currently the tab is labeled “Resources”. Once our move is complete the tab will display its proper name.
This post will cover how to upload, update and delete files.
Like most things there are multiple ways to accomplish a task. You may find a different way to work your uploads which you prefer. Feel free to use the method you like.
Key details about the files you can upload in the library.
From whichever section of the website you are in Click the Resources tab (note: again this will change to WarbirdsV4 at a later date).
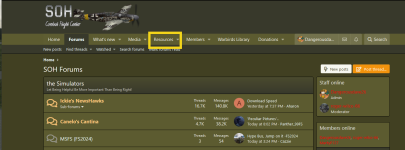
From here you can click on Add resource


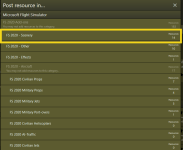
At this point you need to pick your category. Note unlike the last version of the library you can only pick one category at this time. I did find at least 1 add-on that would allow you to select multiple categories, but it is not for our version the software and is no longer supported by its developer. I also found based on the screenshots the selection process was not very clean. It had multiple steps. At a later date we may be able to have a custom addon created that would give us the functionality we need. Think extra $$$ for getting someone to develop it.
Time for the important stuff. Some things are required some are optional
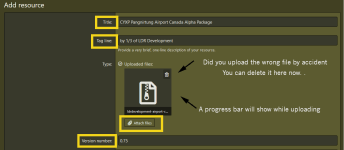
Title is absolutely required. Accurately give your work a title that tells the viewer what it is.
Tag line is also a required field. Add a short description about the file.
To add the archive file click the attach files button. This is also required but goes without saying as they is why you are here in the first place. You will get an error message if you don’t remember to add the file. There will be a process bar displaying while the file is uploading. Do not try to save the addon while it is uploading.
Version number is optional but if you don’t fill it out the system will display the date the file was uploaded.
Now on to the description which can be a technical as you want. I add the image that I prepared for the library entry in this manner. You can do it anyway you feel works for you.
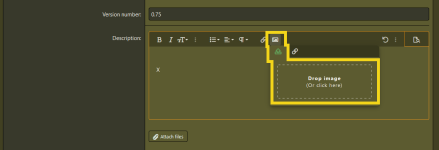
I first hit the enter button 2 times and drop the cursor down 2 lines. I noted this as an X for this How to.
I then go back up to the top row and click the Insert Image button. You will get a drop down box with the option to add the image by file upload or by URL. I drag and drop the image file from the folder it resides in to the box “Drop image”. That is it the forum software will upload the image to the entry. A progress bar will let you know when it is done. Do not attempt to save the whole package until the upload is done.
From here I add my text below the image.
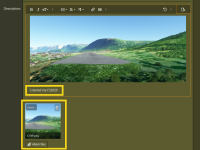
We have more flexibility with this software. You can add multiple files and images to an entry.
The description can contain media files in the way of audio files and video files.
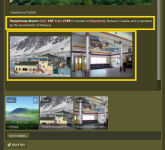
Tags are optional but will assist in finding the entry in a search.
Additional information url is optional but you might want to point the viewer to external resources.
Alternative support URL is optional and available if the uploader is not a primary member of this site and provides support at another Flight Simulator site.

Next you are going to add the Thumbnail to the entry. I use the same file I uploaded as the first image. Right now the thumbs are really small. As we move forward I may be able to find a way to display the thumbs larger. When that is done uploading the same image here will be a benefit.
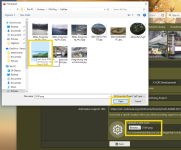
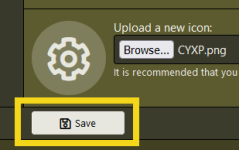
Lastly save the entry.
To be continued...
This post will cover how to upload, update and delete files.
Like most things there are multiple ways to accomplish a task. You may find a different way to work your uploads which you prefer. Feel free to use the method you like.
Key details about the files you can upload in the library.
- Archival files must be in zip, 7z, or rar format. The maximum size currently is 2GB.
- Image files can be in png, jpg, jpeg, jpe, gif, tif or format. Maximum size is 6MB. No restriction on dimensions.
- Document files can be in pdf or txt format. Maximum size is 6MB
- Video and Audio must be in m4v, mov, mp4, mp4v, mpeg, mpg, ogv, webm, mp3, opus, ogg or wav format. File size is limited to 100 MB. If you find you cannot upload video / audio then your user group does not have the necessary permissions.
From whichever section of the website you are in Click the Resources tab (note: again this will change to WarbirdsV4 at a later date).

From here you can click on Add resource


At this point you need to pick your category. Note unlike the last version of the library you can only pick one category at this time. I did find at least 1 add-on that would allow you to select multiple categories, but it is not for our version the software and is no longer supported by its developer. I also found based on the screenshots the selection process was not very clean. It had multiple steps. At a later date we may be able to have a custom addon created that would give us the functionality we need. Think extra $$$ for getting someone to develop it.

Time for the important stuff. Some things are required some are optional
Title is absolutely required. Accurately give your work a title that tells the viewer what it is.
Tag line is also a required field. Add a short description about the file.
To add the archive file click the attach files button. This is also required but goes without saying as they is why you are here in the first place. You will get an error message if you don’t remember to add the file. There will be a process bar displaying while the file is uploading. Do not try to save the addon while it is uploading.
Version number is optional but if you don’t fill it out the system will display the date the file was uploaded.

Now on to the description which can be a technical as you want. I add the image that I prepared for the library entry in this manner. You can do it anyway you feel works for you.
I first hit the enter button 2 times and drop the cursor down 2 lines. I noted this as an X for this How to.
I then go back up to the top row and click the Insert Image button. You will get a drop down box with the option to add the image by file upload or by URL. I drag and drop the image file from the folder it resides in to the box “Drop image”. That is it the forum software will upload the image to the entry. A progress bar will let you know when it is done. Do not attempt to save the whole package until the upload is done.

From here I add my text below the image.

We have more flexibility with this software. You can add multiple files and images to an entry.
The description can contain media files in the way of audio files and video files.

Tags are optional but will assist in finding the entry in a search.
Additional information url is optional but you might want to point the viewer to external resources.
Alternative support URL is optional and available if the uploader is not a primary member of this site and provides support at another Flight Simulator site.

Next you are going to add the Thumbnail to the entry. I use the same file I uploaded as the first image. Right now the thumbs are really small. As we move forward I may be able to find a way to display the thumbs larger. When that is done uploading the same image here will be a benefit.

Lastly save the entry.
To be continued...
Last edited:

