-
Please see the most recent updates in the "Where did the .com name go?" thread. Posts number 16 and 17.
-
IMPORTANT DOWNLOADING INFORMATION - ALL MEMBERS PLEASE READ
Please see this thread for updates. Update Thread
SOH ADMINISTRATION
You are using an out of date browser. It may not display this or other websites correctly.
You should upgrade or use an alternative browser.
You should upgrade or use an alternative browser.
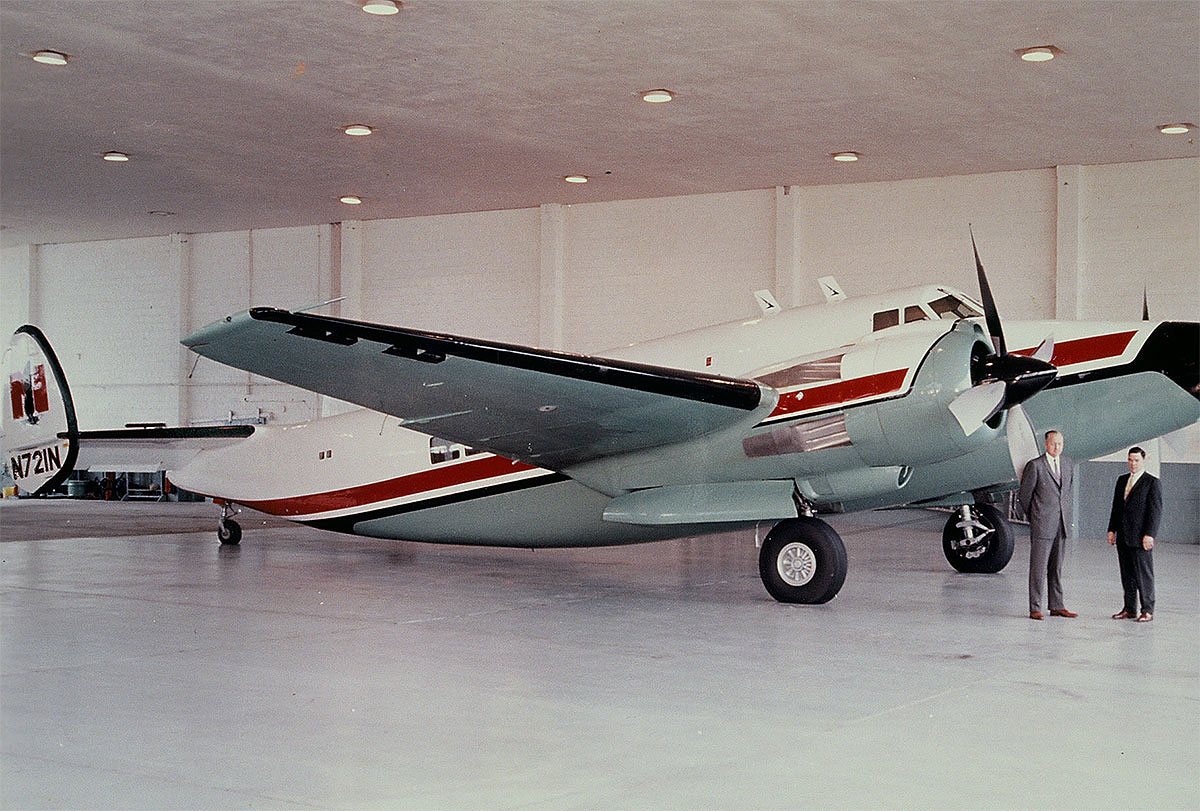
Howard 500 N4362F
- Thread starter TuFun
- Start date


TuFun
Riveter
For what it's worth here some update pics. You might get lucky to fly it some day.
Setting up a pattern of fastners and rivets for the cowlring textures... later the the big cowling and parts will get the treatment.


Tails all set just needs color...


Hope you got a key to the door you'll need one!

UPDATE: Red pattern now into something usable. Going to do some research how the slots should be on the fastners. Big cowl will get these nice fastners next.

Setting up a pattern of fastners and rivets for the cowlring textures... later the the big cowling and parts will get the treatment.
Tails all set just needs color...
Hope you got a key to the door you'll need one!
UPDATE: Red pattern now into something usable. Going to do some research how the slots should be on the fastners. Big cowl will get these nice fastners next.
Last edited:


TuFun
Riveter
Well, now I was trying to figure out why one bezel rivets/lnes had the innies and the other the outies? I did the bumps right... I know I did I did! 
Hmm... so I thought to flip half the bump texture and voila both innies... yeaaaaaaa!
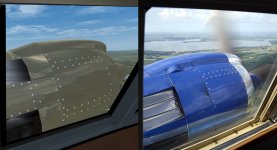
Right side #2 engine...

Left side # 1 engine...


Hmm... so I thought to flip half the bump texture and voila both innies... yeaaaaaaa!
Right side #2 engine...
Left side # 1 engine...


Greenhouse357
SOH-CM-2023
Amazing TuFun!
Duckie
SOH-CM-2024
Beautiful work Ted, and, for me anyway, a great tutorial series as I watch and see the evolution of your work. Your remarks are also helpful and provide insight into your reasoning, intention, and approach. And, although this is all very subjective and not for everyone, it certainly is and has been an enjoyable and informative process/series for me. Thank you.
Steve
Steve
jamminjames
Charter Member
Man that sure is looking good!!
TuFun
Riveter
Thanks, Duckie! Some of these older models like this one take some time when nothing is round or flat or line up just right. Looks good drawing them up in a graphics program until you see it in 3d.
Right now it's a little artsy like all the bling that aircraft don't have but until I finish the rest of the model it's fun to see. Those strips on the cowl are four parts and not all are the same size making fun to line up. Will be adding the pinstriping that goes in the white background. The fuselage rivets are about right for a painted aircraft thus the wings will look like that later.

Rivets are now flush on the cowl flaps not what I did before. Same with the smaller fastners with no slots yet.


Right now it's a little artsy like all the bling that aircraft don't have but until I finish the rest of the model it's fun to see. Those strips on the cowl are four parts and not all are the same size making fun to line up. Will be adding the pinstriping that goes in the white background. The fuselage rivets are about right for a painted aircraft thus the wings will look like that later.
Rivets are now flush on the cowl flaps not what I did before. Same with the smaller fastners with no slots yet.
Last edited:
gray eagle
SOH-CM-2026
Looks nice and eventually in Concours d'Elegance condition. 
TuFun
Riveter
Looks nice and eventually in Concours d'Elegance condition.
Thanks! Factory new right out of Dee's facilities it will be. Giving the Howard one last leg in the virtual universe.
Just like this one.

TuFun
Riveter
Looking marvelous, Ted! Love the engine cowling color and detail (post-#51 third picture)!
Thanks! Favor this big twin. Thought I would give her one last shot!

Also in the first pic of post #51, is there a way the VC glass and reflectivity can be made like that of the two cabin windows shown (ie. less 'blue')?
That I don't know, do like the way the windows look in FS9 models. Looks to me the cabin and cockpit windows are tied together change one change them all.
Also, the cockpit window frame can only be black so it can't match the color of the fuselage.

