Bomber_12th
SOH-CM-2025
Gabe, yes it is! The gun bay is actually a detail carried over from "Little Friends" (I). I have the gun bay door animations assigned to the wing-fold key, so it prevents the ability to fly around with the gun bay doors open. ; )
If you find the main Warbirdsim folder within your root FSX folder, there is a user guide that provides information about all of the different features that you may not otherwise realize/be able to find right away, so if you haven't looked it over yet, I greatly encourage you to do so!
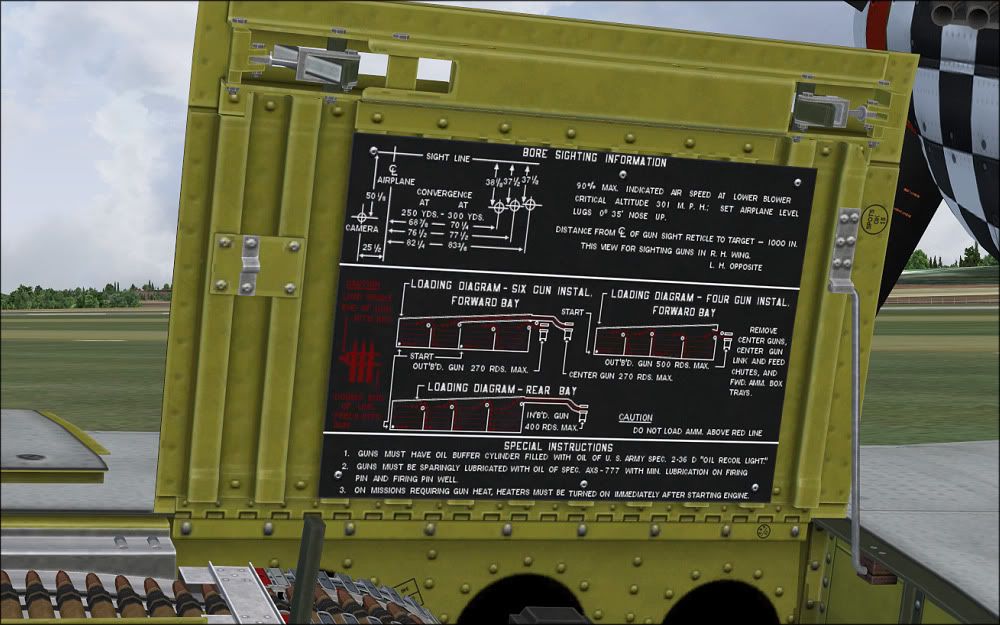
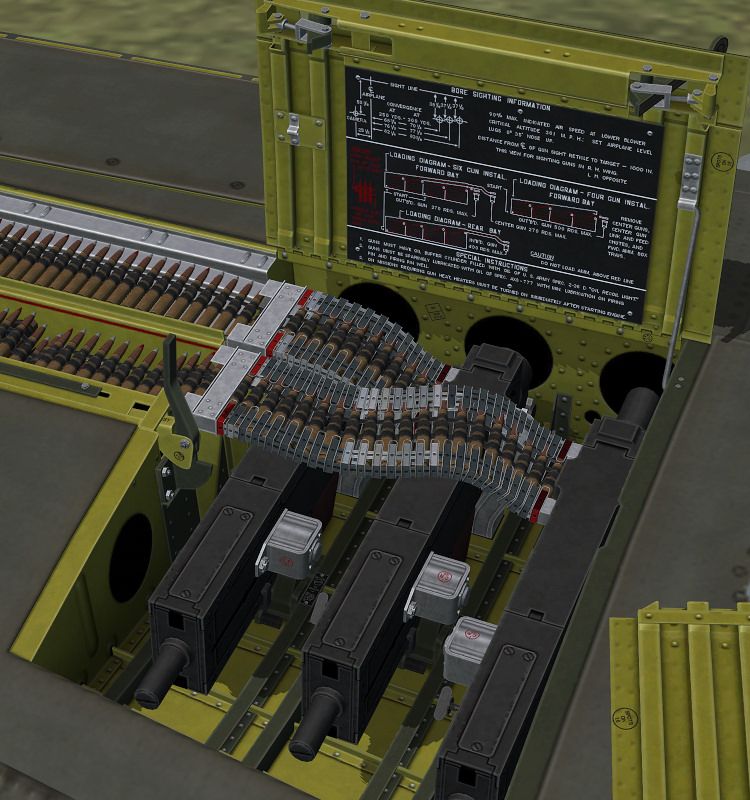
Although it took a month just to build, with it in focus, it was one of the biggest feelings of accomplishment when it was finally finished, and despite the amount of detail, still be incredibly performance friendly (in order to model it/texture it, I had a folder with about just as much photos of various P-51D gun bays and gun bay doors, from every angle, as I had of photos of Mustang cockpits for VC work). The coolest thing is that you can count the links of the ammunition chutes or compare all of the various animations associated with the gun bay, to the real thing, and it is all exact. You can also compare the primer finishes and inspection stamps to the originals (or authentic restorations), count the numbers of rivets, spot welds, or screws, and note their locations, or even count-off the up/down/up/down pattern of the forward gun bay door hinge, and it is all the same. There are nuts and bolts in there, such as those which attach the machine gun mounts to the wing structure, that I am not sure anyone else has seen but me.
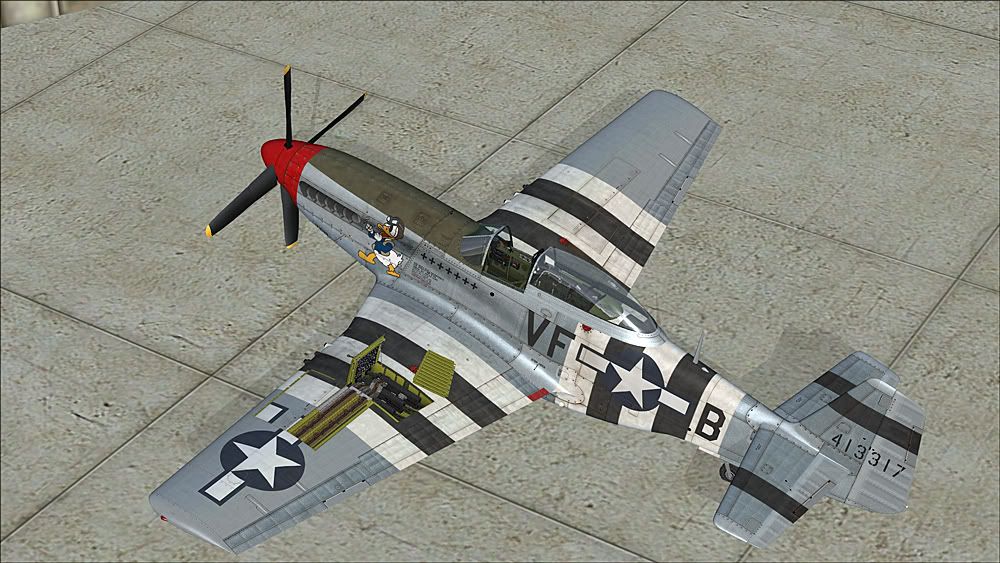
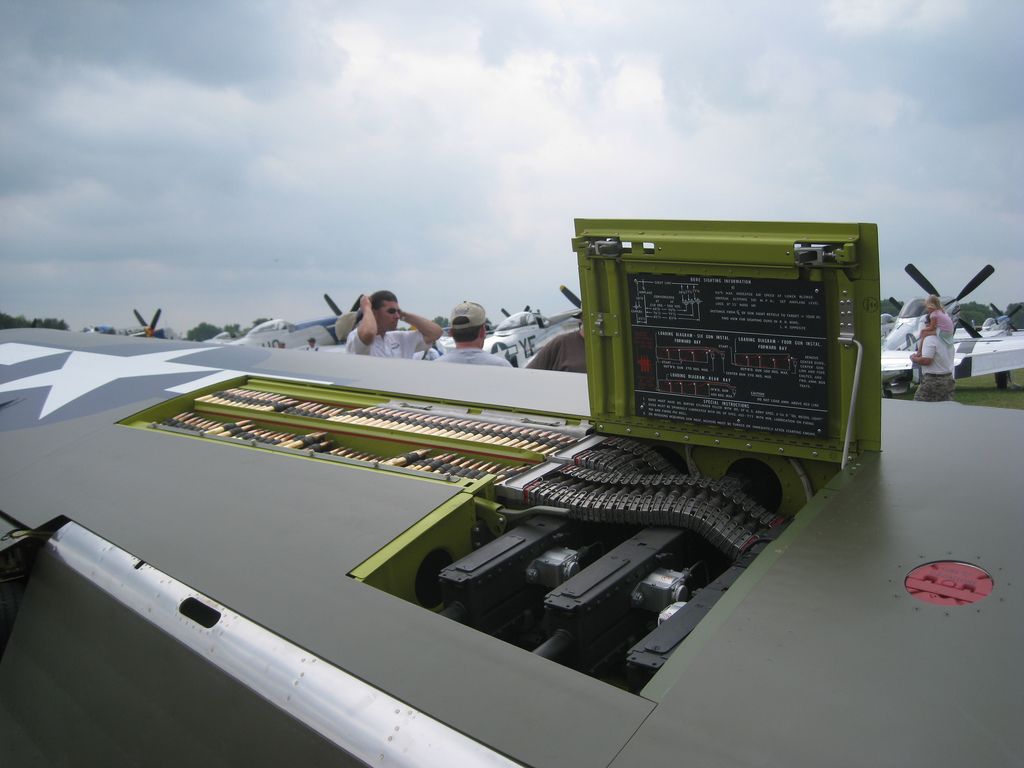
If you haven't watched the animation first hand, the gun bay opens up in the exact way you would have to open it for real. The gun bay doors are designed in a way that the forward gun door is hinged, while the rear gun door is slotted to slide into postion, as is the large ammunition bay door. There are lips on both the forward edge of the rear gun bay door, as well as the side of the ammunition door, which tuck underneath the forward gun door, so when the forward gun door is latched down, it locks those edges of the other doors.
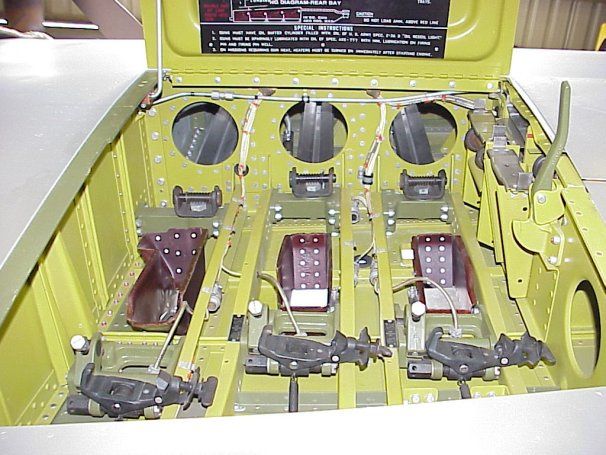
In order to get into the gun bay, first the locking arms, as mounted to the forward gun door, are pulled up, un-locking their clamps and freeing the forward gun door to be opened forward on its hinge. When the door is pushed fully forward, it allows for the support arm to be rotated upward, and then the forward gun door is brought back a little in order to seat on the top of the support arm. With the forward gun door set, then the rear gun door can simply be slid out, from where it is slotted into place at the tailing edge of the gun bay. The last remaining door is the large ammunition bay door, which is locked into place by a strip of bolts that slot into the base of the door along its trailing edge. By pulling up a lever, the strip of bolts shifts over, de-slotting with the door, and thus un-locking it. The door is then pulled up and slid backward, from where it is slotted along the leading edge of the gun bay, and removed.
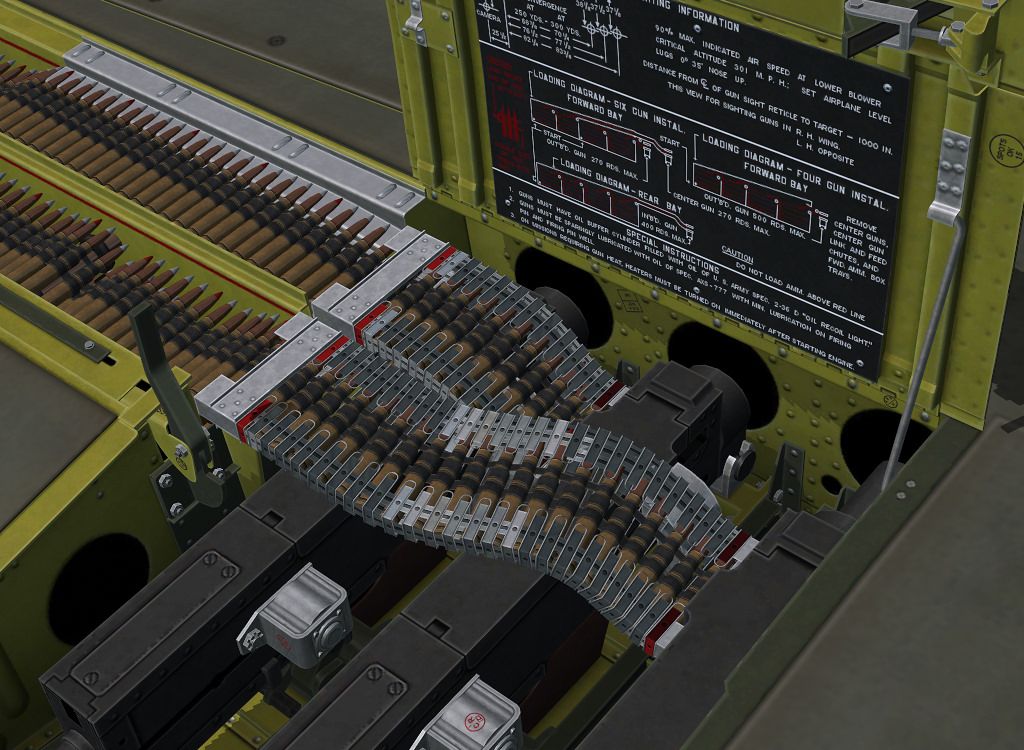
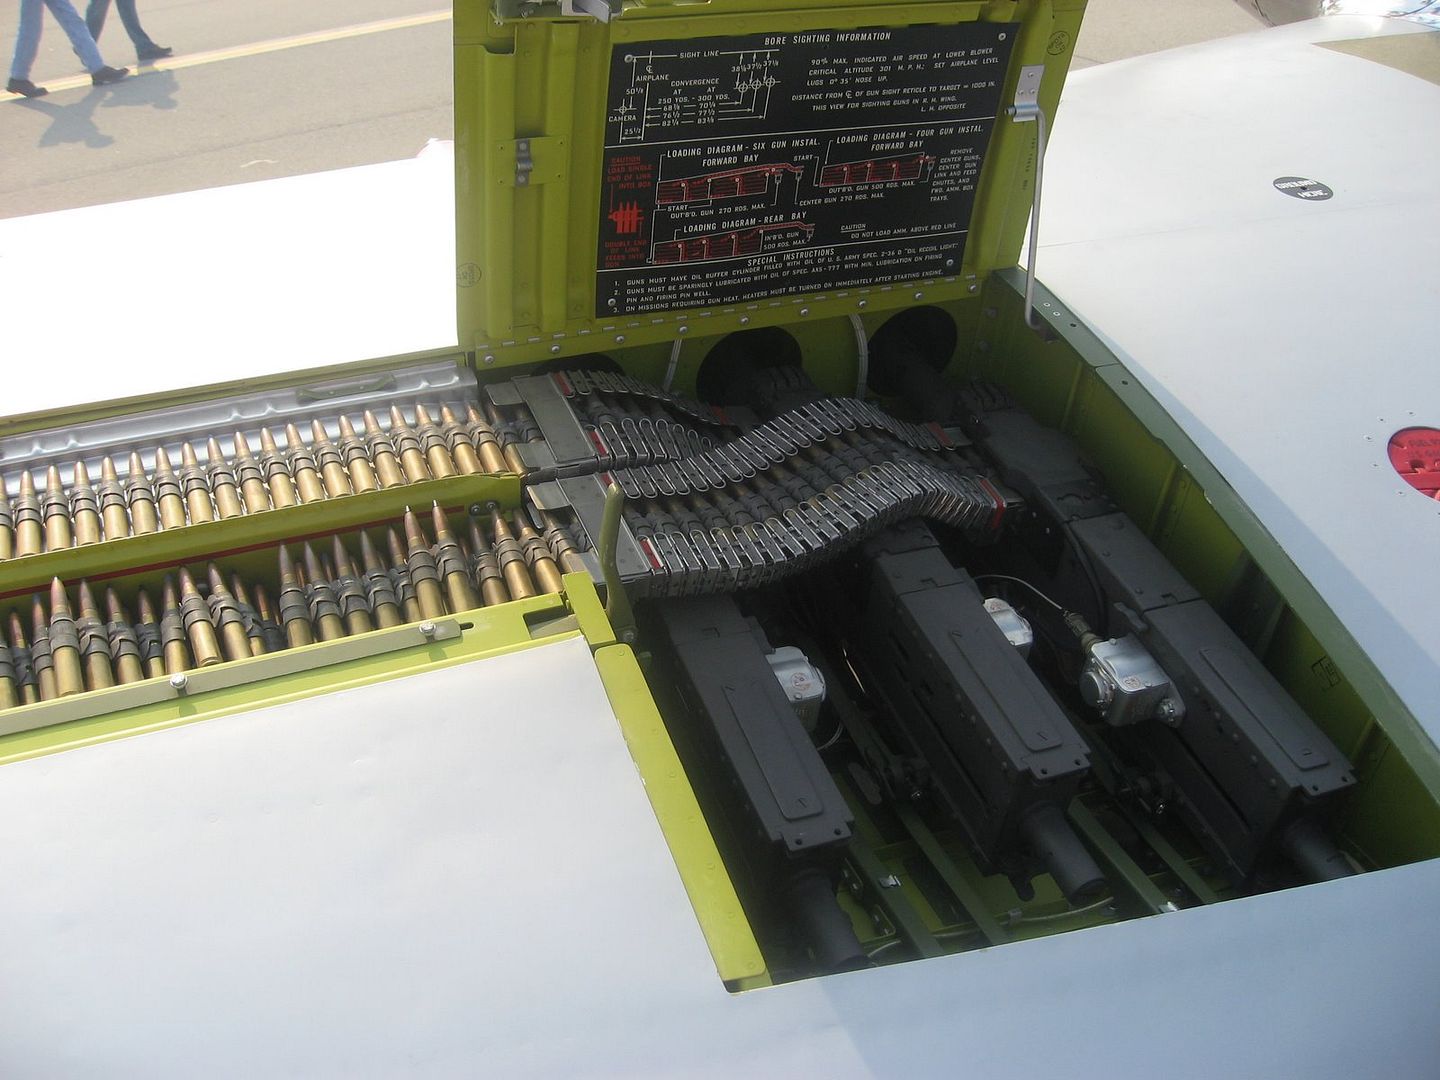
Note the red paint applied to the ends of the ammunition chutes - this was done through following the same standard guidelines as wingtip lights, red on the left, and green on the right, so that you would know which gun bay the chutes were for (thus the chutes in the right gun bay had green paint applied to their ends).
Note also how the ammunition belts flow over and around the ammunition rollers, flooding into the next individual ammunition bay box, before climbing up and out into the next (like water in an ice tray), loaded exactly as the loading placard illustrates on the inside of the forward gun bay door. Also, each 5th bullet is a tracer round, as marked with a red tip, while the rest of the ammunition, marked with a grey/silver tip, is standard incendiary, as used most commonly amongst Fighter Groups.

If you find the main Warbirdsim folder within your root FSX folder, there is a user guide that provides information about all of the different features that you may not otherwise realize/be able to find right away, so if you haven't looked it over yet, I greatly encourage you to do so!
Although it took a month just to build, with it in focus, it was one of the biggest feelings of accomplishment when it was finally finished, and despite the amount of detail, still be incredibly performance friendly (in order to model it/texture it, I had a folder with about just as much photos of various P-51D gun bays and gun bay doors, from every angle, as I had of photos of Mustang cockpits for VC work). The coolest thing is that you can count the links of the ammunition chutes or compare all of the various animations associated with the gun bay, to the real thing, and it is all exact. You can also compare the primer finishes and inspection stamps to the originals (or authentic restorations), count the numbers of rivets, spot welds, or screws, and note their locations, or even count-off the up/down/up/down pattern of the forward gun bay door hinge, and it is all the same. There are nuts and bolts in there, such as those which attach the machine gun mounts to the wing structure, that I am not sure anyone else has seen but me.
If you haven't watched the animation first hand, the gun bay opens up in the exact way you would have to open it for real. The gun bay doors are designed in a way that the forward gun door is hinged, while the rear gun door is slotted to slide into postion, as is the large ammunition bay door. There are lips on both the forward edge of the rear gun bay door, as well as the side of the ammunition door, which tuck underneath the forward gun door, so when the forward gun door is latched down, it locks those edges of the other doors.
In order to get into the gun bay, first the locking arms, as mounted to the forward gun door, are pulled up, un-locking their clamps and freeing the forward gun door to be opened forward on its hinge. When the door is pushed fully forward, it allows for the support arm to be rotated upward, and then the forward gun door is brought back a little in order to seat on the top of the support arm. With the forward gun door set, then the rear gun door can simply be slid out, from where it is slotted into place at the tailing edge of the gun bay. The last remaining door is the large ammunition bay door, which is locked into place by a strip of bolts that slot into the base of the door along its trailing edge. By pulling up a lever, the strip of bolts shifts over, de-slotting with the door, and thus un-locking it. The door is then pulled up and slid backward, from where it is slotted along the leading edge of the gun bay, and removed.
Note the red paint applied to the ends of the ammunition chutes - this was done through following the same standard guidelines as wingtip lights, red on the left, and green on the right, so that you would know which gun bay the chutes were for (thus the chutes in the right gun bay had green paint applied to their ends).
Note also how the ammunition belts flow over and around the ammunition rollers, flooding into the next individual ammunition bay box, before climbing up and out into the next (like water in an ice tray), loaded exactly as the loading placard illustrates on the inside of the forward gun bay door. Also, each 5th bullet is a tracer round, as marked with a red tip, while the rest of the ammunition, marked with a grey/silver tip, is standard incendiary, as used most commonly amongst Fighter Groups.


 Say, would anyone be able to create this texture for P-51 Little friends. It's called "The Galloping ghost" but with oil stains and heat stains from where the exhaust are? I always felt a connection with that one.