Thanks you Mantock, very old nice pictures but I have finnish the truck texture, yesterday.
Paintkit:
Sorry Ferondoe, for over 10 days I tried a lot of different approaches on textures to solve a reflection problem that appears with the solution I presented in post
#331 but I can’t solve it.
My hypothesis is that by cutting the fuselage and assigning a separate texture to each part,
smoothness of these parts is different and the rendering calculation with PBR textures is not what we might expect. (PBR is based on the light reflexion on objects).
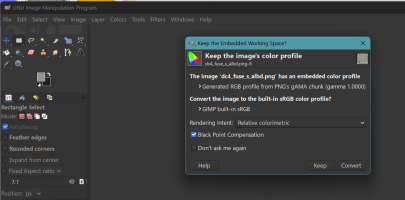
At first, I thought it was a problem of colorimetry when I imported the textures into GIMP because most are made with PSP or PSP and Gimp use two different systems.
So I created an "
icc" profile from the textures made by PSP and I took care to apply this profile to each texture, but without success, it does a bit to improve the rendering, but you can clearly see the difference in shade and brightness between the upper/lower parts and the sides.
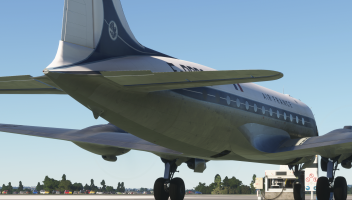
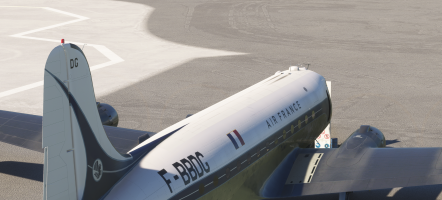
Two screens to demonstrate my problem on the Air France, which is textures I succeeded in the best. On each screen we can see the line separating the upper/lower and sides parts. On other liveries, it's even worse

I even reinstalled an old version of Adobe CS6 without any success in my tests

This morning I am testing another solution that should definitely succeed:
- I will join these different parts of the fuselage and apply a homogeneous smooth over the whole object,
- from the paintkit of the fuselage, by
upscaling the resolution to 8k and applying a factor of 0.85 on the wireframe in Blender, I isolated enough space on the side of the texture to place the two upper/lower parts there.
(See the Wireframe.ZIP joined lower)
By practicing this way, I can review this file of the painkit quite easily (scaling all the "fuselage" parts and moving them to the side) and on top of that, we will be able to increase the resolution of the fuselage because even in 4k, the rounded areas where some logos are crenellated, in 8K, it should be much better, at least in terms of the rendering of MSFS.
In practice and in quick/dirty mode:
- I open under Gimp the Wireframe.png (8K)
- I select the desired ICC profile (Adobe, Gimp, or the one from Flight-Replicas used for the initial paitkit)
- I add the Albedo.png file of my livery to a second layer
- I increase the size of the second layer from 4Kx4K to
6963x6963 pixels (important)
- I move this second layer so that it is positioned at the very top left
- I check by changing the opacity of this second layer that everything is correctly aligned with the wireframe,
- then I draw the missing parts (fuselage up / down) using the wireframe as decal,
- I save the result.
All that’s left is to do the same thing again for the Comp and the Normale, adapting according to the processed file.