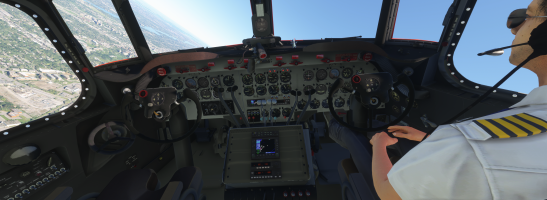
DC-4 Skymaster

Obviously, why hadn’t I thought of it... we aged little by little.

Shell and Texaco would ask me to review the current colorimetry of the truck that I have a lot. On the other hand, Phillips 66 seems to match much better: white inscription on a red background and logo surrounded by black, which seems a bit simpler to make.

OK, and thanks again for the photos, it will help me finish these parts more easily
 
Thanks you Mantock, very old nice pictures but I have finnish the truck texture, yesterday.

Paintkit:
Sorry Ferondoe, for over 10 days I tried a lot of different approaches on textures to solve a reflection problem that appears with the solution I presented in post #331 but I can’t solve it.
My hypothesis is that by cutting the fuselage and assigning a separate texture to each part, smoothness of these parts is different and the rendering calculation with PBR textures is not what we might expect. (PBR is based on the light reflexion on objects).

At first, I thought it was a problem of colorimetry when I imported the textures into GIMP because most are made with PSP or PSP and Gimp use two different systems.
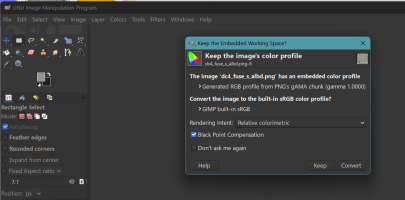
So I created an "icc" profile from the textures made by PSP and I took care to apply this profile to each texture, but without success, it does a bit to improve the rendering, but you can clearly see the difference in shade and brightness between the upper/lower parts and the sides.

1790069197870.png
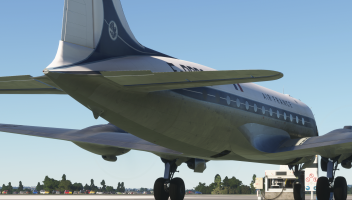
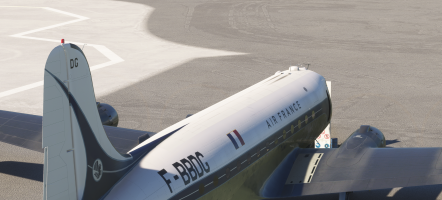
Two screens to demonstrate my problem on the Air France, which is textures I succeeded in the best. On each screen we can see the line separating the upper/lower and sides parts. On other liveries, it's even worse :mad:

1790068808372.png

1790068920780.png
I even reinstalled an old version of Adobe CS6 without any success in my tests :redfire:

This morning I am testing another solution that should definitely succeed:
- I will join these different parts of the fuselage and apply a homogeneous smooth over the whole object,
- from the paintkit of the fuselage, by upscaling the resolution to 8k and applying a factor of 0.85 on the wireframe in Blender, I isolated enough space on the side of the texture to place the two upper/lower parts there.
(See the Wireframe.ZIP joined lower)

By practicing this way, I can review this file of the painkit quite easily (scaling all the "fuselage" parts and moving them to the side) and on top of that, we will be able to increase the resolution of the fuselage because even in 4k, the rounded areas where some logos are crenellated, in 8K, it should be much better, at least in terms of the rendering of MSFS.

In practice and in quick/dirty mode:
- I open under Gimp the Wireframe.png (8K)
- I select the desired ICC profile (Adobe, Gimp, or the one from Flight-Replicas used for the initial paitkit)
- I add the Albedo.png file of my livery to a second layer
- I increase the size of the second layer from 4Kx4K to 6963x6963 pixels (important)
- I move this second layer so that it is positioned at the very top left
- I check by changing the opacity of this second layer that everything is correctly aligned with the wireframe,
- then I draw the missing parts (fuselage up / down) using the wireframe as decal,
- I save the result.
All that’s left is to do the same thing again for the Comp and the Normale, adapting according to the processed file.
 

Attachments

  • Wireframe.zip
    23.6 MB · Views: 6
Last edited:
It took a bit of time to redo the 4 aircrafts, especially since the height 3D models had to be revised because the texture of the doors on the outside is precisely the outer fuselage texture, but finally it’s finished and the fuselages have their PBR textures in 8K (65 MB for each component).

I chose to take the modern VC for this variation and since the last model was a firefighting aircraft, it was necessary to add the necessary elements to the VC:
- a revised panel (the rectangular plate between the pilot's yoke and the throttle of engine 1 & 2)
- tablets attached to the yokes with a watch and two control buttons for opening/closing the retardant tank hatches.

1790179327117.png

PB: The XML code for 8 led for oil & fuel pressures need to be improved because currently they are lit a bit too often (the thresholds need to be reviewed)
 
Hello,
Since last time, I haven’t given much news, I apologize for that, but as much as I love 3D and XML coding, the 2D graphics part is quite difficult and painful for me.

First, I made a list of the diffuse textures I used: there were between 120 and 130.
So I started by creating a working directory for each type of texture and I applied the following workflow:
- opening each "diffuse" file from P3D with ShaderMap PRO version 4 (payware under $30) to create the basic files I needed:
- Albedo,​
- Ambient Occlusion,​
- Displacement,​
- Metallicc,​
- Roughness and​
- Normal DirectX.​
- With ORM-Maker (freeware that can be find on FSDeveloper) I then built a COMP file with the AO, Roughness, and Metallic for each set of texture.
- Finally, it was necessary to modify the materials of all the Blender files :
- 3 cockpits (Vintage, Modern, Firefighter),​
- 4 interior (DC-4, DC4-SAAF, C-54E & C-54S)​
- 4 exterior (DC-4, DC4-SAAF, C-54E & C-54S)​
- 3 airport environment files (Services, Cargo & Firefighter)​
to enter the resulting textures in the correct slots of the MSFS plugin in Blender (some of them need also a Emissive texture for the night envionment).

These textures are not perfect because the automatic generation does not treat several objects differently on the same "diffuse" file, but it allowed me to have a complete project and work files allowing me in a next step to improve each point that could be modified.

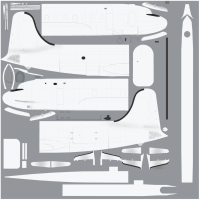
For the 4 exterior fuselages, the paintkit has been finalized (wireframe and PSD (photoshop) / XCF(Gimp) file) and I started working on the layer "panel & fasteners" to draw the lines and rivets. It’s a long and tiring job that takes me a lot of time. So I work one or two hours per day and I return on this step every day. Most of this stuf was made with Texture Paint plugin under Blender so I can now paint rivets on the fuselage under blender.

Only the fuselage textures are 8K: as you can see, the paintkit is very close of the old one, you have to simply increase the old layers to 4K to 6963x6963 pixels, move theen this part in the left upper corner and it's all (the upper and bottom of the fuselage are located in the place available between the 6K zone and the supplement to reach 8K).
1791304038021.png
This allowed me to find about twenty errors in materials that had not been built correctly and that caused warnings in the logs during the construction of executables.
I also flew with these aircraft and tested their behavior so that I could fix about ten ModelBehaviors that did not take into account specific initialization or exit cases from the simulator:
- prevent the display of the gustlock when you change of aircraft during a session,
- reaction time of the needle regarding the flaps indicator has been slowed down in order to make it more consistent (LAG = 0.5)
- thresholds for lighting the oil pressure indicators have been decreased (Templates) while waiting to review this aspect of the simulation
- etc ...

For the past two days I’ve been trying to see if I can "visually" modify the COMPs with Ucupaint (change the metallic aspect or the roughness of certain objects directly in Blender with sliders usage) rather than doing it manually and then testing afetr lauching the simu, which is very time-consuming.

Some details have been added as:
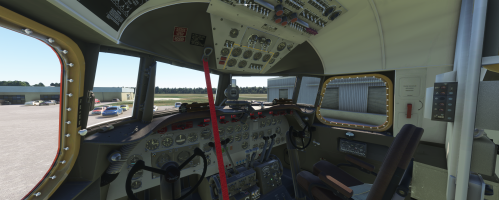
- Headphones for the pilot and first officer are located on the VC and they are undisplayed when the gustlock is remove befor the run up.
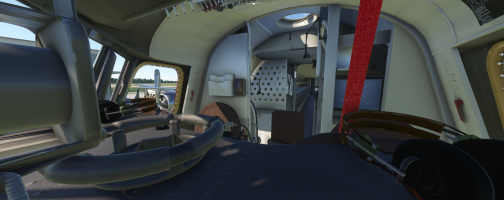
- Luggages and sweets are in the crew bulk if you increase the values of some payloads in the UI interface
- Glass have been added on each gauge (no scratch or wear on theses parts, just a light reflection).
1791303584777.png

1791303655836.png
 
Yesterday, I forgot to give you a small tip that I have used during the modification phase of my materials so that they use the missing COMP files or correct certain errors that had been made during the first texture creations in February 26.

In MSFS you can use legacy our PBR textures, theses ones are composend principaly by 3 textures:
- one alb (albedo) which correspond to the old diffuse (_diff) used in FSX
- one comp where the 3 channels RGB are composed by :
Red: Ambient Occlusion texture​
Green : Roughness texture​
Blue : Metalness texture​
- one nrm or norm which is the "bump" file (_bump) in FSX
- in some case, we use also a emis or emissive teture for the night texture (_l in FSX) when it is a "light".

In Blender, you have a other notion: Material which are set of several texture (standard, glass, etc). You can find all the MSFS Materials in the SDK and theses materials used one or many textures listed upper in this post.

To make all the modifications that I have listed last week, I have worked on the DC-4 model and created new materials in order to be sure that they will be compliant with the SDK.
Theses news materials were named "DC4 Material" but in a blender file we can have a lot of objects with a material X and if you want to change it for a Y material you should do it for each one (it's forbidden to forget one of them).
So, to realize this stuff I use a simple python script like this :
import bpy

materiau_x = bpy.data.materials.get("Old Material")
materiau_y = bpy.data.materials.get("New Material")

if materiau_x is None or materiau_y is None:
raise ValueError("Old material or New Material can not be find !")

for objet in bpy.data.objects:
for emplacement in objet.material_slots:
if emplacement.material == materiau_x:
emplacement.material = materiau_y
Of course, I have make a list of all the new materials and use a loop for each one to be sure to change all the objects of a given category .

PS: Why a python script ?
Because Blender is based on this language, behind each button in the interface we have a script python to perform an action so you can also write our own scripts to help you in repetitive and boring actions .
 
Back
Top