Hi,
I am trying to add a couple of 2D gauges to the Osprey's panel.cfg. Has anyone else tried this and did you succeed?
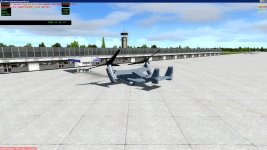
I thought this would be useful when flying the Osprey in an outside view, e.g. 'Spot'
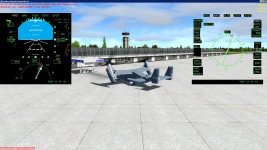
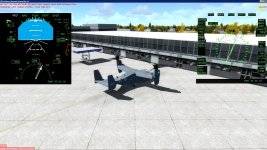
Here is my attempt. Don't know why it's so small. Can't find how to enlarge it:-
Anyway, if you look closely

you 'll see that there is a PFD in the top left corner and a NAV gauge at top right. Only problems are that neither display can be altered as there are no buttons around the gauges; and the NAV gauge has no map. But if you click on the buttons in the corresponding 3D panel, the 2D gauge changes accordingly.
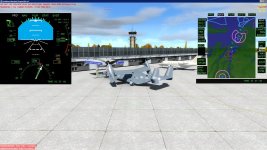
I haven't (yet) found out how to make the map appear in the NAV gauge... Anyone achieved that?
Here is an excerpt from my modified Panel.cfg file for anyone to use:-
// MV/CV-22B/C created by maryadi
// VTOL from Rob Barendregt
// GPS Map from fsdeveloper comunity
// See comment for added gauges.
// Version: Beta 2.0
[Window Titles]
Window00=PFD/MFD 1
Window01=PFD/MFD 2
Window06=TEST (DEBUG)
Window07=EVENTS (DEBUG)
//Window08=CAMERA (FSX ONLY)
VIEW_FORWARD_DIR=-1.000, 0.000, 0.000
[Window00]
size_mm=512,512
window_size= 256,256
window_pos= 0,0.07
Type=SPECIAL
gauge00=Mar_MV22B!mar_pfd, 0, 0, 512, 512 ,1
[Window01]
size_mm=512,512
window_size= 256,256
window_pos= 0,0.07
Type=SPECIAL
gauge00=Mar_MV22B!mar_pfd, 0, 0, 512, 512 ,2
If you try this, be warned that the NAV gauge won't appear where it's shown in the image above. It'll be superimposed on the PFD. I haven't been able to place it where I want it in spite of trying several variations. I had to drag it (kicking & screaming!) to the top right corner...
Mark