Milne Bay UT
A new entry has been added to Add-Ons Library, category CFS 2 Scenery Add-Ons
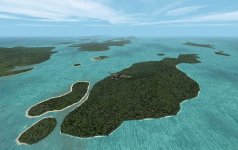
Description: Milne Bay Scenery for CFS2 by UncleTgt
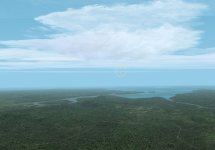
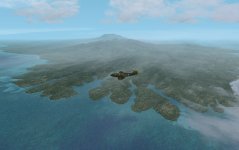
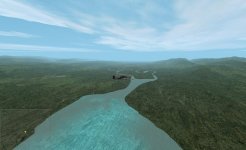
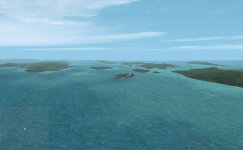
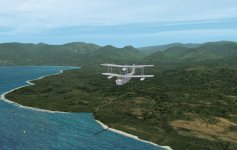
This is a reworking of the stock sceneries for the Milne Bay area at the SE end of PNG. It is designed for use with Rhumbas mesh, but the scenery excludes provided should mean this works well in a stock mesh install too.
Contents:
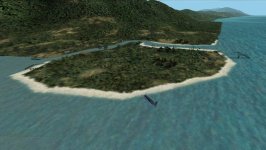
New Ground2K scenery for each, including fringing reefs.
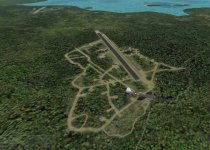
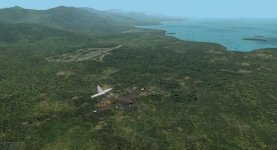
New airbase scenery, made using FSSC.
New gsl infrastructure.
New custom Landclass & Waterclass.
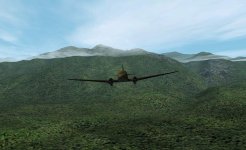
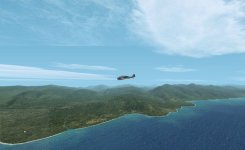
Some simple missions using the stock F4U-1A Corsair for viewing the gsl airbases & scenery
The sceneries are as developed during late 1943 & encompass the immediate offshore islands. It includes a new seaplane base on Samarai island. This was developed by US Seebees in July 1943, & was an active base from the Autumn of that year.
Known conflicts:
Installing this scenery pack will require the archiving of some airbases from Maskrider's Papua New Guinea scenery.
Gurney:- My version is a more developed base layout than Maskrider's, from mid-1943
Turnbull:- My version is a more developed base layout than Maskrider's, from mid-1943
Milne Bay No2:- My version is at a slightly different location to Maskrider's
Dogura:- I struggled to find any reference to ww2 airstrip activity at Dogura, though there was a small runway used to service the Catholic "cathedral" built nearby. I replaced MR's airbase with a simple cleared short runway instead.
Installing this scenery pack
The G2K scenery included in this package requires copying contents of your scenedb/world/texture folder to your main CFS2 texture folder. (see SECTION A: TEXTURE PREPARATION)
SECTION A: TEXTURE PREPARATON
1. Highlight all files in your SCENDEB/WORLD/TEXTURE folder
2. Copy and paste them to your main CFS2/TEXTURE folder
3. If asked to overwrite click “no”
4. Hi-lite all files in the MilneBay_UT_UT/TEXTURE folder
5. Copy and paste them to your main CFS2/TEXTURE folder
6. If asked to overwrite click “no”.
7. Highlight all files in the MilneBay_UT/SCENDEB/WORLD/TEXTURE folder
8. Copy and paste them to your your CFS2/SCENDEB/WORLD/TEXTURE folder
9. If asked to overwrite click “no”
SECTION B: ADDING NEW SCENERY & GSL
12. Drop the folder "SWPTO_Islands_UT", "SWPTO_Reefs_UT", "SWPTO_River_Deltas_UT" & "SWPTO_Excludes_UT" into your main CFS2 folder, or wherever you pull your add-on scenery from. Note: If these folders already exist, because you already have my Solomon Sea scenery installed, then simply copy the contents & if asked to overwrite click "yes" - this pack has the latest version of these files.
13. Next, drop the content of the gsl folder along with GSLMan.exe into your CFS2/GSL folder. If asked to over write click “Yes”.
14. Make a back-up copy of your current cfs2.gsl file. Its OK to leave it in the GSL folder- just rename it.
15. Open GSLMan.exe from inside your CFS2/GSL folder.
16. From the "Available Custom Gobs" list hi-light the gsl version you want. "Lite" is the air facilities only, "full" includes eye-candy. Select the MilneBay_UT (full or lite).gsl & click the "ADD" button.
17. Wait until GSLMan.exe says it's thru then…
18. Close GSLMan.
SECTION C: ACTIVATING & ARRANGING THE NEW SCENERY IN CFS 2
(NOT REQUIRED IF MY SOLOMON SEA scenery is already activated in CFS 2 & you added these new files to the relevant folder contents)
20. Activate the "SWPTO_Excludes_UT" scenery. Put this low down in your Library listing, just above the "Runways" (stock runways layer)is a good location.
21. Activate your "SWPTO_Islands_UT" scenery. This can be quite high in the listing, way above any mesh, watermasks or exclude layers, BUT CERTAINLY ABOVE the "SWPTO_Excludes_UT" layer! I put my G2K sceneries below the "Airport Facilities Data" layer.
22. Activate your "SWPTO_Reefs_UT" scenery. This needs to sit above the "SWPTO_Islands_UT" layer. You may see unusual display effects if this sits below the "SWPTO_Islands_UT" layer.
23. Activate your "SWPTO_River_Deltas_UT" scenery. This needs to sit above the "SWPTO_Reefs_UT" layer. As above, you may see unusual display effects if this layer ordering is not followed.
The screengrab of my own Scenery Library order is included in this zip & should help with clarification.
The scenery is installed.
NOTE: To make the runways available in MB enter the runway entries listed in the SolomonSea_UT/airbase_entries.txt file into your airbases.dat file which can be found in your CFS2/INFO folder. Be sure to back up your current airbases.dat file first.
Credits
Thanks to:
Jean Bomber for his inspiration, advice & support. He talked me through getting to grips with G2K & more…
Maskrider for all his airbase packages & the blended airbase tutorial. This set the standard for airbase sceneries for the game.
Rhumbaflappy for the new more accurate world mesh – it was a desire to make best use of this development that is the driver for many of my scenery projects. He also developed the vtp1 fixer programme to fix display errors in vtp bgls compiled from Ground2K.
GavinC for his reworking of the stock airbases, making individual base reworking/ revision much easier
Shessi for his water textures, that were the inspiration for my reworking of Jimkos Pacific Blues, & indirectly lead me to develop this latest set of water textures.
Lindsay Watt for all of his scenery objects & innovations.
Wolfi for his scenery objects.
Xavier for all his scenery objects & airbase sceneries, opening up a larger world for us all to fly in
Martin Wright for all the various software tools that are so useful!
Russell Dirks for his EZ landclass programme, making large scale land/ water class adjustments possible
Christian Fumey for his excl8 & Ground2K programmes, making the creation of completely new scenery possible for CFS2.
UncleTgt
JAN 2021
To check it out, rate it or add comments, visit
Milne Bay UT
The comments you make there will appear in the posts below.

")


 Almost ready to upload.
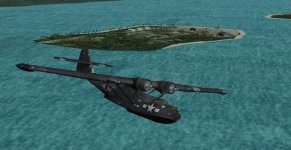


 )
)