• Guest Please check out the Help Wanted thread in Ickie's NewsHawks.
    The future of the Outhouse depends on you!
    Help Wanted

The FSDS 2.24 and 3.5 Tutorial

Part #032

The first Aircraft 10, joining the fuselage parts (continued)
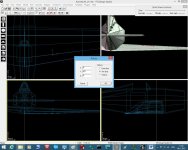
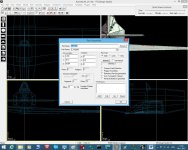
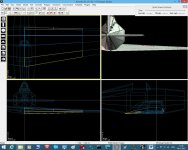
Now we create a new box 1m x 1m x 1m we need the box just for the “View” and “Center on Part” function to get an better look at details, expand the right view window and create the box, move the box into the cowl of the aircraft then go to view and press “center on part” maybe you have to zoom out a little bit (Picture125).Now make the fuselage the current part and go to “Point Mode”, use the left or right arrow at your keyboard until you see the white point at the upper right corner of the fuselage (Picture126) even when it looks like it is only one point, there are two point’s, so we have to join those point’s. We will start with the always selected point. Press the “mouse select” button at the main tool bar and select the “white point” now go to “Part” and click on “Join Selected” or use the shortcut “j”, now proceed with all the other upper and lower points (yellow marked in Picture 127) of the fuselage the same way . At picture 127 are a few points marked within a red circle; those points should not be joined because we will keep a sharp end. If you join that point’s, the rear end will look bulge when you use polysmothing. So finally go to “Edit” and “Part Properties” and check the box before “Poly Smoothing” (Picture128)


Project source file update

I made a few changes to the source file; I finished the windshield and closed the headrest gap. I also colored the right and left texture green and red. There are minor changes made to the wings.

With those past tutorial parts you should always be able to make the changes yourself.
 
Part #033

The first Aircraft 11, Fuselage 1 CFS2 only

Now we will give the fuselage part its name, because we will make a breakable aircraft for CFS2 we have to split the fuselage into two parts the fuselage and the fuselage rear part.
Select the fuselage and go to “Poly Mode”, then select all rear polys inclusive the headrest as shown in (Picture129) than go to “Part” and click on “Split Part” at the dropdown menu (Picture130). For the breakable parts both parts need their own name that directs the Sim how to proceed when damaged.
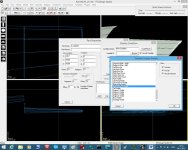
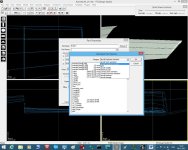
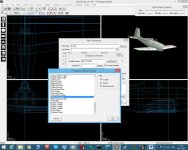
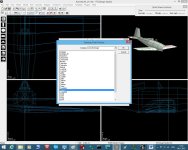
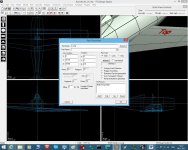
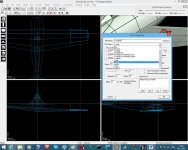
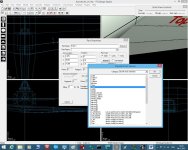
We start with the front part; make it the current Part, then go to “Edit” and “Part properties”, at the upper Box called “Part Name” you can see at the right side “Browse”, click on it and a popup Window opens called “Standard Part Names” at the “Category” Window is again a dropdown menu, click on it , go down and click on “Aircraft Damage” (Picture131). Select and click on “Fuselage” (Picture132) then press “OK” until all popup windows are closed. Now do the same with the rear fuselage part, but select this time “Fuselage_aft”.
 
Part #034

The first Aircraft 11, Fuselage 1 FS2004 and FSx

For FS2004 and FSx models you don’t have to split the fuselage just rename the “Tube” into “fuselage” as described in Part #033
 
Part #035

The first Aircraft 11, Fuselage 2 and Aircraft Stock Animation “Rudder”

Before we proceed with the breakable rear part of the fuselage, we will cut out the “Rudder”
Make the “Fuselage_aft” part the current Part and switch to poly mode, use “Mouse select” and select the Polygons of the Rudder (Picture133) than go to part and use the “split Part” function again.
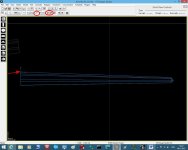
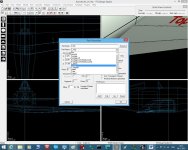
Now we cutout the rudder, but the ruder axis is still at the center of the aircraft and must be moved back (Picture134) so press and hold “shift” at your keyboard and Move the axis into the correct position (Picture135). The next step will be the correct Name of the Part; it’s like to rename the fuselage, described in Part #033, but this time we use “Aircraft Stock Animation” and select “rudder” (Picture136) than press “OK” until all popup windows are closed. -Now you created your first animated part. It’s on you to close the gap into the front side of the rudder and the back side of the “fuselage_aft” part.
 
The tutorial will be finished, but not in the moment because we have summer! It’s very warm :applause: for the part of Germany where I live, so I still enjoy the nice whether outside and try to avoid any PC work. But be sure, the weather will getting bad and cold again here and the tutorial will be finished.:salute:
wolfi

Picture: Borkum beach
 
Part #036

Ok, summer has definitely gone!

The first Aircraft 11, closing the gap

before I will proceed with breakable parts, I will show you how to close a gap. Maybe some of you tried or did it always. FSDS has a bug, when creating a 4 point polygon!

Select the ruder as current part, than go to “View” and select “show current part only”, than press “Center on part”.

First step: select the points, (Picture137) than go to Polygon and press “Make Poly from select Points”, you will see a “twisted poly” it appears like two triangles, but it’s only one poly (Picture138)

Second step: select the new poly (the poly will be green when selected) then go again to “polygon” and press “subdivide all/selected”,if you go to “point Mode” you will see you created a new point just in the center of the new poly, the poly itself is divided into 4 triangles. One triangle is white, go again to polygon and press “subdivide”, the triangle polygon is again divided into 3 new polygons with one more point in its center. Now select and remove all new polys and go to “point mode” you will now have two new points.

Third step: select the two new points and also select the upper (or lower) initial points from the first step, I will use the upper two points (Picture139). Now go to Polygon and create a new poly from selected points, if the front side of poly is facing inside, flip the poly (polygon/ than select “flip”) (Picture140).

Fourth step: at last we have to join the two new Points with the lower initial points, (we did it before), so select one of the lower points and one of the corresponding new points (Picture141) and go to “Part” than press “join selected” do the same with the other new point.

Now close the gap completely. When closing the lower gap,the points at the lower aft corner appear as one point, but there are two points. You have to select only one of the two points (Picture142)
 
Important update to make CFS2 Breakable parts

This update is for FSDS2.4 and CFS2 models only; it doesn’t work for FS2004 and FSx.

If you want to make your aircraft breakable you need this update, extract the zip, than copy and paste (replace) the “VarPresets2002.cfg” in your FSDS2.4 main folder.

I added my always updated file to the Zip

a special thanks for Hayden Scott-Williams.

Please read the “Breakable Parts.txt” file also

here is the original download site

http://www.freeflightdesign.org/tips/breakable.txt

 
Part #038

The first Aircraft 12, breakable parts
Now we make the “fuselage_aft” part breakable. First, select “fuselage_aft” and make it the current part! Now go to “Edit” and select “Part Properties”, than go to the “Pre-Process” window (Picture143) and press “Add”, a new popup menu opens called “Add Predraw Process”, select “Condition” (Picture144), at the next popup menu press “Load preset” a dropdown menu appeared called “Variable Display Presets”, scroll down until you find the entry “Tail Visible” and select it and press “OK” (Picture145). You will see that the entries in the “Display Condition” Window had changed (Picture146). Now close all popup menus.

 
Part #039

The first Aircraft 13, assigning a part
To assign the “Ruder” to the “Fuselage_aft”, make the ruder the current part, than go to “Edit” and “Part Properties”, in the Window “Part Parent” is a dropdown Menu at the right, click on it and you will see all parts without the ruder, select “Fuselage_aft” and Click on it (Picture147), press OK
 
Part #40


The first Aircraft 13, Elevator
The proceedings for the elevator are similar to the ruder, so I will not explain it in details just with a short description.

I joined the left and right elevator wing together, than moved the axis to the elevator turning point. I split the elevator from the elevator wing and closed all gaps of the elevator. The elevator wing was joined with the “Fuselage_aft” part, than the “elevator” was parented to the fuselage aft. Finally I smoothed the polygons of the “fuselage_aft” but let the elevator polys unsmoothed. (Picture148, Picture149)


Unfortunately all zip files and pictures are gone; nevertheless, I will proceed with a new tutorial aircraft model soon.

wolfi

 
Part #41

The first Aircraft 14, wingtip and aileron 1

I will start with the right wing only because the proceedings for the left wing are similar.
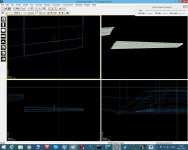
Because we will make the aircraft breakable we will define the wing tip. Go to “poly mode” and select the poly’s as shown in picture 150 than split the part from the wing (part; split Part), center on part, than select the poly’s of the aileron (picture 151) and split the aileron poly’s from the wing tip. The next proceeding is to close the gaps of the aileron.
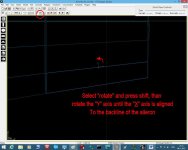
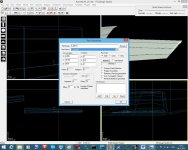
To keep the next steps easy, go back to the wingtip part, got to “Part properties” go down to “Rotation” and “Z” there is a number inside that describe the angle of the axis (6.5) (picture 152) we have to keep this number in mind and set the number to “0”. We will notice the part moved down, now do the same with the “aileron”. To have a correct aileron animation we have to move the aileron axis outside (Move Mode) than press shift and move the axis into position as shown in picture 153 (it doesn’t matter if you move the axis more or less outside). Next we have to align the axis with the aileron as shown in picture 154.
 

Attachments

  • FSDS F4F Wildcat 23.zip
    47.9 KB · Views: 15
  • FSDS 150.jpg
    FSDS 150.jpg
    73.1 KB · Views: 16
  • FSDS 151.jpg
    FSDS 151.jpg
    71.8 KB · Views: 13
  • FSDS 152.jpg
    FSDS 152.jpg
    74.6 KB · Views: 13
  • FSDS 153.jpg
    FSDS 153.jpg
    63 KB · Views: 14
  • FSDS 154.jpg
    FSDS 154.jpg
    70.1 KB · Views: 14
Part #42

The first Aircraft 14, wingtip and aileron 2
Going back to the wingtip part, this should be breakable (CFS2 only) and it should be foldable also. Again we had to move the axis only, so press “Move Mode” and select “X” and “Y” axis only, than press shift and move the axis of the part to the upper left corner of the part as shown in picture 155.
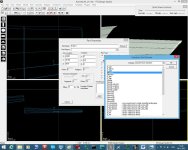
Now we have to name the part and make it breakable, go to “part properties” look at “part Name” than press the “Browse” button at the right, there is another window called “Category” use the dropdown menu and select “Aircraft Keyframe Animation”, in the following menu select “r_wingfold”, press “OK” (picture 156), now we look again into the “Pre-Process” window, press “Add” than press “Load Preset”, scroll down until you find “Right Wing Tip Visible” and select it (picture 157) close all Windows.
Back to the aileron, select the aileron part and go to part properties, click the browse button, “aircraft stock animation” and select “r_aileron”, press “OK” (picture 158), now parent the aileron to the “r_wingfold” part (picture 159) and close all windows.
 

Attachments

  • FSDS 159.jpg
    FSDS 159.jpg
    80 KB · Views: 13
  • FSDS 158.jpg
    FSDS 158.jpg
    78.2 KB · Views: 11
  • FSDS 157.jpg
    FSDS 157.jpg
    80.6 KB · Views: 13
  • FSDS 156.jpg
    FSDS 156.jpg
    77.7 KB · Views: 9
  • FSDS 155.jpg
    FSDS 155.jpg
    53.4 KB · Views: 15
  • FSDS F4F Wildcat 24.zip
    48 KB · Views: 16
Part #43

The first Aircraft 15, wing and flap 1
To make the wings will follow nearly the same proceedings like the wingtip. Like the wingtip we go to “Part Properties” and set the “Z” Rotation of the wing from 6.5 to “0” (remember, we keep the 6.5 in mind), instead the aileron we make the right flap, again that will follow the same proceedings as with the aileron. So select the “Flap” polygons and split them off the wing (picture 160), now move the axis to the lover frontline of the new “Flap” part. For this aircraft, the angle of the Flap follows the same angle as the aileron, so make the aileron the current part and look into Part Properties, we need the “Y” rotation number, (picture 161), and it’s 6.5, keep it in mind and go back to the flap part.
To apply the Rotation to the Flap, go to “Transform” select “Rotate” select at the options menu “Axis Only” and write the 6.5 into the “Y” box (picture 162) than press “OK” we have to adjust the “Z” Axis also a bit, to keep it short the setting is 1.5 (it’s a bit try and error to find the right setting). Now close all gaps of the flap.
Back to the right main wing, select the part go to “Part Properties” press the browse button, go down to “aircraft damage” and select “r_wing”, press “OK”, than go to “Pre-Process” under load preset select “Right Wing Visible” (picture 164) press “OK” until all windows are closed.
 

Attachments

  • FSDS 164.jpg
    FSDS 164.jpg
    88.1 KB · Views: 9
  • FSDS 163.jpg
    FSDS 163.jpg
    80.2 KB · Views: 6
  • FSDS 162.jpg
    FSDS 162.jpg
    80 KB · Views: 7
  • FSDS 161.jpg
    FSDS 161.jpg
    87.6 KB · Views: 7
  • FSDS 160.jpg
    FSDS 160.jpg
    79.1 KB · Views: 7
  • FSDS F4F Wildcat 25.zip
    49.2 KB · Views: 8
Part #44

The first Aircraft 15, wing and flap 2
…select the flap part again; there are two options to animate the flaps, stock animation and key frame animation, to keep it simple we will use the stock animation. So go to “Part properties”, press browse, go to “aircraft Stock animation” and select “r_flap” (picture 165) close the window with “OK”, then go to “part Parent” and select “r_wing” (picture 166) press “OK”. Now make the “r_wingfold” current and parent it also to the “r_wing” (picture 167). Finally go back to the “r_wing” again to “Part properties” than under “Rotation”, “Z” Axis and rewrite the 6.5 into the box (picture 168) than press “OK”.
As I said it before the proceedings for the left wing are similar J
 

Attachments

  • FSDS F4F Wildcat 26.zip
    49.1 KB · Views: 8
  • FSDS 168.jpg
    FSDS 168.jpg
    71.9 KB · Views: 7
  • FSDS 167.jpg
    FSDS 167.jpg
    68.8 KB · Views: 9
  • FSDS 166.jpg
    FSDS 166.jpg
    72 KB · Views: 8
  • FSDS 165.jpg
    FSDS 165.jpg
    76.8 KB · Views: 8
Part #45

The first Aircraft 16, r_wingfold animation
The first Animation will be the wing fold animation; it’s a key frame animation, usable key frames are the frames between “0” to “100”.
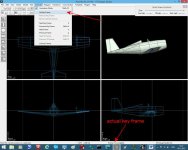
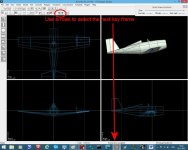
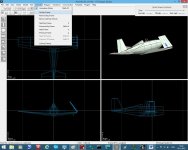
To start with the animation we go to “Animate” at the main toolbar and then click on animation mode. In the dropdown menu you see “set Keyframe”, below the “right view” you can see the actual key frame, it should be “0” (picture 169). To set the initial key frame press “set Key frame” after setting you will see there is a “*” at the right side of the “0” (0*) that means this frame is set and the movement of the “r_wingfold” will start at frame “0”, now we select frame 80, use the left or the right arrow at the main toolbar or at your Keyboard to move forward (or backwards) (picture 170). Frame “80” should be the end of the movement. So select rotate at the main toolbar and move the part into the final position (use the Front view Window), than open the animate menu and click on “set key frame” (picture 171). Now move to frame “100” and click again on “set Key frame” move again forward until frame 200 and set key frame again. The next frame after “200” is frame “0”.
Before you go to the next animated part you have to close the “animation” mode.
Unfortunately FSDS2 didn’t show the animation, the part will stay on its starting position until you reach frame 80 then it will flip into the end position. Within the game the movement will be slow steady.
I added to the zip file below two source files one with an animated r_wingfold and one file with a right and left wing fold animated.
 

Attachments

  • FSDS F4F Wildcat 27.zip
    70.4 KB · Views: 8
  • FSDS 169.jpg
    FSDS 169.jpg
    70.2 KB · Views: 12
  • FSDS 170.jpg
    FSDS 170.jpg
    70.9 KB · Views: 11
  • FSDS 171.jpg
    FSDS 171.jpg
    67 KB · Views: 11
About Fsds2.24 and Windows 8

After more than 10 hours I'm happy to restore a hard drive which I had accidentally formatted yesterday, all files -special for this tutorial, are back and usable again.
Don't ask how I can format a wrong hard drive; it simply happens because of some kind of stupidity for one moment.:censored: :banghead::dizzy:
The program I used to restore the files was the "Renee Undeleter" (it’s not freeware) which fortunately worked fine, I was surprised how much of long time ago deleted files are still there. :tears_of_joy:

Back to the Tutorial:

About Fsds2.24 and Windows 8

Before I made this mistake yesterday, I noticed that Windows 8 didn't work for all animations when compiling FSDS2.24 models, the standard animations like Ailerons, Ruder, Elevator, Wing fold and Flaps are working, but not the wheels and Prop animations for some reason. Fortunately I have an "old" windows 7" installation on a second hard drive, so I installed FSDS 2.24 on it and it works properly with all animations!

wolfi
 
Back
Top