CFS1 Curtiss-Wright AT-9 "Jeep" Work In Progress.

Hello Aleatorylamp,

Most of this text is also in your email, but I thought it would be worthwhile to post it here as well for folks who may be following along. I typed this before I saw your post this morning.

I did some more testing of the AIR file last night.
Here is what I found out:
Initial Climb Rate is between 1610 and 1615 FPM at TAS of 131-132 MPH. Aeroplane is very stable, so trimming for about 135 MPH might work better even though the climb rate drops a bit. This climb rate was checked at around 200 feet altitude . By 500 feet, aircraft is below 1600 FPM.

I typically line up way way out and drag the thing in at low power and a fairly high rate of descent.
The problem is that this method is a bit less predictable because the descent rate varies quite a lot depending on flaps and especially engine power. The aeroplane also gets VERY wobbly directionally with low speed and full flaps and is always barely stable longitudinally.
Your method of 50% power and dragging it in pretty much level with a low rate of descent is the better method and historically more correct. The flare is a lot longer though.

Also worth noting is that in my opinion, the directional stability is a bit too high and that directional control at low speed is a bit low. It is nicely coordinated for take-off but not so much when lining up for landing.

To go over the top at around 100 knots, you must be entering the loop a bit faster than I am doing. I typically don't exceed 75 MPH and have even made it at around 40 MPH with an entry speed of around 185 MPH.

Glad it works for you.
- Ivan.
 
Hi Ivan,
Yes! I was diving a little before entering the loop!

Fine - I think I´ll repeat some of my e-mail reply here too - it may be of general interest as well.

I think the .air file now has a nice balance between realism and simming practicality.

Climb: A good rate of climb I think is fine for the model! I would leave it at this and not lower it. Anyway, it´s very good at 1600 fpm initially at about 200 ft. it goes down enough a bit higher up!
Directional stability: I had the feeling that in its present state, the need for certain speed and hence power during approach and landing, and also the (consequent) wobbliness at low speed, coincide very nicely with reports on the handling of the real plane, and I would be inclined to favour the low directional control at low speed as well. One thing is the stall at 80 mph, quite another being the low directional control - that´s probably why there was a normative not to fly the plane below 110 mph.
The .air file comes quite close, I feel, and I think also it would complicate things too much moving the CoG backwards, so I´d prefer to leave it as it is!
I´m still working on the transparent canopy, which is not so easy because as it sits in
and not on the fuselage, the rear being flush with the aft fuselage top.
However, following the sequence in your Lightning J I think I´ll be able to do it!
Cheers,
Aleatorylamp
 
Last edited:
Lucky with AT-9 transparent cabin

Hi all, Hi Ivan,
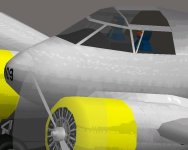
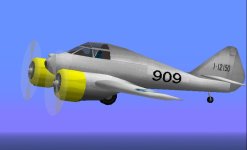
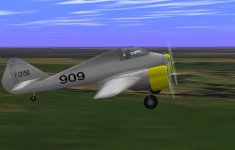
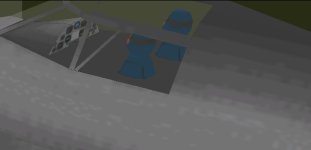
After many different approaches, finally I think I´ve arrived at a satisfactory transparent cabin. There are no parts designated as interior view, so a standard SCASM correction of the virtual cockpit later will suffice.
For the time being, and while I get other little details polished up, here´s some eye candy - 2 close-ups of the tinted glass cabin, one general shot and an interior virtual cockpit view.
In a few days I hope the definitive Fledgeling will be ready for upload!
Cheers,
Aleatorylamp
 

Attachments

  • transparent2.jpg
    transparent2.jpg
    46.5 KB · Views: 0
  • transparent4.jpg
    transparent4.jpg
    32.4 KB · Views: 0
Nav lights

Hi Ivan!
I forgot the nav-lights... I think it would be a red one on the fuselage just behind the cabin, then the usual one on each wing-tip, and then three formation lights in a row under the fuselage just aft of the wings, but I don´t know the colours of these.
Should nav-lights be important, I´d have to add them and send you the plane again, but if they aren´t I can just include the red and green in the textures on the wingtips, which I have often seen done!
Cheers,
Aleatorylamp
 
AFX Updates

Hello Aleatorylamp,

You have the latest AFX at this point. After moving the CoG, I did nothing else to the AFX, so you have the latest.
I looked through the MPI files for content and from what I can tell, the markers are a form of Hash and since I don't know how they are generated, there is no way I can edit them.... SO... With the new model, the old animation would be lost.

Please add the pieces you want. I will hold off on editing the model until I get another copy unless you want to do things differently. I am sure you noticed already, but I changed the shade of the Canopy Glass so I could see inside better for bleeds and also changed a few Parts to Insignia as we were discussing.
I have pretty good confidence that the results of an edit of the assembly sequence will be a pleasant surprise.

- Ivan.
 
The new AFX

Hi Ivan,

Thanks a lot for your work! I´ll have a look at the changes in the new AFX! It will be interesting.

Not to worry about the animations - I can do them again easily as many times as necessary. No difficulty!

OK, so then I´ll add the Nav-lights and send you the new AFX as soon as I´ve done them.
I found some WW2 bombers had a row of 3 belly formation lights in red-green-amber starting from forwards, apart from the standard red/green nav-lights on the wing-tips. Then it seems that the AT-9 had a red position light on the back (a dark Khaki livery one), or a white one on the fin (the silver ones), but not both.

OK, for the canopy windows, I can see from others of your models that you prefer grey. No problem - I always used to use dark grey as it was less milky, but OK! Thanks for correcting some of the Insignia stuff.

I am quite intrigued as to the outcome of all this hard work! Sounds promising!
Cheers,
Aleatorylamp
 
Hello Aleatorylamp,

This is your aeroplane. Colour the Canopy whatever you like. I just changed the colour so I could see it better.

The P-38 Lightning also had a row of three lights on the aft end of the Nacelle.

As for the outcome, the general feel will be pretty much the same as the Macchi C.202 with the same style of Virtual Cockpit.

- Ivan.
 
Hi Ivan,
Fine, fine! Sounds great!
Interesting how the momentary cabin bleedthrough only seen from the left disappeared with your CoG shift processing - Thanks! It hadn´t done so when I moved it from within AF99.
I just sent you the AT-9 again with all the lights and a slight improvement in the wing-shape as well as on the area where the nacelles meet the lieading edges. However, further cleaning up (hairline cracks, etc.) will be necessary, and I need some more time. Should this cause any annoying need for repetitions in your processing, perhaps you may like to wait until I send the cleaner AFX. If not, then of course use the new AFX right away. Whatever!
Cheers
Aleatorylamp
 
Reworked AT-9 Fledgling

Hello Aleatorylamp,

I did a major rework on your AT-9 AFX last night.
Check your email. I think you will like it.

- Ivan.
 
Hi Ivan,
I´ve just unpacked the new AFX, and I´m very impressed. It is a very clean-looking job, despite the initially feared two-pilot combination! Incredible - thank you very much! This would then be the basis for the future SCASM-addition of the Virtual Cockpit.

I have achieved slight improvements on the leading-edge/engine-nacelle area, and added the new parts to the new construction file, and the AT-9 is looking great now.

I will gladly do any of the other little issues you may like to point out!

Working on the hairline cracks between ...grunt!... the upper and lower nnacelle components on the wings and the forward nacelle structures is hard. In some positions it´s quite impossible to match the vertices. Maybe I should try doing both just in case there is a position where they can match. Making it overlap a little could possibly also help... I gather this issue is rather notorious!
It´s better now, so that´s something good anyway!

Cheers,
Aleatorylamp
P.S. Perhaps one of the next steps is the canopy frame plus windows in a separate AFA file for SCASMing.
 
Last edited:
Alpha transparency setting

Hi Ivan, Hi all!
I remembered the "Speed below 179" alpha transparency setting for the canopy-window component, and tried it out. It´s slightly less dense and I think it looks cool!
Here are some shots.
Cheers,
Aleatorylamp
 

Attachments

  • new1.jpg
    new1.jpg
    41.5 KB · Views: 0
  • new3.jpg
    new3.jpg
    13.2 KB · Views: 0
Hello Aleatorylamp,

The two areas I was thinking about that should be tuned a bit can both be seen from above and to the rear.
The front quarter windows will disappear at around that angle. They are not quite planar and should be triangulated (convex).
The underside of the fuselage can also be seen at certain angles through the wing fillet. I didn't look much into a solution for that, but I would imagine it to be a glue adjustment with the wing fillets and possibly moving some polygons from the fuselage to the wing fillet.

Yes, it is definitely time for a interior canopy frame, but that also presumes you are satisfied enough with the model to adjust it using SCASM.
While I can see adding the interior of the canopy frame via SCASM, I don't believe you should add window glass.

The Alpha Transparency idea is a good one for certain aircraft but doesn't look so good on others. You make the determination here.
I liked it on my P-38 and P-40, but when I tried it on others, I didn't like it as much. I think it looks good when there is a lot of framing but not on bubble canopies where the Alpha Transparency almost makes the canopy vanish.

I presume you know this already, but many times, the vertices of a Structure do not align on an even multiple of 0.01 foot and you simply CAN'T match it with a AF99 Part.

Glad you like the result.
- Ivan.
 
Hi Ivan,
Yes, a great result! Thanks also for the extra indications: OK with the screen-windows - they´ll get their triangles. The underside seen through the wing-fillet will be a bit harder to solve, but I´ll get there in the end!
Yes... some hairline cracks can´t be fixed... maybe moving both the component vertice and the structure template vertice could help... I´ll see.
You´re right about the alpha transparency - it indeed requires struts in order to enhance its weaker hue.
I will wait until I´ve fixed everything fixable on the plane before the canopy is added with SCASM.
Maybe an easy way to do it would be for me to send you the sole canopy frame .SCX file, and you could point out exactly which part of the text should be copied into the aircraft SCX file. I know where to copy it to, as I identified the place quite well on the Giants.
Cheers,
Aleatorylamp
 
Hello Aleatorylamp,

Build another AFA file with either just the Canopy Frame Component or with minimal other stuff.
Texture it the way you like but with the assumption that the textures you see on the outside will eventually be inward facing.
Package it into an AFX and send the AFX along with the texture file.

I will build the model here, disassemble, pull out the routine you will need and flip the polygons and send you back just the SCASM subroutine to add to your code.
I believe you already know about making additional calls to existing subroutines to generate the V-Cockpit.
I believe the following sequence should work:

Cockpit Floor
Control Panel
Canopy Frame <---- This is not be the Canopy Frame already in the model. It should be the flipped version I will send back to you.
Pilot Torso
CoPilot Torso
CoPilot Head

This is the process I would follow. No Glue Parts are required because the V-Cockpit point of view doesn't change.
Hope the process makes sense. If you want, I can also do the SCASM additions and calls to existing code.
Obviously if I do the SCASM additions to your model and you change the AF99 project, you will have to redo the SCASM stuff.
If you want me to do the SCASM stuff, let me know also if you also want me to change the code to use BMP textures.

The only real "Magic" in this process is flipping the polygons of the Canopy Frame.

- Ivan.
 
VCockpit to SCASM

Hi Ivan,
OK! I remember for the Giant you´d sent the .sxc file of the VCockpit alone comprising roof, lateral struts, back and floor, and I just put that piece of text into a specific place near the end of the aircraft .scx file, and then there was one call to it from further above just after the viewpoint alteration. (I know exactly where those places are). I didn´t use several calls, so I didn´t use the sequence you mention.

So, I´ll send you a new fabrication into one textured component of the canopy frame.
Were I to use a different texture for the interior lining, this texture would then have the next .Xaf suffix number after the last one used by the aircraft, and it would also be inside the texture directory.
... and yes indeed, it would be great if you could use your "magic" to flip the polygons, thanks!

I inspected the changes in glue sequencing and the re-arrangement of some of the fuselage structures and components, and found it very interesting how several glue sequences along the line can be interpolated, eg: on one hand there were my cabin/glue/aftwall and nosetip/glue/nose sequences, and then elsewhere in the list you did a nosetip/glue/aftfuselage sequence amongst others... This kind of thing had never occurred to me, but makes a lot of sense, making several glue-sequences along the line possible.

Thanks for your offer to change the code to use bitmap textures. It sounds incredibly useful, but I will take you up on that on a later occasion so that it doesn´t get too complicated so quickly.

Thanks so much again for your pacience, and it´s great to see you are having fun too!
Cheers,
Aleatorylamp
 
VCockpit texture

Hi Ivan,
I´ve aligned all the cockpit-frame and aft-wall vertices to eliminate some hairline cracks, and it´s perfect now.
Just a small question:
Texturing the separate "CW25-Cab.afa" Vcockpit with either the existing "fuselage.pcx", or better darkened new "VCockpit.pcx" texture, AF99 makes a texture file named CW25-Cab.0af. Will this combine with the rest of the aircraft-texture files named "AT-9Jeep.0af" through "AT-9Jeep.aaf" without confusion?
I´d be quite happy to leave the Vcockpit untextured in light grey to avoid problems.
What would you recommend?
Thanks in advance,
Cheers,
Aleatorylamp
 
So Many Subjects

Hello Aleatorylamp,

Lets hope I don't accidentally miss one of the subjects that was brought up.

The Virtual Cockpit for the Giant was already done by you as pretty much a new assembly. You had already determined that from an interior view, the V-Cockpit was enough to hide the relevant pieces of the aircraft exterior.
All I had to do there was to bypass the goofy handling of interior / exterior distinctions by AF99 by using SCASM.

In this case, you don't really have a new assembly for the interior view which covers the exterior pieces that are showing. That is why it is necessary to call the drawing routines again to hide the pieces of the exterior that should not show. On the GIant, the interior pieces were not part of the exterior view which is why they all had to be added via SCASM. In this case, the "interior" pieces are also seen in an exterior view but are displayed in the wrong sequence when viewed from the interior..... SO, we just call them again from an interior viewpoint.
No point in duplicating code when a duplicated call is all that is necessary.

This is NOT the most efficient way to display a model, but it gives pretty good results without redoing all the glue sequences that are wrong.
Yes, it displays slightly slower in theory, but the differences isn't noticeable even on my old Pentium 233 much less the modern Gigahertz machines.

If you think you have the Canopy Frame looking good from outside, change it to a Collection and rebuild it to see how it looks from inside. Sometimes the alignment isn't quite the same. I ran into this way back with my A6M2 Canopy so the interior and exterior are actually quite a bit different. Most of the time it also makes sense to narrow down the frames a bit because they may look too wide from an interior view.

Don't worry about the .?af texture name. I was planning on doing the Canopy Interior as BMP anyway but just wanted you to lay out the texture as you might like. It doesn't have to be the same as the Canopy exterior. The BMP textures are derived directly from the PCX files and not the ?af files.
Look at my Macchi C.202 textures and you will see what I mean; The exterior is textured Left-Right while the interior is Top-Bottom and is not a square scale if I recall correctly. The idea was that the important section was going to be on the sides and they are at a pretty severe angle when viewed from the top so I textured them so that the pixels on the texture image would be scaled square on the surface of the Canopy Frame.
Hope that makes sense.

You will actually NEVER see the Canopy Interior texture as an additional ?af file. It is a different assembly. Essentially you are building one aeroplane with the regular parts and a different aeroplane in the same directory using perhaps some of the same parts.
I actually don't know if SCASM has the same limitation on the number of texture files as AF99 does. I suspect it does not but have never tested it.

Regarding the gluing sequences.... Hubbabubba calls this "Ivan's Conga"....

- Ivan.
 
same pieces, new component

Hi Ivan,
Yes, I think I understand what you mean.
What I did after cleaning up the vertices on a few of the canopy frame parts was to make a new component labeled as Collection and tagged as Internal View, using all the canopy struts that had already been made for the left and right canopy frame components, and I put it into a new .afa file, texturing it with a new texture. Then I compiled it into a new model only containing the canopy frame, checked in the simulator that it was invisible from outside, and that the virtual view was fine, and sent it to you. I think this was then correct!
Cheers,
Aleatorylamp
 
Last edited:
Hello Aleatorylamp,

I got your Canopy Frame and processed it.
Check your email.

I actually had to copy your Component back to your original project to get things to work.
I am not sure what exactly was wrong with the newer AFA file but although the result would display in the simulator, it would not disassemble.

The Canopy Frame Component in your AFA had some issues, so I changed things around a bit:
The Component was a Collection. I changed it to Smooth.
The Component was Interior View. I changed it to Always.
The Component was Light Gray and Untextured. I changed it to Light Olive and Textured.

Flipping the Component was uneventful and worked the first time.

- Ivan.
 
Hi Ivan,
Just to sum up: The Virtual Cockpit with its textured canopy-frame now works after adding some seat-backs.
I tried sequencing the seats and their glue into your cockpit-content sequence but the seats are causing problems. I still haven´t mastered what Hubbabubba calls Ivan´s Conga!! ...although I did apply it successfully to two extra components that I put on the belly to eliminate the fuselage-bottom bleeds through the wing-fillet. ...at least I learnt something!
In the new Virtual cockpit code I sent this afternoon when I also sent you the new aircraft AFX, in order to eliminate the engine bleeds through the VCockpit floor, I mistakenly built glue templates into the left and right nose groups, but it perhaps should have been an insignia floor panel grouped into the nose group facing upward to block the engine nacelles from being visible through the internal view floor, but then it would obstruct the view of the instrument console and dashboard. That is another difficult bit here, I´m afraid.
So only the new aircraft AFX is good, not the Vcockpit AFX, which can be ignored.
Anyway - progress is evident!
Cheers,
Aleatorylamp
 
Back
Top