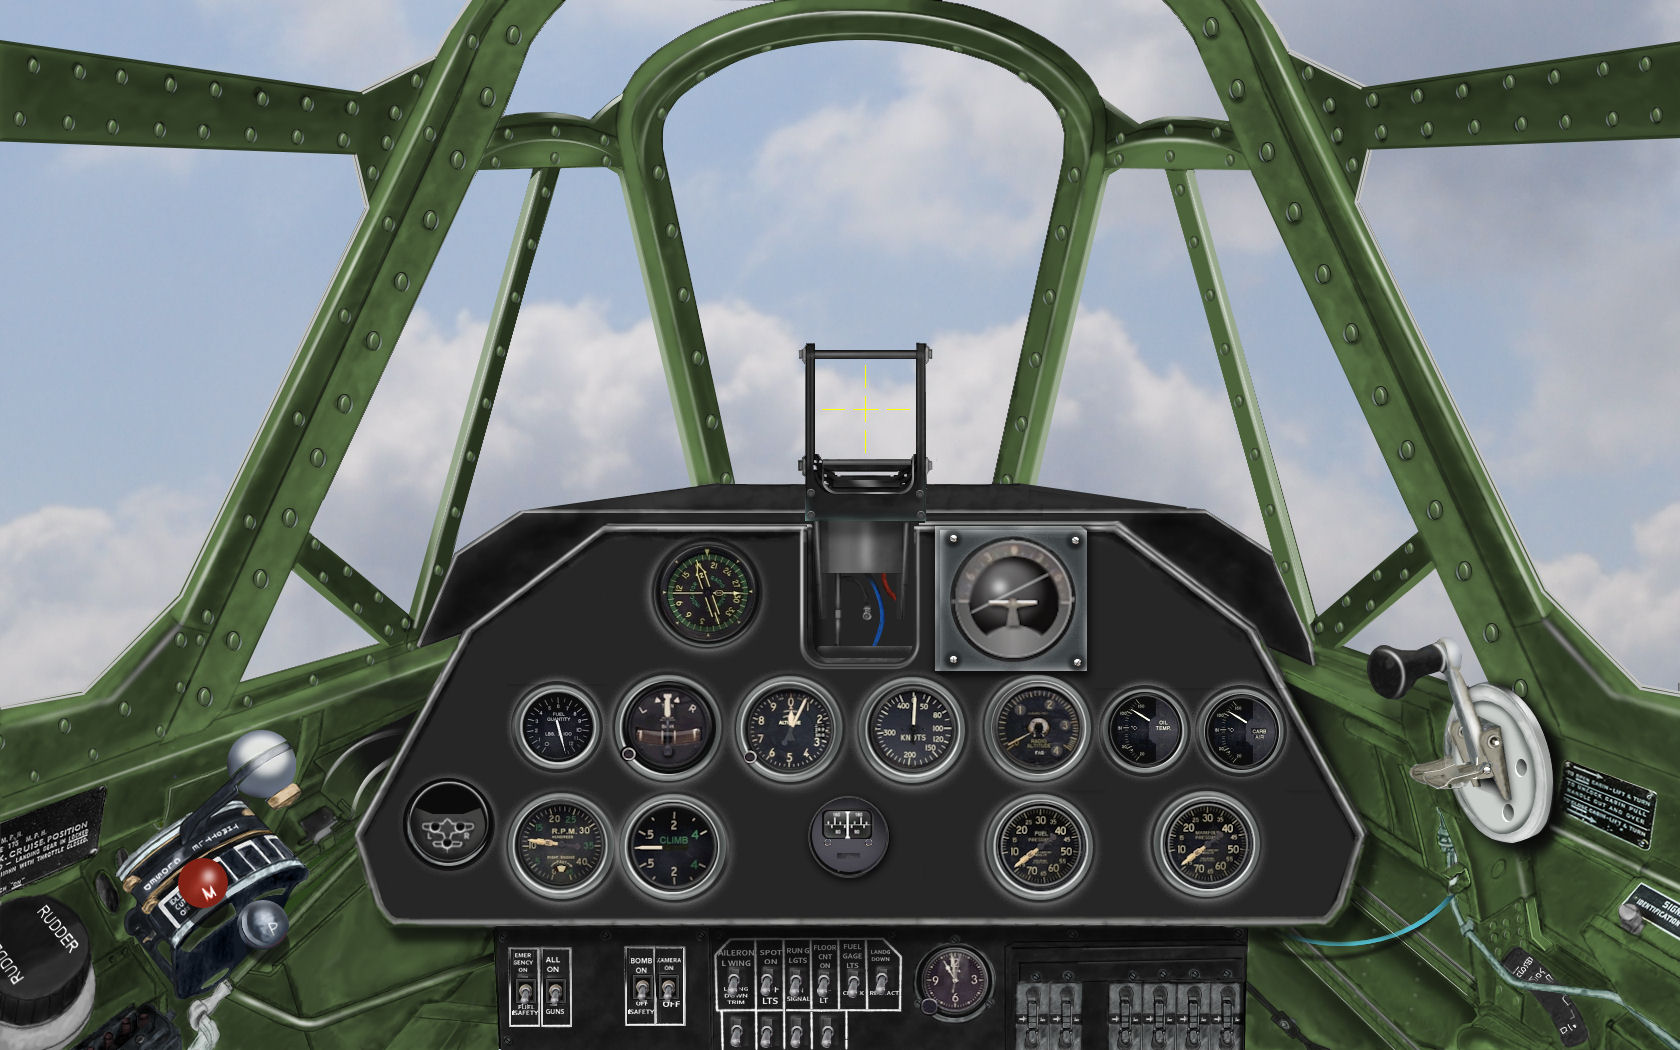
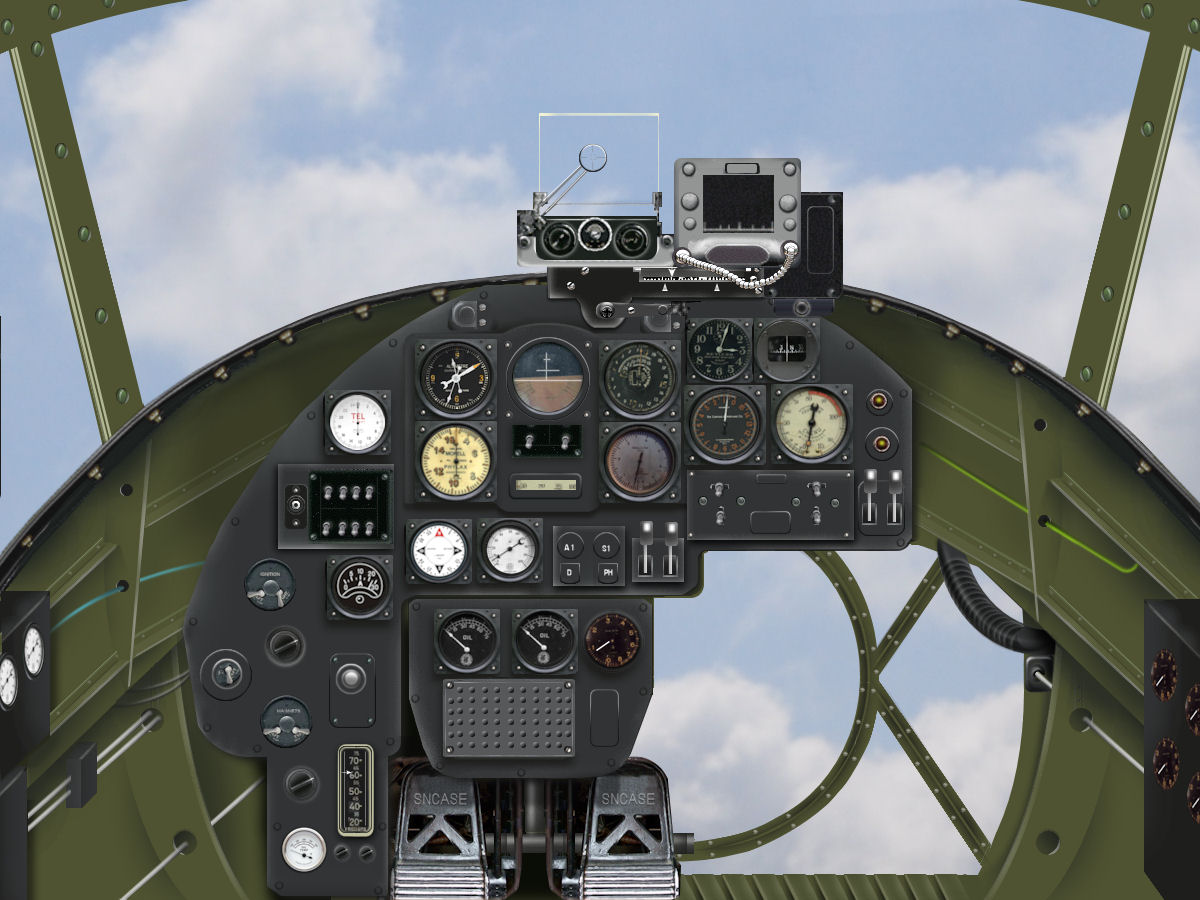
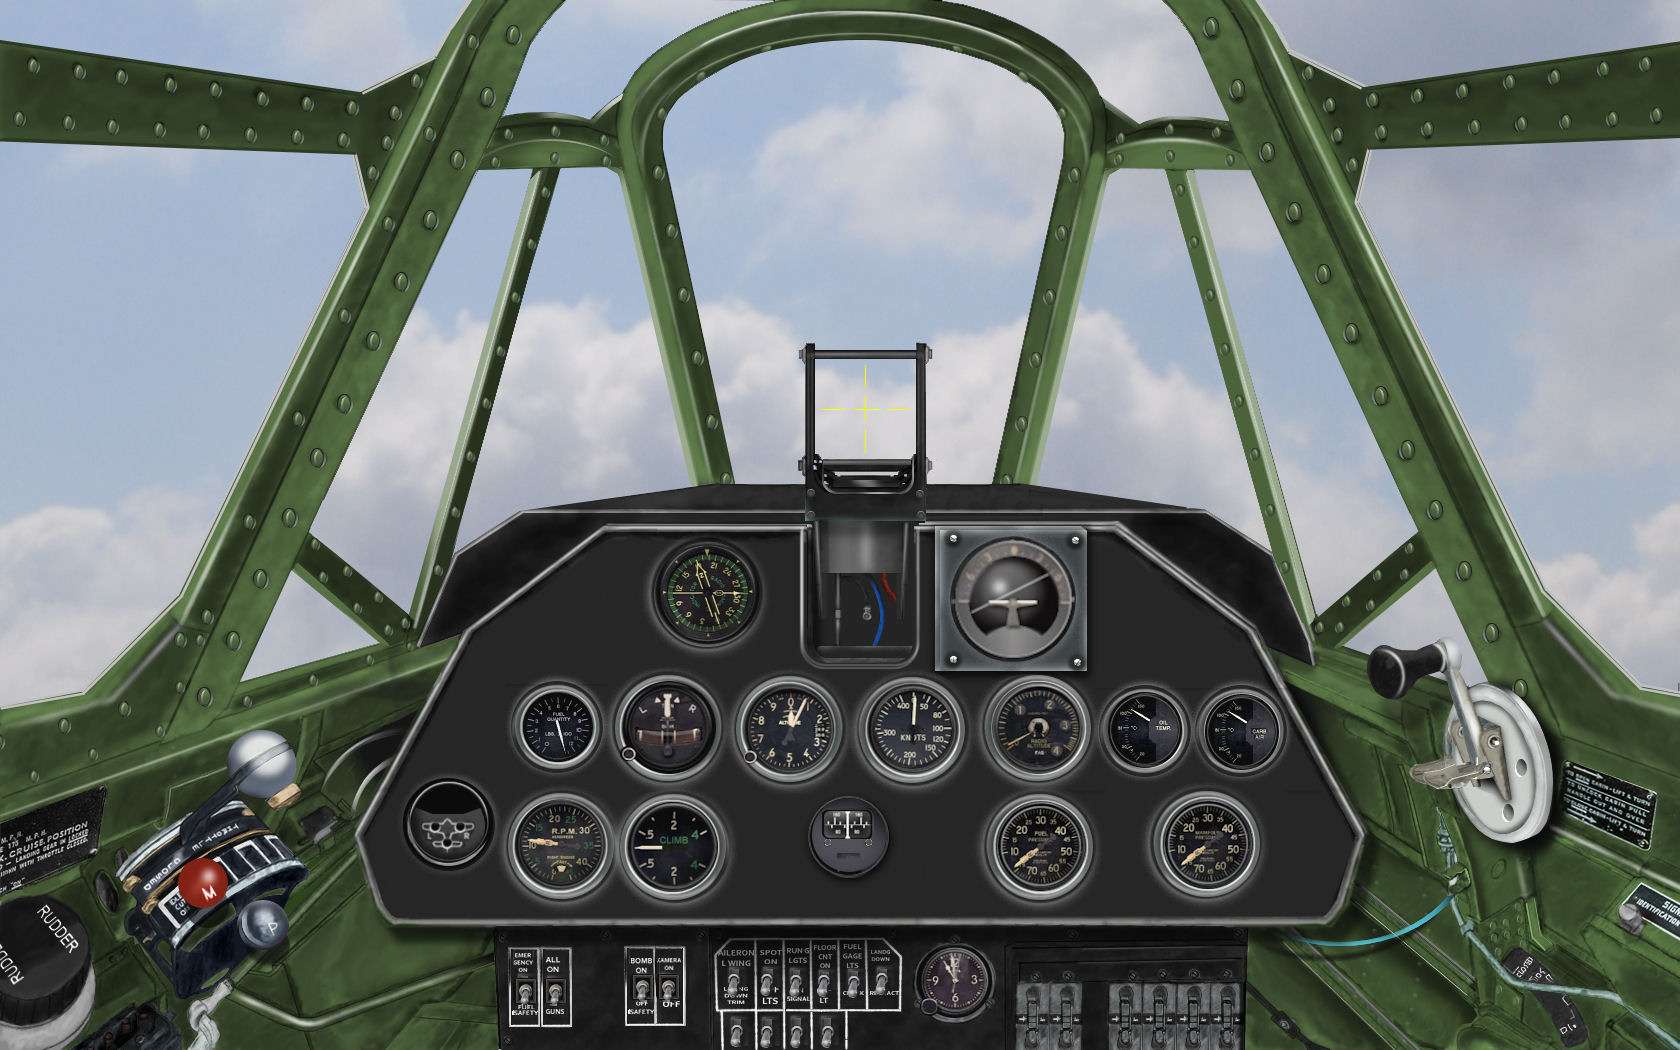
Just finished a new 2D panel for the Storch..

Continuing to refine details...

Gius,

I reiterate, you have a great beginning with this panel...
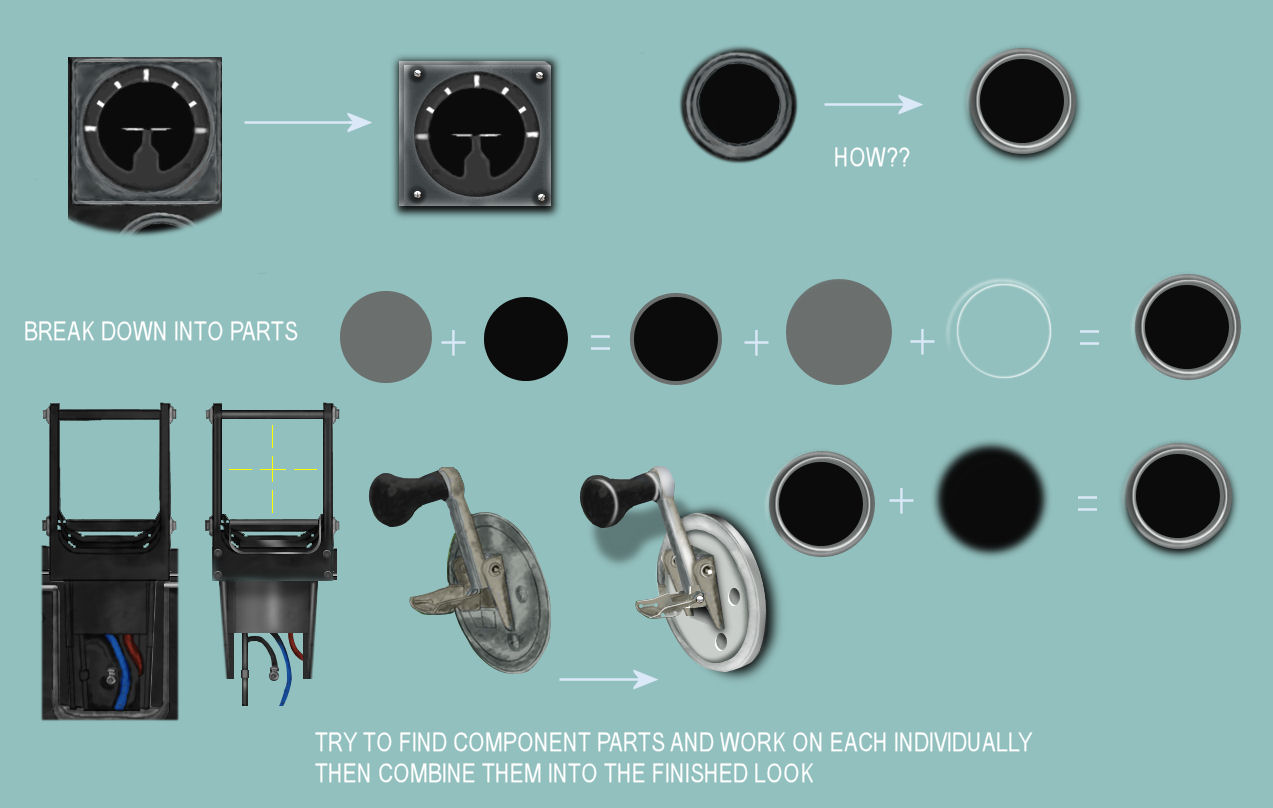
here are some more pointers to help you refine your approach... One of the key maneuvers, is to treat
each item by itself, instead of trying to do the whole panel at one time... the advantage of digital "painting" over
regular painting is that one can do isolated items and then combine them for a very effective look... For example,
you can do the gun sight or that cranking handle by itself... clone it... blacken and diffuse it.. and then put it on a layer behind itself...
and voila' you have a thrown shadow... that really makes it come alive and look realistic...
no more instruments or panel items floating in mid-air with "no visible means of support" so to speak...:wiggle:


13562867753_fb6b1aaf6f_o.jpg


Once you learn these few tricks... to use them is a breeze... and the collection of these little creations... screws, bolts, gauges, levers, etc.
comes in very handy to quickly produce a panel from a photograph or line drawing that will be very effective....
 
Carlos,
i'm appreciating very much your tutorial: i suggest you to keep it as public, so that other folks too could use the tecniques for their own creations, not only me, and for the benefit of whole community, one comment:GREAT:applause::applause::applause::very_drunk:
Best wishes,
Giuseppe
 
Containuing the tutorial...

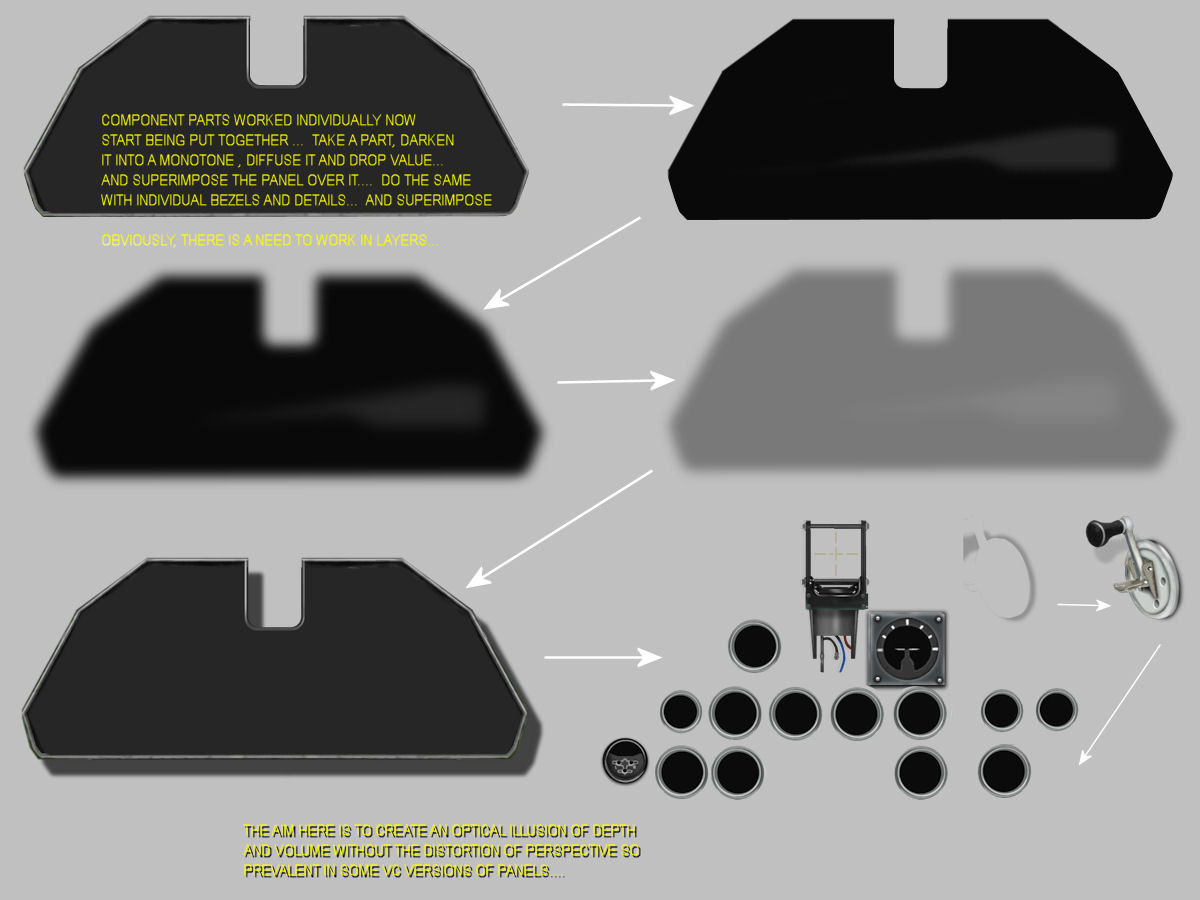
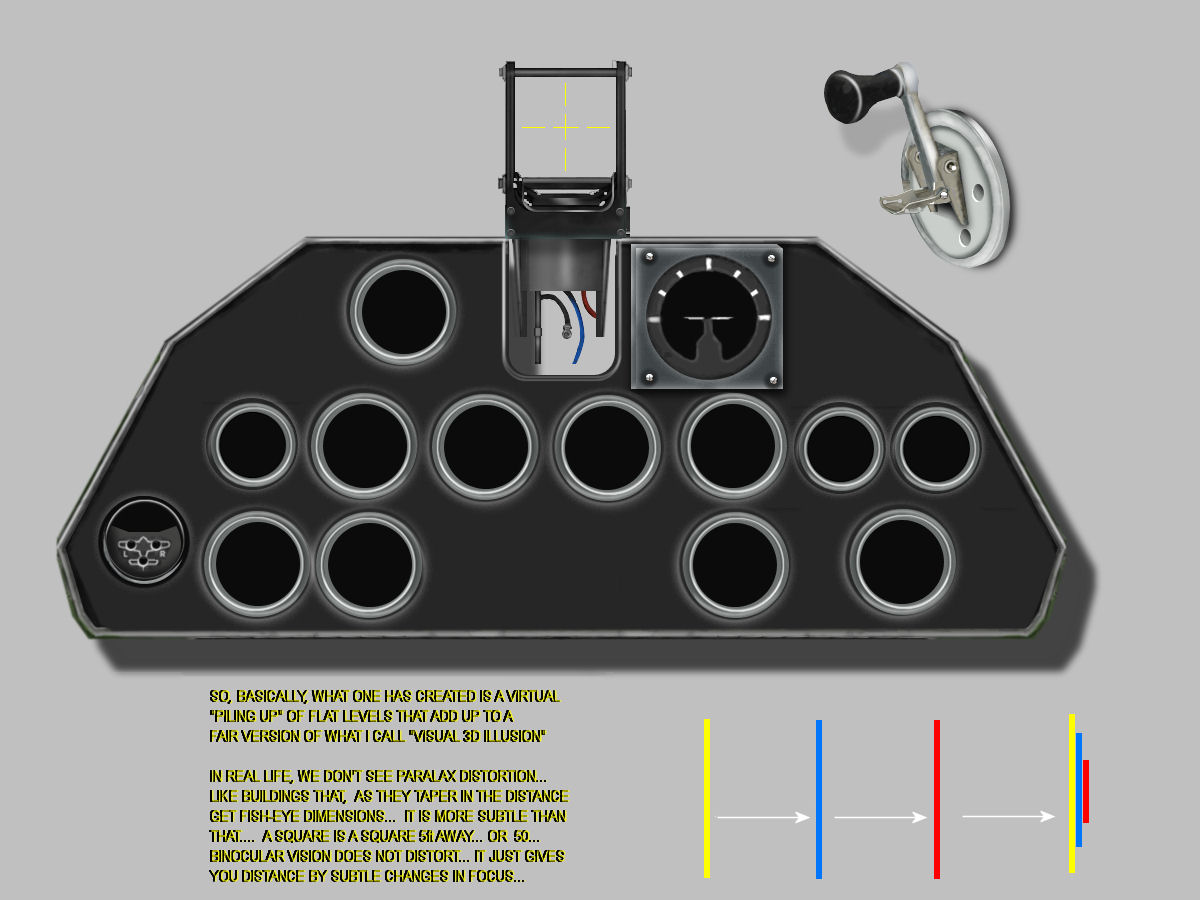
So here is a next installment on the tutorial Giusi... and I hope this is not boring...but, as you will see
the finished product encourages to reach for further perfectioning of your skills... at least it does for me...
I think that with a modicum of patience and some basic painting skills, ANYONE can obtain satisfactory results...

13602403654_b057e32fcf_o.jpg


13602446904_8455d51797_o.jpg


I'll give you time to digest this... and on the next installment we will put things together for a final look...
 
Just to keep things interesting...

Dear Gius,

just to whet your appetite to pursue further perfectioning of your skills...
here is the stage when things start taking shape.... This is what I have done
so far with your initial bmp... which you should be able to accomplish with a
little practice... the addition of more detail will give fertile ground to show a
few more tricks and techniques... as I add the details, I'll explain the method
use to get the desired effect...

The addition of faces on the bezels...I usually cover all holes...then on the
config. file one decides which and how many instruments will be covered with
active ones... and the rest are dummies... that still lend a modicum of credibility to
the panel... preferably... you want to use gauge files that DO NOT have securing
screws of that misplaced with relation to the artwork... add up to that hodge-podge
look... in other words... let the screws in the artwork stand instead... the ones in
the gauges are usually the product of non-artistically inclined technological folks
who are more interested in the instrument that what it look like...
but more about that later... when we get to that adding of details...


13603301754_c3990f4a23_o.jpg
 
A new panel for the Liore' et Olivier 45 just posted....

Gius,

Got distracted from the tutorial by the posting of the Liore' et Olivier 45 by Dombral
and could not resist cooking up a fast new panel for it...

To wit....
13626496074_7ca0c9a730_o.jpg


in a way it fits with the tutorial because it shows how my methodology lets one cook
a panel pretty darn fast... I just used a line drawing and applied the stuff I have been
illustrating
 
Last edited:
Gius,

Got distracted from the tutorial by the posting of the Liore' et Olivier 45 by Dombral
and could not resist cooking up a fast new panel for it...

To wit....
13626496074_7ca0c9a730_o.jpg


in a way it fits with the tutorial because it shows how my methodology lets one cook
a panel pretty darn fast... I just used a line drawing and applied the stuff I have been
illustrating

Carlos,
can i grab this bitmap to make a panel for this beautiful French bomber?
Thanks in advance,
Giuseppe
 
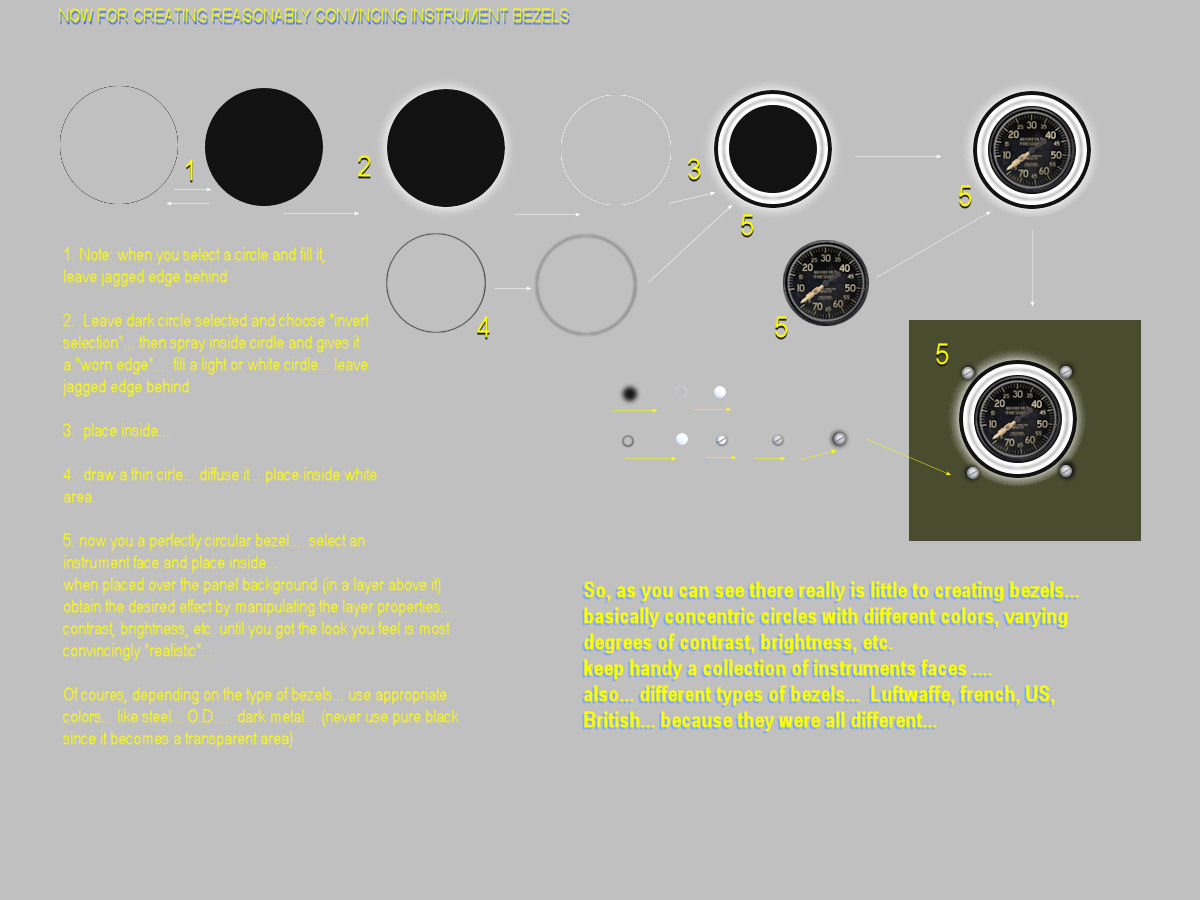
Now back to detailing panels.... bezels

Dear Gius,

Picking up where we were before... here is a simple but convincing method to create
instrument bezels... as you experiment you will see how easy it becomes...
You need to keep a good collection of ready made bezels and instrument faces...
On our next installment... we can go into creating transparent glass lenses for them...
The only limits to this endeavor is your own creativity and desire to excel at it....


13630240865_25227d22a7_o.jpg
 
Last edited:
Containuing the panel detailing tutorial...

Dear Gius,

Picking up where we were before... we add some more details to the panel project....

13677583944_3e8b0caaa5_o.jpg


and incorporate a control column... (that can be made into a "pop up".. or just
stay there to give the panel an "inhabited" look...

13677622654_a940b9eba6_o.jpg


now all that is left is a little "weathering or wear and tear" to.. without exaggerating...

Next installment we'll do that to finish the "dressing up" of the original panel bmp.
 
ANF 115... a very quaint and interesting aircraft....

Just downloaded this one... and thought it was worth a little cosmetic treatment...
A very quaint looking thing... doing several liveries found in Wings Palette...

13694624014_b49e1362a1_o.jpg


13694278543_82b0f9e460_o.jpg


13694218625_e17fc99e6e_o.jpg
 
Repaint of one of Ito's hidden treasures...

worth a little cosmetic treatment... Ito's 109 G
Not a quaint looking thing... rather the killer look...


13706024355_48e7d88768_o.jpg


13706005503_529a23d7e4_o.jpg
 
Paint tweaking...

Dear Gius,

Proceeding apace... and excuse my jumping back and forth a bit...
but you ask questions and I try to answer them as they come along...
only problem... with Skype I can answer quickly... but the illustrations come
with a little time lag...
In reference to your question about texturing... especially the one you made about
a Br20 in one of your posts, where I think you said it was too difficult to repaint...

Well, if you follow this method... you can repaint anything... with luxury of detail...
the only requisite is having patience and attention to detail... as well as a good
original texture source... [well, not exactly... you can make a nice texture out
of a mediocre or frankly lousy original too]

To wit:

13720606983_09e237ea99_o.jpg


13720550625_9246758e0a_o.jpg


More later...
Cheers and in boca al lupo!
 
Third installment of tutorial on texturing...

Dear Gius,

Continuing the tutorial...
To wit:

13723859255_090088265e_o.jpg


Any specific questions... possiamo approfondire in Skype Gius... anyone else... just formulate them here...

Cheers,
G.
 
This concludes the tutorial on textures...

Dear Gius,

This pretty much concludes the tutorial... any particular questions can be
addressed as they arise...

Happy texturing! :wavey:


13726037503_0bc4cbb339_o.jpg


Any specific questions... possiamo approfondire in Skype Gius... anyone else... just formulate them here...

Cheers,
G.:running:
 
I would be sitting, watching and thinking from what end i should start and now things are much more clear and simple, please keep continue with you tutorials Goucho, they are awesome!
 
Thank you... it is very rewarding to

I would be sitting, watching and thinking from what end i should start and now things are much more clear and simple, please keep continue with you tutorials Goucho, they are awesome!

share one's discoveries and feel appreciated in one's efforts...
I invite anyone who wishes, to ask questions so I can better orient my effort to illustrate things...
in both medical and art school... I always felt that instructors seemed to want to teach what
they thought was necessary... never asking one .... "well, what do you feel you want to learn...."
I started this tutorial quite by accident... trying to answer some questions by Gius and my PM
box here was empty because I accidentally erased every message... so I used the thread to
answer those questions... :wiggle: maybe it was a blessing in disguise...
Thanks again and I am here to answer and contribute whatever I can...

G.

Hello Carlos,
today i'm unable to contact you with Skype, i apologize for this,
but another time i must say thanks for your tutorial,
THEY ARE BETTER AND BETTER,:applause::applause::applause:
CALOROSI SALUTONI, CARLOS
Giuseppe
 
No problem...

Hello Carlos,
today i'm unable to contact you with Skype, i apologize for this,
but another time i must say thanks for your tutorial,
THEY ARE BETTER AND BETTER,:applause::applause::applause:
CALOROSI SALUTONI, CARLOS
Giuseppe

Hey... non ti preocupare... ci ritroviamo quando puoi....
mi raccomando.... cerca di smettere col fumo....
In boca al lupo... in culo a noi... (cosi dicevano I sub della marina quando
andavano in missione in Libia...)

Ciao for now...
 
Another repaint of the ANF 117

Hey... non ti preocupare... ci ritroviamo quando puoi....
mi raccomando.... cerca di smettere col fumo....
In boca al lupo... in culo a noi... (cosi dicevano I sub della marina quando
andavano in missione in Libia...)

Ciao for now...


This quaint aeroplane has many possibilities..

13770384333_26a2f5caef_o.jpg


13770368173_7c67fa0133_o.jpg
 
Back
Top