Learning AD2K

Hello Smilo,
Thanks for your get well encouragement!

I see what you mean. Staightening things out also makes this life a bit more comfortable too!.

I have 2 neighbours, one of which is into psychic things, meditation and astral voyages and such like, and both are over 80, still lucid and healthy, and then, on the other hand, I have had school mates who have expired from heart attack, multiple brain stroke and other unpleasantries in their 50´s.

Thus, I have stopped worrying about my date of expiry, and consider myself fortunate to only suffer from migraines - I´ve learnt to avoid what causes them whenever I can. It´s mostly food chemical intolerance (preservatives, etc); farm products grown with pesticides and herbicides; meat from animals fed with growth hormones; and finally most medicines (damn the food and drug industries).

The Lockheed Model 10 Electra sounds like an enticing plan after the tutorials, so I´ll sign up for that! Poor Amelia Erhart, at least she died doing what she liked most - but so young is so unfair!

Anyway, today I´m more lucid again and will try to sort out the CubeFYI a bit further.

Cheers,
Aleatorylamp
 
my father passed at 42.
and i've attended services
for some of my children's friends.
so, i've witnessed early departures.
none knew when time was up,
although, some, like Emilia,
risked their lives on dangerous endeavors.

to be honest, when i suggested the L10,
i wasn't thinking of her,
simply, the base model for the hudson
and, in my humble opinion,
one of the truly beautiful aircraft designs.

now, since you're on board
with the collaboration proposal,
i have another...how about if
you build the model parts in sections?
say the nacelle/wing, tail, aft fuselage,
turret, etc. as complex and detailed
as you like...the more, the better.
don't worry about parts count.
i'll take care of the sticky stuff,
the sequence coding.
 
Hello Smilo,
I know you weren´t thinking of her when you suggested the L10, but as we were on about the subject,
the memory came to mind.

Anyway, it is a good suggestion, as I agree with you on the nice design.
The different sections you suggest would then be built at their correct coordinates, to be inserted separately.
I think someone said max. parts count was 8000, so that leaves ample room.
The building style using bulkhead templates and so on should be quite exciting.
OK! We´ll do it once I have the sequences licked on the tutorials.
...although from your enthusiasm, one could say that finishing the tutorials is secondary, and can wait to be finished later! - Ha!

Cheers,
Aleatorylamp.
 
i would suggest, building the major sections,
(is that the correct term?)
tail, turret, nacelle, nose, etc, at 0,0,0,
each as their own 3DM master project,
mainly, for ease of viewing details.
when it's time to assemble them all together,
they can be moved, either with Multiple selection,
or by means of vectors, then, converted to MD1s
for insertion into the master L10 project.

you are correct about my enthusiasm.
i am anxious to get going.
although, i hope i'm not inferring
that you scrap or shelve the tutorial.
i believe it is an important tool,
both for others and for ourselves.
 
Hello Smilo,
Methinks I´d like to finish the tutorials after all, just to be a bit more knowledgeable,
and get some more practice before starting on the L10.

I just want to fix the bleeds on the turning wheels and skirts of the CubeFYI,
and then get the propeller working on the Pony (Ugly100), including the turning the wheels,
and skirts, in Me109 landing gear style - shape of the aircraft really seems to want it.

So, after that we can start on the L10, and OK, I understand why the sections are to be done
initially at 0,0,0, and as master projects.
Cheers,
Aleatorylamp
 
as you wish...as always, it's your call.
let me know if you need assistance.

as for the wheel/skirt bleed issue;
are parts of the wheel,
bleeding through the wheel itself?
or, is the wheel bleeding through the skirt
and/or vice versa? if so, it's and easy fix
with a properly placed Jump Plane sequence.
just make sure you place it after
the moving wheel instruction.
the term "after" meaning above in the list,
since construction is from the bottom up.
one pair of gosub calls will be the skirt,
the other two will be whatever you call
the animated wheel.
the seal will be the in or out facing skirts.
it doesn't matter which one,
since they are both in the same location.

as for building at 0,0,0,
i believe you will clearly see what i'm talking about,
when complex sections are being produced
and visibility of parts become an issue.
the turret and nacelles, especially, come to mind.

hmmm..a side thought,
i wonder if the turret can be made
to pan left and right with a rudder call?
and bomb bay doors to open and close
with a spoiler call?
 
Hello Smilo,
In fact, the wheels are called last in the list, so they then have priority over the skirts seen from outboard, that are still together with the Struts in that SA. The struts are OK, it´s just the skirts. Then, the inboard view is OK.
I just have to separate the skirts and sequence them correctly. I´ll try to do it like you say - thanks!
Of course, a cop-out would be to just take out the skirts...
If I run into trouble, I´ll send you the .3DM.

I also still have to fix the momentary Nose/propdisk bleed you mentioned seen from the side, slightly aft, but I got the propdisk/blurr and blades speeds right again. The propdisk and blurs are shown when it´s turning fast, when the blades disappear - it looks better than with just the disk.

Turrets turning with the rudder? Why not indeed! Pilot´s heads sometimes do that too.
Bomb bay doors opening would involve making the bombs visible on the inside. I once did that on my F-22 Raptor - there was a bitmap with the missiles when the doors opened.

Cheers,
Aleatorylamp
 

Attachments

  • wheels.jpg
    wheels.jpg
    24.4 KB · Views: 0
this is fun without actually,seeing the model editor.

stating the obvious....what i am seeing
is the skirts and struts look okay from both sides.
the wheels are out of sequence.

i'm assuming they are each animated on the main page.
each wheel animation, left and right,
need to be named, then added
to separate jump plane sequences
with the left or right skirt/strut.
the seal will be the face of each wheel
that contacts the strut/skirt it is next to.

if, when compiled, it still shows out of sequence,
in model editor, find the jump plane you just made,
click on the seal Plane,
click on reverse in the Select seal pop up window.
compile and have a look again.

if that doesn't work, send me the 3DM.
(it would be so much better,
if you could print it out and post it here,
so others could see what is being talked about.
not to mention, i wouldn't have to guess
at the problem and solution)

actually, there are two problems and solutions here.
both the left and the right strut/skirt and wheel
gear "groups" are out of sequence.
 
Hello Smilo,
Yes, you have identified the fault quite correctly!
Thanks for your help and explanations.

The turning wheels are still outside the gear sequencing.
This experiment just-to-see-how-they-turn started out by taking the wheels out of the LGEAR and RGEAR Sub-Assemblies, putting each of them into their own SA, and then just copying the code from the unsequenced FS2000 RFO tutorial turning-wheels addendum, which was simply added on at the end.

The wheels are still without a Jump Plane instruction, and the skirt is still within RGEAR and LGEAR.
I haven´t been able to get the time to separate them yet (although probably it isn´t necessary!), or to think about where to put the Jump Plane instruction, nor have I had a clear enough head for it yet - I´m not quite up to par...

The positioning of the wheel could be either sandwiched between the strut and the skirt, or inboard of the strut+Skirt assembly, which would be easier, and the skirt needn´t be separated from the strut!
Only, the wheel would have to be as you said, correctly sequenced and Jump-Planed.

In theory, the Jump-Plane instruction would have to either show the strut+skirt first and then go to the wheel animation, or go to the wheel animation first, and then show the strut+skirt. Let´s see if I can do it!!


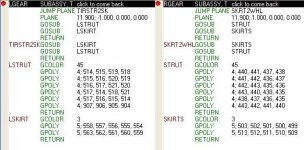
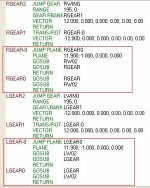
Printing out the main code page here into this post is a bit out of the question, BUT the attached .ZIP file is a more legible version of the also attached screenshot of the Main Page Code, easy to read or to print out.
Here´s also the Code for the Gear Sub-assemblies.
The code for the Wheels are straight forward and only contain the parts and the texturing, no sequencing .

Cheers,
 

Attachments

  • CubeFYI-Code.jpg
    CubeFYI-Code.jpg
    126.6 KB · Views: 0
  • GearCode.jpg
    GearCode.jpg
    51.4 KB · Views: 0
thank you, Stephan.
i'm sorry to say,
it will be a while before i am able
to take a serious look.
it's house cleaning thursday
and i'm a bit indisposed for a few hours.

that said, i would leave
the left and right strut/skirt SAs
as they are...that is, unless,
you want to change the folded gear location.

also, i was under the impression
wheel movement could not be accomplished
within a SA...or, that's what the help file says.
it seems, you have proved that to be untrue...correct?
 
Improvement

Hello Smilo,
Our posts just crossed the Atlantic at the same time!
Thank YOU, Smilo, for the instructions in your previous post. Wonderful!
... and also for confirming there´s no need to separate the skirt from the strut.

I managed to concentrate a bit more, I got it a bit better!
I put in a nice Jump-Plane Sequence, and thought it out logically - a feat in itself...

Now all I have to do is shift the wheel to the other edge of the strut,
so that the wheel is inboard of the strut and not between the strut and the skirt.

Cheers,
Aleatorylamp
 

Attachments

  • Improvement code.jpg
    Improvement code.jpg
    52 KB · Views: 0
  • improvement.jpg
    improvement.jpg
    25.1 KB · Views: 0
Hello Smilo,
More progress - I hope...
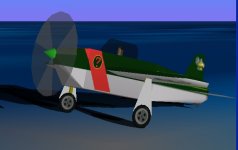
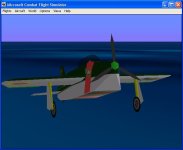
The gear does fold inwards. I shifted the tyre and the seal so that the strut has
the skirt outboard, and the funny 2D wheel, inboard. The layout is correct, though.
Now I have to check the short propeller/nose bleed.
 

Attachments

  • wheelproblemgone.jpg
    wheelproblemgone.jpg
    37.4 KB · Views: 0
better wheels!

Hello Smilo!
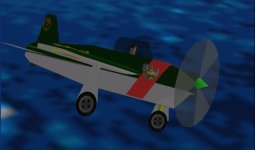
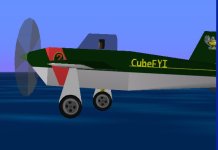
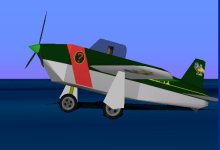
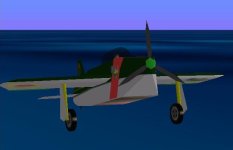
I´ve done 3D wheels for the CubeFYI - making cylinders out of the wheel circles, and flipping and moving the circle out of the Desk Assembly to the wheels ones. It looks much better, I´d say!

I´m also thinking of trying out flaps and fuselage-side airbrakes, as they can be quite useful, but maybe it would be complicating the tutorial too much. What do you think?

Shall I post the model just so you can try out and see the wheels turning?

Cheers,
Aleatorylamp
 

Attachments

  • better wheels.jpg
    better wheels.jpg
    22.9 KB · Views: 0
i'd say so, too.
it's a much better visual,
than the racing bike tires.

the flaps and brakes are your call.
they might be helpful, but,
as you said, it might be a bit much.

please post the zipped 3DM
I'd like to have a look.
 
Hello Smilo,
Hmmm... I quite fancy the idea of the extra moving surfaces, just for
the sake of maximizing possibilities. Flaps will also make the trailing
edge more uniform, and I´ll texture it. If the necessary sequencing gets
too complicated, I´ll refrain, but I´ll try first.

Attached herewith is present build with the 3D wheels.
I´ve included the textures if you want them, and also a new .air file
which flies better, just in case you want it.

I checked with the Beckwith gauge, to put in the best cylinder number and
prop diameter for the best RPM, power and speed, to at least make it fly
in a reasonable way.

I tried to see what I can do about the short propeller/nose bleed seen from
the side, but couldn´t think of a solution. Will the prop maybe have to be
split into forward and rear facing SA´s?

Thanks again for your interest, cooperation, enthusiasm and help!
Cheers,
Aleatorylamp
 
hello Stephan, thanks for the current 3DM.
i've downloaded it and will transfer shortly.
i'm anxious to check out the animated wheels.

i'm beginning to think lights may be possible.
how do you feel about giving them a try?
when you have time, of course.

i encourage you to do the flaps.
there may be a sequencing problem,
but, don't panic...
we can work it out.
where there's a will,
there's a way.

as for the prop bleed,
may i ask you to hold off?
let me have a look see first.
a quick question before i go have a look,
do the blade leading edges protrude forward,
beyond the aft end of the spinner?
if they do, that is the source of the bleed,
if not, it's most likely a seal issue.

okay, i'm off to go look.
have a good night.
 
after the first peek at the PROP SA,
for starters, the SPINNER and BLUR
parts are not separated by a RETURN
consequently, the blur bleeds through the spinner.
no great surprise...but, now there is no visible blur.

this does not bother me.
as i've previously stated,
i don't understand why
there is a prop blur
when the prop is stopped.
but, that's just my opinion.
if you want it,
i can make it happen.

in any case, for the moment,
i am not done with the PROP SA.
 
Back
Top