Radius and VC
Now we need to set the radius with RADitor. Dead easy. I guess everybody has RADitor installed- see top of thread, D/L and install. Run it, and a window comes up.
View attachment 36646
Point it to the newly converted file, hit the small select button, then the read button. You will see some huge number in the radius window and bounding box window. Double left click on each in turn and change to match the picture values. You can increase or decrease to suit your tastes, but the VC model should have the same radius and bounding box latter. Hit the the 'write' button. That's it. You should now have a basic MDL X A-3B ready to go.
Now, the VC. Hit the import button on MDL converter,
View attachment 36647
select the FS9 A-3B. The model dialogue window will pop up.
View attachment 36648
You will want to set 'gen model' to 1, lights state to 5 for the VC landing light. (You can use the converter to remove or edit those latter by hitting the wrench icon for the attached object editor.) Select set, the converter fruit machines for a moment, and...
View attachment 36649
The VC come up. Select the material editor. Each of the $VPANEL place holders is selected and assigned 'default transparent' in turn.
After those are adjusted, select the animation editor (clapper board) icon.
View attachment 36650
This is a short list, so start at the top again, you can manually select these. These are going to be changed to the lever commands. There is the lever stick fore and aft, lever stick left and right. The tail hook lever is on the left side of the pedestal- pilots right hand. The 'unknowns' are the throttles- left lever becomes 'lever_throttle_0', right becomes 'lever_throttle_1'. Two 'unknowns' are the rudder pedals, those have 'lever_pedals_l_r' assigned to both. The last two are 'lever_landing_gear' on the right pedestal, the lever that looks like a gear leg and wheel, and 'lever_flap' on the left corner of the pedestal, f_canopy -s 'door_0'. Select one at a time and wiggle the slider. This one is easy. A cockpit with zillions of switches is a major PTA.
Select the 'object information' icon (magnifying glass) hit edit, change the name to A-3_interior_X or something, hit the 'set new guid' button, close the window, and export.
Run RADitor again, set the radius and bounding box to the same values as the external model, hit the write button.
Now, amend the model config file as you would for any FSX model- eg:
normal=A-3B_X
interior=A-3B_int_X.
Load up the sim, see if it works.
This is the tedious part. Find any miss features, note those, exit, go back to model converter, adjust animation definitions, export a new model. Note. Export with a new name so you don't overwrite and loose your original. You must also reset the radius every time you export a new model.
Test again.
I'll save you some time. The one un-feature I found is the left main wheel refuses to rotate. It could be a contact point glitch, I'll have to look, or I might have screwed up. If not, try 'tire animation' assignment, or assign it to the 'right tire blurred'.
View attachment 36644

Addendum-de-dum-dum. I ran the 767-100 through the gizmo, just to have a look at it. As I thought, its got all this yellow stuff glommed around it on visibility conditions. That can be done, Henk seems to have that by the face. It's just a bit more complicated. Say, like tying your outflow valve to your uvula the long way 'round.
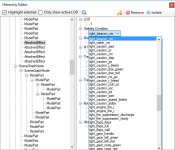
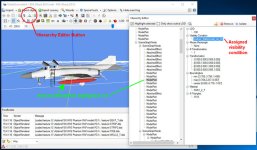
The nasty, lazy way I favour is to sand off the offending bit's with the material editor and hierarchy editor. You can isolate (sometimes!) parts, highlighted in red, and remove them.
View attachment 36655 Easy.
Then...
View attachment 36656
So. This would be a (Sisyphean) labour of love(?). Then hope you don't get an aptly named 'main ARG string error' - which is when you scream ARRRRRRRRGGGGG!... And unload eight rounds of .45 ACP into the laptop...


