New P3 Orion

Hello Ivan,
My daughters went out with friends dressed as zombie fiancés and didn´t haul in much either, so they went off to the pub afterwards.
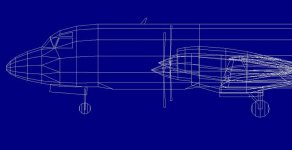
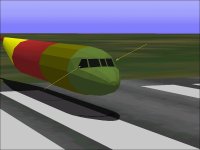
Structures are great to get nose-shapes to start off better, and then make components copying the parts. I got the forward fuselage nose/cabin/bombbay into the new sizes, first as structures, with the new nose outline measured out from one of the perpendicular photos, and turned it into 2 components: Nose and forward fuselage. Now I´m doing the aft-fuselage - I over simplified it under the fin-fillet and have to correct it, but it´s going reasonably well.

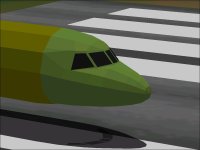
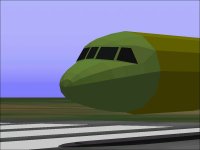
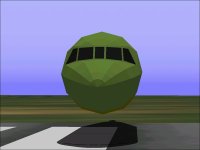
Here´s a screenshot of the forward part. Perhaps the windows are too big - I´ll have to re-measure them. I still have to fit the cabin parts at the windows so that the body shape coincides better and doesn´t do funny things with the windows when viewed from different angles.
(The engines are not components yet - still structures - and the wings are being corrected).

Cheers,
Aleatorylamp
 

Attachments

  • newnose.jpg
    newnose.jpg
    39.6 KB · Views: 0
Hello Aleatorylamp,

That shape doesn't look bad at all. The Windows ARE kinda big on the real aeroplane.
I think they have the right look so far, but perhaps the Component underneath can be made to match.

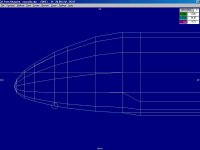
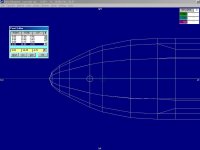
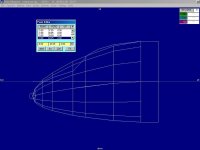
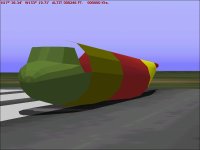
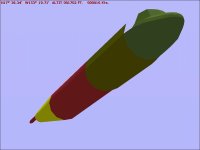
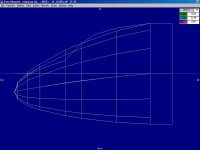
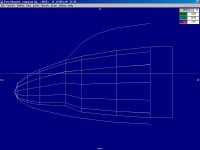
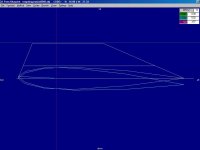
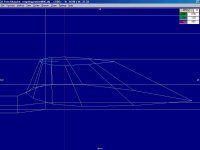
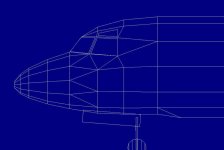
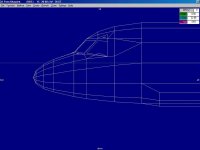
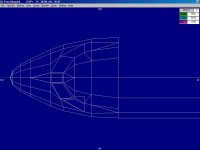
The attached screenshots show the idea that I had. Obviously the shape is wrong at the moment, but it is where I want it to be on the underside. This is what I meant by using Structures as a guide There will be other Structures used as guides in other areas, so hopefully it will all look right when completed.
I believe one of the Bulkheads on my Structure is actually unnecessary but will remain long enough for me to attach a few Windshield pieces.

Mine doesn't look like much right now, does it?
But it WILL get better unless I get bored first. The Merlin Warhawk is begging for attention again.

- Ivan.
 

Attachments

  • Orion-NoseStructSide.jpg
    Orion-NoseStructSide.jpg
    38.4 KB · Views: 0
  • Orion-NoseStructTop.jpg
    Orion-NoseStructTop.jpg
    42.4 KB · Views: 0
Interesting!

Hello Ivan,

I was just making some class material. I can´t find exactly what 2 of my students need: An intensive, fast English revision course, so I´m making my own, and it seems to be working with the students. I´m basing it on the layout of an old intensive German revision course book from 1974 that covers 3 years of learning (for once-a-week classes). Modern course books nowadays never cover more than one single year - publishing companies certainly saw where the business was! Anyway, I like this kind of activity too because it is creative!

So, I have made no further progress on the Orion today.

Your approach for the nose certainly does look intriguing, I must say!

- My bomb bay is simpler and only really occuppies the bottom part of the fuselage. I´ll try and make it include the next panel further up the side.

- Windows: It should not be too hard to match the "metal" under the windows to the windows. Looking at photos, the cabin surface does merge with the flat windows, doesn´t it?
- Then, come the wings - correct placing and thickness. Angles are already OK, and so are the Wingtips!
- Next, the engine nacelles conversion into components, which will definitely be a challenge!

Cheers,
Aleatorylamp
 
Bring out the Big Hammers

Hello Aleatorylamp,

The next task is to create some Window Parts and adjust the wireframe to match.
This task is much more artwork than anything else.

- Ivan.
 

Attachments

  • Orion-NoseProfile.jpg
    Orion-NoseProfile.jpg
    42.6 KB · Views: 0
..and the blow torch

Hi Ivan,
If I suppose correctly from what I´m seeing, the reason for starting out with a B-787 or Caravelle type nose is to use the lower outline of the parts in the lower portion for the nose component, as this way you eliminate the interference of the windschield cutaway at the bottom. Once you do the cutout, you get the outlines for the upper parts. Very interesting!
The idea is very simple, but the key is to have the idea!
I always asked myself what the purpose behind being able to actually make complicated and exact structures was in AF99, as you can´t really use them as such on the model because of parts count!
Cheers,
Aleatorylamp
 
Hello Aleatorylamp,

You are supposing quite correctly.
As I have stated many times, I don't tend to use Structures very much when building but they are useful for templates.
There is seldom a piece of an aeroplane other than perhaps a Spinner or Drop Tank (Or a Cowl Machinegun) that is really shaped as a Structure requires. Just about anything a Structure can do, a Component can do better....
BUT, a Structure is pretty much guaranteed to have a predictable cross section and the lines often flow better than ones designed by eyeball.

I have ben using this idea for years. It is certainly no secret.
It was used to build the majority of the Macchi Fighters Fuselages and to check the P-40 Cowl.
The exact same technique being used here was shown in the Lightning Design Study.

The upper part of Nose really needs to be done by hand which will happen as soon as I can create properly shaped Windows. The dimensions of the Windows are being scaled from photographs as usual.

Today is Election Day in the United States.

- Ivan.
 
Hello Ivan,

I´ve been off line a few days trying to sort out a medical issue a different way than what is being imposed on me, and it´s taking up more time that I expected.
Also, after misdiagnosing one of my daughter´s flu as mononucleosis and prescribing antibiotics, they made things worse for her 6 weeks ago, and now my other daughter has the same symptoms. They´ve also prescribed antibiotics, but we haven´t started administering them yet, and today it´s back to the doctor to make sure there´s no misdiagnosis this time.

Your way of using structures is reminiscent of casting two different plaster halves and then shaping the final figure by hand in wood! A more useful of structures!
I will try to make some progress on the Orion at the weekend.

Cheers,
Aleatorylamp

 
Hello Aleatorylamp,

I do understand the feeling. We have a few issues around here also.

I have bee reworking the Structures a bit to get a better contour which means all the Parts created from the old Structure need edited.
I also worked out a little technique with a very special Structure and might need to write a new program to make tuning such a Structure less tedious.

- Ivan.
 
I've always loved this plane. I've spent a few days with my day when I was a kid around them. So it must be in my blood.

attachment.php


Got to love the old tail feathers.
 

Attachments

  • P-3 VP-8.jpg
    P-3 VP-8.jpg
    88.8 KB · Views: 0
Hello, Blood_Hawk23,
You were very lucky! It must have been rather impressive.


What I find attractive about the plane is its rather classic design, (it has big props, that´s great!, even if it has jets too... ha ha!), its tremendous turboprop power - a bit more discrete and not quite as outrageous or monstruous as that of the Tu-95 Bear...(one day I´ll continue building that one too), and the fact that it´s still very much alive an kicking about 50 years after it started being built.

In your case, you will no doubt have many more reasons for liking this plane. According to several pilot´s comments, it definitely seems to be a remarkable machine, rugged, fast and reliable, even if they did have one or two mishaps due to "fodding" gearboxes, which sometimes caused props to over-rev, detach and create havoc. I wonder why there wasn´t an auto-feathering governor to prevent over-revving.

Very interesting, your very varied CFS2 work!, although I fear my projected P3-Orion will not do very well in that simulator...

Cheers,
Aleatorylamp
 
Taking it literally

Hello Ivan,

Well, no antibiotics as yet, just in case it isn´t flu, which will be seen once the test results come through next week. This time we´re playing safe!

I was taking notes on the way you were describing the steps to make a cabin in this new way, (very exciting!), and you had mentioned making the windows before cutting out the upper cabin. I interpreted this very literally, and have changed my building strategy, which upto was adjusting the metal corners of the cabin shape so that they don´t portrude, and was having only a limited degree of success, as depending on the viewing angle, metal appeared beyond the windows, ...or not.

So: Now the windshield is a flat, 4-corner piece without triangles as it´s not supposed to be bent, and right now I´m fitting all the vertices of the different cabin component parts to meet the contours of the windows, checking that the 4-vertice pieces all remain flat. It´s like cutting pieces out of cardboard and gluing them to one another in handwork in junior school ages ago! What fun!

Let´s see what comes out. Maybe I can post something reasonably successful later today!
Cheers,
Aleatorylamp
 
They've had the viral form of meningitis up around here. The school my niece's goto have had a couple case. She had them out of school for a couple days a few weeks ago just incase.

I loved it being around the P-3s. I was born into it you might say. My Dad was stationed at NAS Jax from 73-78 then NAS Brunswick from 78-83/84ish. I remember going in on the weekends and walking around them. On a few occassions I was able to sit in them while he did his dailys. 81 or 82ish was the last time I was able to do that.

Something to note while your working on the P-3s. Not all of the B's or C's are alike.

For an interesting read look here...

http://www.verslo.is/baldur/p3vpu/p3vpu.htm

and here.

http://www.p3orion.nl/sneaky.html

That could be why you've had trouble with some of the measurements. Depending on your reference pics and the actual plane.

I will say She's looking great. I'll see if my Dad still has his pics and cruise books. If so I'll try to get some of them scanned. If you're interested that is.
 
Thanks for the links! A wealth of real information.
Some of the photos are excellent for modelling as they seem to be exactly perpendicular.
There is a very large variety of combinations of antennae, tubes or whatever that I´ll have to take into account for any specific unit I want to depict.
I´m trying to shape a basic model first, and had only furgally thought about the differences between B´s and C´s yet. Depending on how it goes, I may take you up on your kind offer to send me some of your father´s info on the plane. Would his cruise books perhaps have a reference to take-off speed, by the way?
Depending on the resources left after the result is as good as I can get it on a "generic" P3 without any special portrusions, my intention is to make both a B and a C model, with correct textures, hopefully being able to depict an existing unit that had some kind of special career.
Unfortunately, however, there will definitely be no parts left over for a radome like on the fake invasion of China model, which is a bit disappointing, actually.
 
A Little Progress

Hello Blood Hawk,

Welcome! It is very rare to see a new face in the sub-sub-basement.

A few posts ago, I realised I had been giving out lots of recommendations on the "best" approach to building the Orion. It is easy to give out advice without any proof, so I decided to test my own advice which is why you may occasionally see screenshots from me as well. It is also a nice diversion from regular projects and I can test ideas without really worrying if I finish anything or not.
Hopefully some of the developments will be of interest.

Hello Aleatorylamp,

Here are a couple more screenshots showing the current construction and the "Very Special Structure" I was describing earlier.
The Nose Component seems to be reasonably shaped at this point.
It also ties in well with the Forward Fuselage and Bomb Bay area behind it.

I had to revise my original Nose Template Structure to bring the Mid Line down a bit. It should still be a smooth downward curve to the front. I found a night time photograph of the Orion in which the lights reflecting off the Fuselage show a distinct and smooth downward curve.

I found that my hand editing of the Upper Nose area didn't work very well, so I created a "Very Special Structure" which is quite ugly but makes a good template for Nose Parts. The "Very Special" aspect of this Structure is that its Mid Line is the same as that for the Nose Bottom Structure. Hmmm.... That is a strange way to go but I think the results look pretty good.

The Nose at the moment is just a single Component. The assembly order is what makes bleeds minimal:
Nose Window Parts First,
followed by Nose Fuselage Parts,
with Nose Roof Parts to "top things off".
There may be very very slight bleeds from certain angles, but the Windows Glued on top block even those slight bleeds.

What is in the screenshots has expended 2 Components and 220 Parts thus far.

Note also that the Windows and the panels under them are not quite planar which is why the far side Window will vanish at certain angles, but it isn't very noticeable. I think the shape is pretty good at this point, but let me know if you see issues.

Please pardon the numerous screenshots but I wanted to illustrate the evolution from where I began to the final form.

- Ivan.
 

Attachments

  • Orion-NoseComponent1.jpg
    Orion-NoseComponent1.jpg
    34.1 KB · Views: 0
  • Orion-NoseComponent2.jpg
    Orion-NoseComponent2.jpg
    23.6 KB · Views: 0
  • Orion-NoseComponent3.jpg
    Orion-NoseComponent3.jpg
    38.3 KB · Views: 0
  • Orion-NoseComponent4.jpg
    Orion-NoseComponent4.jpg
    35.3 KB · Views: 0
  • Orion-NoseComponent5.jpg
    Orion-NoseComponent5.jpg
    32.2 KB · Views: 0
  • Orion-NoseBottomStructure.jpg
    Orion-NoseBottomStructure.jpg
    41.1 KB · Views: 0
  • Orion-NoseTopStructure.jpg
    Orion-NoseTopStructure.jpg
    40.4 KB · Views: 0
  • Orion-MissingFarWindow.jpg
    Orion-MissingFarWindow.jpg
    42.4 KB · Views: 0
Good grief!

Hello Ivan,
Good grief! If this is not an amazing job, nothing is...
Just out of curiosity, I´ll try to prepare my own version without textures, just to see how it compares!

Update:
The shortness of this post upto here was because I only had a few minutes before we were leaving for an important social visit.
Thankfully I can still edit it!
I had wanted to add that after finishing my version of this component, I´m going to try my hand at the new approach and do one like yours.
Incidentally, the shape that is coming out on mine just behind the side-window is the same as
yours!
Oh, dear!, another interruption... Oh, well...

Cheers,
Aleatorylamp
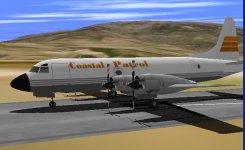
 
Last edited:
Two More Components

Hello Aleatorylamp,

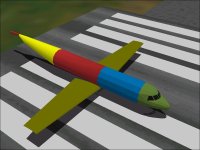
Here is a first attempt at a set of Wings for my Orion.
The airfoil is symmetrical and hopefully resembles the NACA 0014 at the Root and NACA 0012 at the Tip.
The 3 degree angle of incidence looks pretty severe from a comparison with the level version.
The Wing Tip Template has only a 0.5 degree angle of incidence which means there is a slight twist built into the Wing though it is not very visible.

Now I have to go back and confirm the Fuselage Station locations because I know I changed the point of reference a couple times when scaling the drawings to a working size.

- Ivan.
 

Attachments

  • Orion-WingRootV1.jpg
    Orion-WingRootV1.jpg
    32 KB · Views: 0
  • Orion-WingTipTemplate.jpg
    Orion-WingTipTemplate.jpg
    43.1 KB · Views: 0
  • Orion-NewWings.jpg
    Orion-NewWings.jpg
    56 KB · Views: 0
Manual handwork cabin better than before

Hello Ivan,

All these experiments are fascinating.
I´ve just done a better version of my forward fuselage components, based whole structures and then hand-adjusted to the windshields in the cabin area.

Here´s some screenshots, although the model is not as professional as yours. There´s a slight bleedthrough on the "eyebrow" on the textured version, but presumably will be easy to fix. (The rear-fuselage texture is not adjusted yet).
Update: Perhaps I should push out the side window a bit at the back - this way that circle contour would get a little rounder, and then the window should got down a bit at the lower rear corner...

Your wings are coming along very nicely! I´m very much looking forward to see how they progress! (to take some notes....)

Cheers,
Aleatorylamp
 

Attachments

  • Newnose2.jpg
    Newnose2.jpg
    39.9 KB · Views: 0
  • Newnose4.jpg
    Newnose4.jpg
    29.2 KB · Views: 0
  • Newnose6.jpg
    Newnose6.jpg
    37.4 KB · Views: 0
  • Newnose1a.jpg
    Newnose1a.jpg
    44.6 KB · Views: 0
Last edited:
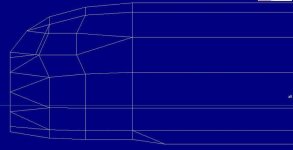
Orion Noses

Hello Aleatorylamp,

Your Orion's Nose actually looks quite good.
I like mine better for several reasons though:
The primary reason is that it is MINE and I spent a fair amount of time on it.
Another reason is that the flow of the Wire Frame on mine doesn't have any breaks in it.
Yet another reason is that the upper deck area in front of the Windows isn't really round on most aircraft with the C-130 being a notable exception. This round bottom, flat / semi-round top is a hard thing to capture.

There are a few not so good areas in my version as well:
The Fuselage / Nose Mid Line curve doesn't really look quite right.
The lines don't really flow all that well but with a limitation of a 12 sided Fuselage, it won't get much better.
The "metal work" under the side windows doesn't look the way I would want, but I also don't want to spend more polygons there either.
The top windows should extend further inward.

As others have commented: The project is never really finished; you just choose when to stop working on it.

I am also running into a slight mismatch on the fin and rudder between the drawings / specifications and photographs of the real aeroplanes.

- Ivan.
 

Attachments

  • Orion-NoseFrame.jpg
    Orion-NoseFrame.jpg
    38.3 KB · Views: 0
  • Orion-NoseFrameTop.jpg
    Orion-NoseFrameTop.jpg
    41.4 KB · Views: 0
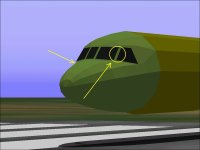
Canopy Frame Oddity

Hello Aleatorylamp,

I just noticed a minor Canopy Frame issue in your model.
Perhaps I am nitpicking here, but I notice it because it took me a while to work it out myself.

In the screenshot attached, you can see the highlighted frame.
This piece on the real aeroplane is not quite what I originally expected.
From the front, it appears to be nearly vertical.
From the side, it is more inclined from vertical than even the front canopy frame.
Normally we expect to see things that are more dome shaped, but this piece is not.

The other arrow in my screenshot points to a polygon that has vanished because of the shallow angle.
It is not ideal, but doesn't look too unsightly.

- Ivan.
 

Attachments

  • Orion-OddCanopyFrame.jpg
    Orion-OddCanopyFrame.jpg
    38.9 KB · Views: 0
Small changes, small improvements...

Hello Ivan,

I managed to improve some angles a bit by placing the windows onto the metal panels instead of between window spars as I had been experimenting. This way I could make window-frames without using any extra parts, and even save some to make an extra triangulation possible under the side windows.

Changes in angles of the spars depending on the viewing point were driving me crazy - I think it happens when the vertice is only correct in 2 of the 3 x-y-z viewing axes, one of them being out.

In some cases now the lines of the parts flow a little better, and I think I can do it better elsewhere too! Here are five screenshots showing the improvements. This manual cut-out adjustment is a bit difficult, but seems to be working.

Very interesting, the visit to the sub-sub-basement of Blood Hawk!

Well... Cheers,
Aleatorylamp
 

Attachments

  • change1.jpg
    change1.jpg
    33.9 KB · Views: 0
  • Change3.jpg
    Change3.jpg
    44.8 KB · Views: 0
Back
Top