Project Martin A-30 Baltimore

Hello Aleatorylamp.

From my point of view, it seems like you do not have enough resources left to build this model entirely in AF99.
Perhaps it is time to build pieces in AF99 and do the final assembly in SCASM?
I don't know if one of your requirements is to keep the project entirely within AF99 at least from the external view.
Most of my projects do have that requirement, but obviously there are a few things that AF99 cannot do.

I am debating on doing that with the somewhat incomplete but promising Lockheed Orion.
It seems a shame to just leave it incomplete though I have no idea how to go about building the AIR file for it.
Perhaps this will be a piston engine Orion?

- Ivan.
 
Getting the look!

Hello Ivan,
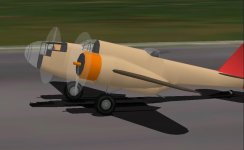
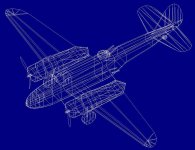
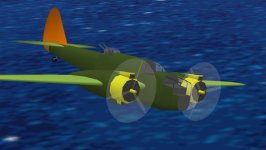
It´s progressing slowly, as you can see from the screenshots. The basic structure is done: fuselage, tail , wings, wingtips, engine nacelles, propellers, undercarriage, glass nose… Parts Count is at 132.4%, but there´s no crew yet.

What is still very problematic are the engine scoops. Structures with rectangular bulkheads are no good because their base bleeds through the top of the forward nacelle despite glue, but I still have a couple of components left over to make them.

Flaps, wheel doors and wells are not there yet, but they should be no problem.

Initially there was a lot of bleedthrough with the glass nose, but I got that sorted out quite well, even though as yet there are dark grey floor and wall panels covering the otherwise empty spaces, and the windw struts are still too thin and simplified. I turned away from the coloured transparencies and opted for the alpha one, which is softer. I still have to see about how to hollow out the glass nose better, without the inner stepped panelling.

Then, the main engine nacelle body has to be made into a component, because the shape looks terrible, especially at the back.


This will be my first model without moving control surfaces – and it is definitely less of a nightmare thanks to this, and looks a lot cleaner.

I hadn´t thought as yet of doing anything with SCASM except for the virtual cockpit, but now that you mention it, this would absolutely be a good candidate for some extra features which will be impossible without SCASM.

I was thinking of attaching the model and the AFX if you would like to have a look, so that we can discuss the SCASMing possibilities. Would you be so inclined?

As regards your Lockheed Orion, I´m sure it will come out very nicely because of the cleaner build resulting from lack of moving control surfaces. As regards the CFS engine .air file, I suppose it would be no problem for you to use the Turbo-Supercharger to emmulate the turbine section of the turboprop! The prop blades are there in CFS, which is better than the FS98 jet .air file, and the Power can be graduated correctly and not ad-libbed with a 2.5 times conversion to foot-pounds thrust...

Anyway, p
hylosophically speaking, a Turbo-supercharger does have a turbine inside, doesn´t it?… so at least it belongs to the family... Then it is justified! It counteracts power loss with altitude like a jet engine does, and there is a compressor section, and an impeller… so it´s all there, even if slightly different!!

The fact that CFS provides a single-stage, single-speed supercharger could propbably be good to make a nice, uniform emmulation of a turbo-prop´s performance curve as regards altitude.

Idea:
A possible engine candidate for the Orion´s 4600 Hp Allison T-56-A-14 Turboprop engine emmulation could be a hypothetical souped-up version of the 28-cyl, 4300 Hp Pratt&Whitney R-4360-51-VDT radial engine (155.8 cu.in. per cylinder, 6:7 to 1 compression ratio), with 2 more cylinders (3 rows of 10 cyl instead of 4 rows of 7), so that you could almost exactly get the 4600 Hp out... The Orion´s Props did 1020 rpm, so you could gear down the props to that, from an engine RPM of 2500 or 2800 RPM or so.

Such an .air file could be a nice experiment, don´t you think?


Ok then. More later!
Cheers for now!
Aleatorylamp
 

Attachments

  • Progress2.jpg
    Progress2.jpg
    37.3 KB · Views: 1
  • Progress5.jpg
    Progress5.jpg
    86.4 KB · Views: 1
Last edited:
Now with the scoops

Hello Ivan,
More progress, to see how it looks: I managed to fit in upper and lower scoops, provisionally as structures, just to see how they look, although they may have to stay like that because the only 4 components I have left over will be needed for mid and rear engine nacelles.

The lower scoops have Keystone Bulkheads for want of anything else, and the 4 scoops are done in forward and rear structures, conveniently grouped and glued, which works from most viewing angles.

The "look" is there! ...And, as parts count (as yet without crew) is only at 145.5%, once I get the nacelles into the 4 components, there should be enough free parts for crew heads.

Let´s see how it goes... even if the lower scoops aren´t round...

Then, I´d be very curious as to the results of how a CFS1 Turbo-Supercharger driven engine can be turned into a CFS1 Turboprop! If it works, it would deserve a medal!
Cheers,
Aleatorylamp
 

Attachments

  • Scoops1.jpg
    Scoops1.jpg
    45.8 KB · Views: 0
  • Scoops3.jpg
    Scoops3.jpg
    34.8 KB · Views: 0
Hello Aleatorylamp,

Your project is looking like it is coming along just fine thus far.

I am willing to take a look at your project, but at the moment, I can't promise any response time.
My mom is not doing well and there are other health problems in the family as well, so they must take priority.
My projects are also getting no attention at the moment.

The difference between working on a project and checking out the model and just responding to flight performance tuning is that I know the tuning steps well enough and have data on this laptop. The model examination requires CFS installed and SCASM and of course AF99.
None of these are installed on my laptop.

- Ivan.
 
Helo Ivan,
Thank you for your motivating comments on the Baltimore project!
There is of course no hurry for any SCASMing assitance or model testing, and we can come back to that at a later point when you have some more time on your hands.
Meanwhile there´s plenty on the model that I still have to do.
I do hope your Mom and other health issues you mention get better. Thanks, and good luck!
Cheers,
Aleatorylamp
 
Hello all,
The Baltimore project is still on the conveyor belt, no fear!

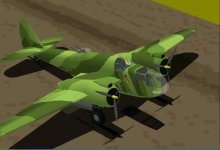
Here´s a picture of the also as yet untextured MkV version (in Khakhi greens instead of the MkIIa´s Khakhi browns) with the better engines. The higher performance comes through very noticeably in the .air file!

Do you remember the "Matchbox" plastic model kits that came with their plastic parts in different colours, allowing quite attractive un-painted models to be built even by modellers who were too lazy to paint them properly?

I´m currently trying to figure out the best way of getting the glass nose better, without the inside steps. Hollowing it out completely involves putting parts into Nose left/right, but I wonder if there will be display interferences with props and engines that are also grouped there.

Cheers,
Aleatorylamp
 

Attachments

  • Baltimore MkV model.jpg
    Baltimore MkV model.jpg
    42.6 KB · Views: 0
Hello Ivan, hello all!
The completely hollow step-less nose was much easier and straight forward to make than I had feared, and now looks correct, except for all the window-struts that would really have to be a little broader, and possibly more numerous.
Next step is getting the wheel-doors right. This is always a bit tricky because of interferences with landing gear and nacelle display, depending on the grouping of parts - and then the wheel wells, which also add to the complication.
Here´s a picture showing the improved nose section.
Cheers,
Aleatorylamp
 

Attachments

  • Glass-nose.jpg
    Glass-nose.jpg
    40.9 KB · Views: 0
Back on the conveyor belt!

Hello Folks!

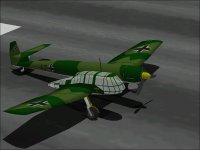
Now that I´ve managed to correct the bugs on the He-162 jet, I can get my teeth back into the Baltimores. It always happens, doesn´t it? You think it´s going to be an in-between quickie to get an already done FS98 plane ready for CFS1, and it turns out to be a major job with lengthy modifications and takes several months instead of a week. But... this way there are more planes getting uploaded. If you think too much about whether or not to stick a quick in-between in, maybe you don´t do it and it never gets done.

So, fortunately the two Baltimores back in production! I had already managed to get them to fly rather nicely with Ivan´s help, and the difference in power is noticeable! Now I´m putting on preliminary textures.

A quick summary:
There will be the earlier Mk.III with desert livery in brown-light brown with the normal engines, and the later Mk.V with the souped up powerfull engines, in khakhi dark/light green. I´m just adapting the camouflage pattern, and there will be screenshots to see in a few days.


Then, as soon as I finish the wheel-doors and the underpart of the nacelles, that still need the panels to match the underside of the wing, I´ll have a first version ready to post as a preview on the thread for any of you who wish to have a closer look and try them out.

There will still be a few issues on the transparent glass canopy in the front and on the rear turret, but they´re not too bad. I´ll tackle that later, and they probably won´t need any complicated SCASMing.

The nose is back on the grindstone!
Cheers,
Aleatorylamp
 
Baltimore Piccys now with textures

Hello!
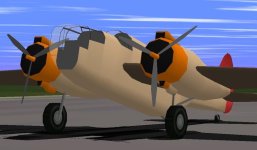
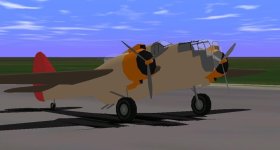
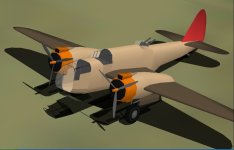
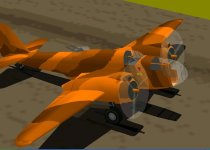
As promised, here´s a piccy of the Mark IIIA in provisional desert colour scheme, and another of the Mark V in khakhi green/green. Cabin bleeds with struts/pilot and then engine intakes/nacelles are not visible because of the chosen viewing angle, but will have to be seen to soon. However, we´ll get there in the end!

I´ll just finish off the underside of the nacelles these days, and then upload provisional appetizer models of both aircraft.

Slowly but surely - sans hâte ni pause...
"Sin prisas ni pausas..." was the sales slogan for the 2-cylinder, air cooled Citroen 2CV car. I had one, they were great! Especially because of their outrageous suspension that made it impossible to overturn the car, no matter how hard you yanked the wheel in a sharp bend.

Cheers,
Aleatorylamp
 

Attachments

  • Mk3.jpg
    Mk3.jpg
    47.7 KB · Views: 0
  • MkV.jpg
    MkV.jpg
    45.8 KB · Views: 0
Hello Aleatorylamp,

It obviously looks much better textured than not.

A couple issues I can see are:
1. The Framing at the Nose compartment does not appear to share the same texture as the rest of the Fuselage.
I would have expected a darker shade to continue on to the frame if it was on the adjacent area of the Fuselage

2. The camouflage pattern does not appear to flow from one section to the next.
I would expect the demarcation lines between colours to flow across wing / fuselage / fin joints.
This part is always a tough one for me because the scaling is usually different between the different sections.

3. The colours look a bit strange but then again, I don't really know what they should be.

Your simple rework (!) of the Heinkel 162 is very similar to what I am running into with a "simple" rework of a Blohm & Voss BV 141B
What is ironic is that this already has been released once for CFS and this was just a "slight" upgrade that has spread to everything and still is not done yet.
Just as you found with your Heinkel 162, I had no idea that this little upgrade would get so complicated..
Perhaps the BV 141B is worthy of its own thread because it looks like it might run for a while.

- Ivan.
 
Hello Ivan,
Thanks for your feedback! I was fitting the textures to the window struts - some were still just coloured.
Yes, once textures come onto the model, it gives a better appreciation of what´s actually going on. Textures are still "in the making", and I´m matching the different parts.

Judging by photos, I thought the tan looked more orangy, but the CFS orange is a bit too strong, so I´ll revert to tan for the desert colour scheme. Then, the green khakhi is perhaps too light, so I´ll darken it, which should not be too difficult.


The main reason for posting the screenshots was actually for a bit of self-discipline. That way I got myself moving with this model again, because the difficult part is where I´m at now: The engine nacelles - always the problem on twins!
So, the textures, though rather tedious to get right, are not a real problem...

The forward nacelles are in Nose left/right. With so many different elements connected to and portruding from them, bleeds are the issue.I tried separating the lower scoops into Gear left/right of Lower wing left/right, but it was no good as all.

When I separated the nacelle structures into top and bottom halves, it became easier, and for the moment, the best sequence (using left and right nose/wing templates) that works seems to be as follows.

Family: Nose left/right:
1: spinner - glue - propeller - glue - black engine circle.
2: upper air intake - glue - scoop - glue forward nacelle to half structure.
3: lower air intake - glue - lower scoop - forward nacelle bottom half structure.

Then, the wing will have upper and lower nacelle components, so that I can glue the gear-doors and gear wells to the lower components in Low Wing left/right, rather than have a whole component for wing part of the nacelle.

Blohm & Voss 141:
I remember you e-mailed me a work-in-progress copy of your model (as yet with no textures), and I just had another look at it.
It is certainly a very neat upgrade, the one you are doing. It looks more like a complete rebuild, rather, and very cleanly done.
Definitely worth while the effort, if I may say so, and I can only encourage you to go on with it! Precise workmanship indeed!

Even without textures it looks great! I´m including a screenshot of it, if I may.

Funny how it always catches us - we think it´s going to be a quick improvement, and modifications and improvements never cease!


Anyway, hopefully I´ll be successful enough with the nacelles so as to post an appetizer model of the 2 Baltimores.
I find that interim posts help to keep me on my toes!
Cheers,
Aleatorylamp
 
Baltimore´s Flaps?

Hello Smilo, Hello Ivan,

I wonder if either of you could help me out with the following - maybe Smilo would be the one as he seems to have more general info on this spedific model.

I´m trying to decipher what kind of flaps - if any - were on the Martin A30 Baltimore. I can´t find any photos showing them deployed.
Possibly they were only under the wing, like on the DC-3. In all this time I haven´t been able to get any reliable reference.
On plastic model close-ups there don´t even seem to be any marks on the underside either. Maybe there weren´t any?

I´ve finally finished the engine nacelles and I´m on 149.6 % parts! It´s looking good. I already had to reduce some parts on the tail fin curvature to keep within the limits, but it´s going fine. The pilot´s in too, so his parts are OK!

Cheers,
Aleatorylamp
 
all of my baltimore information is gone.
a long winded explanation won't bring it back.
my apologies for not being able to help.
 
Hello Smilo,

Oh well... not to worry. I´ll continue searching about the flaps. I´ve just found two pics of the Maryland 167 and it seems to have normal flaps. The Baltimore 187 reportedly inherited those wings, so the answer should be quite obvious, but it is very strange that neither do any of the plastic kit model diagrams nor do any photos of any Baltimores show any flaps!

At the moment I´m quite at a loss as regards what should be done about this issue. Well, we´ll see!

Right now I´m fitting a more correct English Mark V livery camouflage texture in dark-green and brown camo colours.
There´s only two colours, so it´s not too complicated!
Then, for the underside, I there are two options: The slightly garish CFS1 light-blue, or perhaps the rather more discrete light grey. I think I´ll use the grey for the Mk.V and then the light blue for the underside of the light-brown/dark-brown desert colour scheme.

At any rate, the model seems to be progressing quite nicely!

Have a nice Sunday!
Cheers,
Aleatorylamp
 
Baltimore Flaps

Hello Aleatorylamp, Smilo,

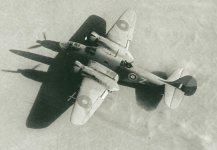
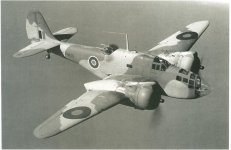
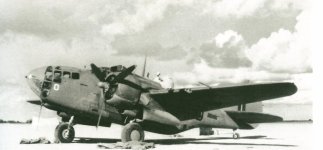
It appears to me that the Baltimore had either plain flaps or slotted flaps from the photographs I found.
There is actually a pretty good photograph of the Maryland with flaps down on the cover of Aircraft Profile 232 but here are some specifically of the Baltimore.
I found a few more, but this should be enough to get a pretty good idea of how they were configured.

- Ivan.
 

Attachments

  • BaltimoreLHigh-Flaps.jpg
    BaltimoreLHigh-Flaps.jpg
    60.9 KB · Views: 0
  • BaltimoreRFHigh-Flaps.jpg
    BaltimoreRFHigh-Flaps.jpg
    62.8 KB · Views: 0
  • BaltimoreLF-Flaps.jpg
    BaltimoreLF-Flaps.jpg
    45.3 KB · Views: 0
Hello Ivan,
That´s very good of you! I hadn´t seen these three photos of the baltimore. From all the ones I´d seen except for the ones of the Maryland, it was difficult to decide whether the lines were just metal panels or in effect flaps.
Thank you very much! OK, so there´s no doubt and it´s reasonably clear how they work!
Cheers,
Aleatorylamp
 
BV-141B Rework

Hello Aleatorylamp,

The version of the BV-141B that you have is actually relatively recent..
The original release was probably a bit over 10 years ago.
It looks a bit better these days with some paint.

As you did with your Heinkel 162, I thought it would only be a simple rework
By the time I am done, there won't be much that will remain original
Perhaps I should start a new thread about this aeroplane....

- Ivan.
 

Attachments

  • BV141B_LFGHigh.jpg
    BV141B_LFGHigh.jpg
    44.8 KB · Views: 0
Hello Ivan,
The textrures make it look great, and it does look almost finished at a first glance.
Of course, a new thread would depend on the amount of information posted, and in such a case, it would be interesting to follow.
Anyway, it would also depend on the time you have at hand for that!
Cheers,
Aleatorylamp
 
Computer disaster fixed

Hello Ivan hello all,

After having inadvertedly exceeded parts count by 2 parts and having tried to animate the model, Aircraft Animator has ceased to work, despite re-installation and surprisingly enough, despite complete re-formatting of the whole computer.

Now I had corrected the Baltimore AF99 build and it works, but doesn´t animate. AA doesn´t even start - even for another model. So I went to my fall-back Pentium 4 tower, where AA works, but immediately after having tried to animate the Baltimore file, that blew too! So this looks quite uncanny.

Obviously there must be an internal error in the Baltimore AF99 model that completely messes up AA, so much in fact, that it then gives a windows error.

Then, thinking a bit further, obviously it´s the Baltimore Aircraft model that is the culprit, so I deleted it from the CFS1 aircraft directory. Now Aircraft Animator can´t look for it, because it scans the aircraft files upon start-up, and now EVERYTHING WORKS FINE!


I could have saved myself the job of re-formatting the whole computer... but fortunately, I can resume activities!
Cheers,
Aleatorylamp
 
Baltimore Mk.V

Hello Folks!

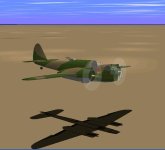
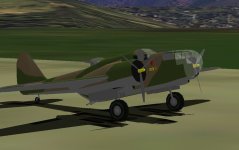
As a pre-view model, an initial version of the Martin A30 Baltimore Mk.V (with 2x1700 Hp 14cyl Wright R-2600-29 radials) is ready. I have given it a green-brown camouflage colour scheme - as yet without military markings.

It carries 6x250 lb bombs in the DP files, which was the usual load, although maximum was 4x500 lb bombs, and has lots of machineguns: 4 on the wings, firing forwards, two in the dorsal turret firing and two in the belly, all firing backwards.

Here is the model attached to this post (Baltimore Mk5.zip), in its current state, for those who would like to have a look and try it out, and the AFX for those who like to poke around inside a little.

The object of course, is to see if there are any flaws that can be corrected or at least improve.
As usual, any criticism and suggestions will be very welcome.

At the moment I´m adjusting a desert colour scheme for the Baltimore Mk.III version, which was almost the same, but had 2x1660 hp 14-cyl Wright R-2600-13 engines.

Cheers,
Aleatorylamp
 

Attachments

  • Baltimore Screenshot2.jpg
    Baltimore Screenshot2.jpg
    32 KB · Views: 0
  • Baltimore Screenshot4.jpg
    Baltimore Screenshot4.jpg
    48.5 KB · Views: 0
Back
Top