This is a better explanation:
C. Rockets.
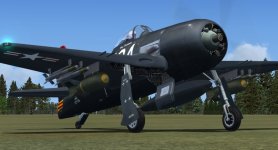
(1) GENERAL. - Prtovision is made for installing four MK 9 rocket pylons on the under side of the center section, two left and two right, adjacent to the folding axis. Four AR HVAR's can be installed on these pylons. The rockets are armed and fired only by electrical control. Rockets cannot be released in the safe condition.
(2) TO FIRE ROCKETS.
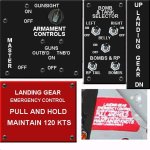
(a) RP - Bombs and Drop Tanks selector switch - RP (early models).
(b) Rockets are set for impact burst by putting the arming switch tp "NOSE and TAIL ARMING", and delayed burst by turning the arming switch to :TAIL ARMING".
(c) Number of rockets to be fired and sequence is controlled by setting the MK 1 Rocket Selector Switch mounted on the fuel control panel.
(d) Armament master switch - "ON".
(e) Press bomb button on the stick grip (early models). Press rocket button on stick grip (later models).
WARNING - Do NOT push SALVO PRESET as the instantaneous firing
of four rockets places an excessive strain on the wings.
(3) F8F-2 airplanes are equipped with a MK 2 rocket selector switch which permits firing rockets in singles or pairs. A three trigger switch provides a separate trigger for rockets and eliminates the use of teh bpmb switch to fire rockets.
Here is a URL for the F8F Pilot's Manual for your info as needed:
http://www.avialogs.com/en/aircraft...8f-1-b-n-and-f8f-2-n-p-aircraft.html#download
")
 See avatar!