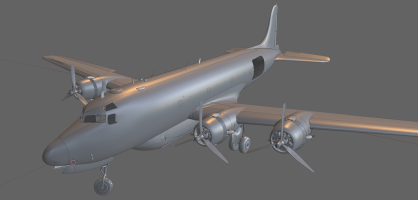
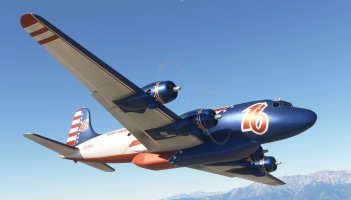
DC-4 Skymaster

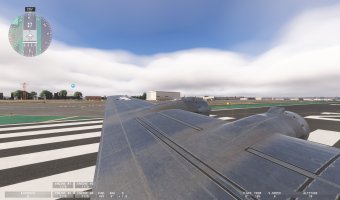
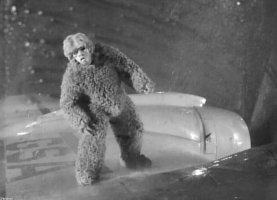
Maybe it's a NAVY thing?
View attachment 197459
Title 4 of the United States Code, also known as the U.S. Flag Code, established advisory guidelines for how the American flag should be handled and displayed. While not mandatory, the code includes specific recommendations for flags on vehicles. According to Lane, the code “states that when the flag is displayed on a moving vehicle—like an airplane—it should appear as though it’s flying in the wind as the vehicle moves forward.”

More info here
 
Last edited:
@gray eagle,
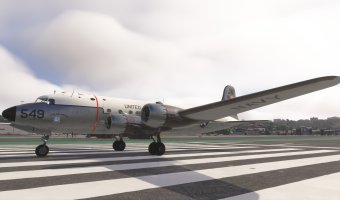
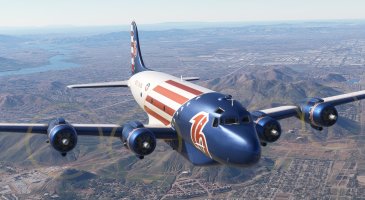
Searching on internet I have find some picture of this R5D [56-549] VR-24 "City of London" but impossible to obtain a good view of the front logo under the label City of London.

However, I found this 56-549 (in color) but with an older/new paint (I suppose) which doesn't show the famous logo:

View attachment 197345

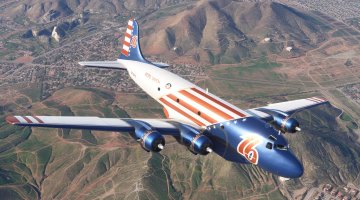
But I also find an other VR-24 [immat 50-863] which can be a good compromise, what do you think ?

View attachment 197346

For the aircrafts from VR-24, I have this link: https://www.vr-24.org/Aircraft_photo_pages/Page_two_R5D_photos.htm
They managed to get the flag on the right side in correct.
 
Hello,

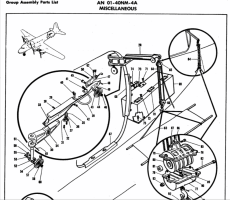
On some models of C-54 (the R5D but also on some C-54 with 8 tanks in the wings), Douglas added a reserve oil tank of 50 gallons to allow to supplement the oil tanks of the nacelles (in case of high consumption) if necessary during long flights.

On the manual of the R5D and C-54E there is also a diagram of this equipment. Here a photo of this oil tank which was located on the right side just behind the front door.

View attachment 196096

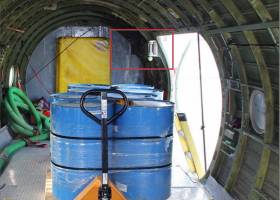
Here the implementation in the C-54 interior model :

View attachment 196097

Normally on the right side of this bulk, next to the Warning label (in black on the screen), there are 2 switches:
- one serves as a breaker and
- the other powers the electric pump
- the yellow selector allows him to choose the oil tank to be supplemented from this reserve.

The 4 oil tanks are declared in the "FUEL_SYSTEM" section as additional fuel tanks but are not used for engine power, which allows them to be viewed in the FS interface and to be able to change their level before starting the flight.

Since I wanted to add the "Engine Enhanced" add-on that I had developed for the Stearman, an add-on that manages oil consumption, this will allow me to add a few lines of code that will allow the plane to be flown once it is in service.automatic to move around the cargo cabin and add oil if needed. Of course, I will need x4 the XML code to adapt this model to the DC-4.

To simplify the process a bit, we will need:
- select the tank to be completed
- click on the switch that controls the pump to add a few gallons (value still to be determined by experiment) until the tank is at the correct value.

PS: On the main panel, 4 red lights are placed near the engines gauges, that light up when one of the oil tanks no longer contains more than half the maximum capacity.
Yes, I forgot to model the funnel and the two rags :)

The cargo interior currently in the v0.55 version (next version scheduled for next week if everything goes well) :

View attachment 196104
 
Hello,

On some models of C-54 (the R5D but also on some C-54 with 8 tanks in the wings), Douglas added a reserve oil tank of 50 gallons to allow to supplement the oil tanks of the nacelles (in case of high consumption) if necessary during long flights.

On the manual of the R5D and C-54E there is also a diagram of this equipment. Here a photo of this oil tank which was located on the right side just behind the front door.

View attachment 196096

Here the implementation in the C-54 interior model :

View attachment 196097

Normally on the right side of this bulk, next to the Warning label (in black on the screen), there are 2 switches:
- one serves as a breaker and
- the other powers the electric pump
- the yellow selector allows him to choose the oil tank to be supplemented from this reserve.

The 4 oil tanks are declared in the "FUEL_SYSTEM" section as additional fuel tanks but are not used for engine power, which allows them to be viewed in the FS interface and to be able to change their level before starting the flight.

Since I wanted to add the "Engine Enhanced" add-on that I had developed for the Stearman, an add-on that manages oil consumption, this will allow me to add a few lines of code that will allow the plane to be flown once it is in service.automatic to move around the cargo cabin and add oil if needed. Of course, I will need x4 the XML code to adapt this model to the DC-4.

To simplify the process a bit, we will need:
- select the tank to be completed
- click on the switch that controls the pump to add a few gallons (value still to be determined by experiment) until the tank is at the correct value.

PS: On the main panel, 4 red lights are placed near the engines gauges, that light up when one of the oil tanks no longer contains more than half the maximum capacity.
Yes, I forgot to model the funnel and the two rags :)

The cargo interior currently in the v0.55 version (next version scheduled for next week if everything goes well) :

View attachment 196104
I found that tank.

tank.jpg
 
most likely probability is a civilian restoration paint - noting also the position of the national insignia under the right wing is cocked and looking at the word 'NAVY' on the fuselage it looks like N AV Y with the spacing all wrong.
Maybe accept that it's real ;-) It was stationed down under as it seems, could explain things...

From 1966:
1788886720459.png
 
Return to DC-4 developments ...
Since the beginning of the week, I have started reviewing the textures and to begin this step, I was interested in the few elements I recently added to the C-54 model regarding the loading cabin area, that is, the backup oil tank assembly, its engine, pipes, controls as well as the two rescue vests ("Mae West" / https://www.blightymilitaria.com/en...-west-life-preserver---raf-history/prod_55455) and a bag containing an emergency inflatable boat.

For this work, I wanted to try UcuPaint (plugin for Blender) that FlakNine was talking about and the first videos I watched did not convince me because they seemed to be only on objects alone and not on groups of objects.
Most of the time, when creating a texture set, we try to group several objects on the same texture to avoid wasting space and above all to optimize graphic calls. (what is sometimes referred to as drawcalls, even though this is not entirely accurate).

In summary, it seemed necessary to create a texture by object and then with another plugin to "bake" these many textures within the same texture (baking: operation where Blender by computing create one or several textures) : which is quite cumbersome as a process.

In the end, I managed to find ONE or rather THE video that brought me the solution to do everything via UcuPaint.
In this video about creating a texture for a jeep, it consists of several elements: wheels, body, steering wheel; seats, etc. We can see by which functions integrated into UcuPaint the author masks the various parts to achieve his goal ... which is also ours.


PS: An interesting point is starting at minute 14, about how the author uses UcuPaint to create details accurately on the normal map.
This method allows you to create rivets and lines of structures in a childishly easy and very fast way... the only thing is to have the Blender file.

For this, I always extract from my Blender work file the objects I want to associate with the same set of textures and save them in a single WaveFront/OBJ file. Then I work on this OBJ file with the version of Blender I want, usually Blender 4.2.LTS with PBRPainter.

This time I installed UcuPaint 2.4.9 on my working version of Blender v3.6.23 to check the feasibility: it works perfectly, which for those who are not comfortable with Blender, allows you to do everything with a single version.

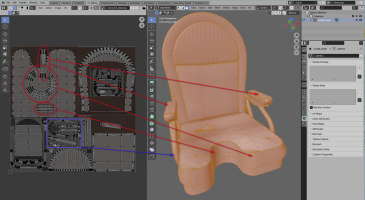
All the objects are mapped on a simple UV map : the highlight parts on the left side of the GUI are the two life jackets.
1789049515550.png

The same objects loaded in Blender with UcuPaint started (on the center) with two layers applied on each object
1789049265910.png

In the end, with the texture set created, I will reintegrate the 3 or 4 files (*.albd, *.com, *.nrm, *.emis) into the global file to check the result.
 
Last edited:
Thanks for the video link. I tried using ucupaint a couple of years ago, but didn't get very far with it. I am very interested in learning how to create more realistic paints, which means I have to learn how to apply occlusion...
 
This video is part of a set of 5 others that details :
- introduction for the tools
- modeling (1),
- modeling (2)
- UV map creation and
- texturing with UcuPaint

It was only yesterday that I really started to "play" with Ucupaint, this morning I started again quietly and I understood how to select objects or parts to insert them into a "Layer Group".

The method is as follows:
- first in UcuPaint you click on the Layer Group
- In 3D Viewport, in Edit mode, you click on a polygon that turns into an over-brightness,
- then we press L to select the other polygons of the desired part,
- By keeping the SHIFT key pressed, we keep these selections,
- we move and click on another polygon from another part,
- there, release the SHIFT key (important) and press L to select the second part then press SHIFT again to store both selections
- and so on.

In the end, to "move theses selections into the Layer Group, we go back to Texture Paint mode, we check as in the video that on the T menu we have selected the "Fill" tool, and finally we click on one of the selected parts : to see if it worked, you need to switch back to Objects mode.

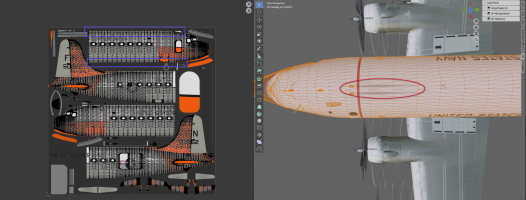
Here the result of 1 hour of work for this morning : oil tank is colored with a grunge layer, attachs are in yellow with some rust, tube are with same "color" than the tank, bolts are in blue and I have begin to texture my life boat package ...

1789113722181.png

PS: On this screenshot I have use a HDRi image en background to highlight my objects and send more light on it.
1789124794239.png

In the "Preview Mode", the choice of different colors are not definitive and you could select a layer and move your slider to obtain a better result at any time.

After some hours of works and learning with this video, I am happy of the result ... in Blender: I even managed quite easily to create an ExtraNormale to add rivets on the yellow fastenings of the oil tank.

1789119832599.png

Now, the final step which consist in backing all this stuff in a set of PBR textures. If it is OK it will fun, if not ... :(
...
The bake take less than 1 mn and the result seems OK in a first stage, but no metallic texture appear in the result :mad:

By following the video point by point to build my textures, no metallic-type texture or roughness is implicitly configured, but despite everything, the final result does indeed include a rugosity due to the "grunge_01.png" file introduced for the oil tank, but no metallic texture is present.

While watching the video again, the author strongly advises to read a blog post from another creator: https://passivestar.xyz/posts/texturing-in-blender-with-ucupaint ...
After consulting this article, which proposes to texture a gas bottle, we realize that the Jeep video did not address a very important point: the possibility of adding metal and roughtness channels on a new layers: this can be done by changing Layer Color to Custom Value on them.

1789123937088.png
With this new option, you can create others channels on your layers and obtain that you desire. This will be my practical work for this afternoon, after a good lunch.

The better to understand this is to read with attention this article (24 pages ! ) which is a very good complement to this video.
Good reading and learning of Ucupaint
 
Last edited:
Back
Top