P-47 Progress Thread

No, no, it only takes 40 minutes to put one together...


We don't often think about how the finished, and flight tested aircraft that came off the assembly lines in America, had to be taken apart again for shipment overseas. That's part of the reason why we immediately scrapped so many that survived the war instead of shipping them home again.
 
Awesome video Andy ! One off topic question. Frosty, where did you get the steel plate runways for CFS3 ? Am i missing something or overlooked a addon ?
 
Looks superb mate nice work, for the complete noob (yep me) do you have to do all the rivets for each skin or do you just skin over the top and the rivets show through?

Mick

My method is working with layers in a paint program; separate layers for the rivets, panel lines, squadron codes/stencils, paint job, weathering etc. This gives good control over the appearance, opacity, intensity etc. of each layer and makes it possible to use the same basic layout to create multiple textures for the same 3D model. So once all rivets, panel lines and other basics are painted on their respective layers, you essentially have a paint template. Now it is possible to create multiple 'skins' by only changing (repainting) the necessary layers (squadron codes, colours, weathering etc) without having to redo the rivets, panel lines etc. The order and opacity of the respective layers will make the rivets 'show through' - if that answers your question.

A complex texture template can have dozens of layers and that's just the main texture (_t.dds). The specular/reflective texture (_r.dds / _s.dds) is derived from this template and is basically an adjusted greyscale version of the _t.dds texture where lighter means more specular/reflective and darker gives a more matte/dull effect. Again, having items on separate layers gives better control over the final result. Then you could create a winter version of your skin (_w.dds, to depict your model in winter camo or as a dirtier/muddier version of the _t.dds texture to reflect winter conditions in the theater of operations of your choice). And finally, with the use of Ankor's shaders, there's also a bump (or normal) map to create which adds surface detail effects through game engine's environmental lighting (eg. skin buckling, panel thickness differences, material texture etc.). Texture-wise, I should not forget the .mos file, which is used to display effects like bullet holes and other damage effects. That all is a lot of work! (And that is why it takes so long to finish this project. Learning 3D modelling on the fly doesn't help either :biggrin-new:).

There are some very good painters frequenting this forum but IMHO the absolute master of the trade is Bravo/4. If you have specific questions about painting that I don't know the answer to, he might be the go-to person.
 
No, no, it only takes 40 minutes to put one together...
...
We don't often think about how the finished, and flight tested aircraft that came off the assembly lines in America, had to be taken apart again for shipment overseas. That's part of the reason why we immediately scrapped so many that survived the war instead of shipping them home again.

No, no, no, much longer - mine didn't come in a crate and I am just by myself :biggrin-new:. Great video and ingenious use of the packing material!

Awesome video Andy ! One off topic question. Frosty, where did you get the steel plate runways for CFS3 ? Am i missing something or overlooked a addon ?

I created the PSP myself. Not published yet because I have to redo the airfield textures underneath the ALGs first (the scaling of the airfields layouts is incorrect). I got a bit sidetracked with my airfield work by a certain aircraft model...
 
Lol - you just wait until my eight tons of vertices fall upon your puny Mk.V!! :biggrin-new::playful:

"Fall" - yep, according to the ex-Eagle Squadron pilots who traded their Mk.Vs for the jug, that's about all it could do!:playful:

Seriously though, that is a gorgeous looking model.
 
My method is working with layers in a paint program; separate layers for the rivets, panel lines, squadron codes/stencils, paint job, weathering etc. This gives good control over the appearance, opacity, intensity etc. of each layer and makes it possible to use the same basic layout to create multiple textures for the same 3D model. So once all rivets, panel lines and other basics are painted on their respective layers, you essentially have a paint template. Now it is possible to create multiple 'skins' by only changing (repainting) the necessary layers (squadron codes, colours, weathering etc) without having to redo the rivets, panel lines etc. The order and opacity of the respective layers will make the rivets 'show through' - if that answers your question.

A complex texture template can have dozens of layers and that's just the main texture (_t.dds). The specular/reflective texture (_r.dds / _s.dds) is derived from this template and is basically an adjusted greyscale version of the _t.dds texture where lighter means more specular/reflective and darker gives a more matte/dull effect. Again, having items on separate layers gives better control over the final result. Then you could create a winter version of your skin (_w.dds, to depict your model in winter camo or as a dirtier/muddier version of the _t.dds texture to reflect winter conditions in the theater of operations of your choice). And finally, with the use of Ankor's shaders, there's also a bump (or normal) map to create which adds surface detail effects through game engine's environmental lighting (eg. skin buckling, panel thickness differences, material texture etc.). Texture-wise, I should not forget the .mos file, which is used to display effects like bullet holes and other damage effects. That all is a lot of work! (And that is why it takes so long to finish this project. Learning 3D modelling on the fly doesn't help either :biggrin-new:).

There are some very good painters frequenting this forum but IMHO the absolute master of the trade is Bravo/4. If you have specific questions about painting that I don't know the answer to, he might be the go-to person.

Frosty, thanks for the detailed answer, I always wondered how it was done.
All of you gentlemen who can do this sort of work have my respect and your right it really does explain how these sort of projects are so time consuming to undertake.
Well done mate thanks :ernaehrung004:

PS Great video Major thanks for sharing

Mick
 
GIMP is a freeware Photoshop-like program, so I am not keeping you from making a start, LOL.... You probably do need a program to convert your textures from .bmp to the native CFS3 .dds format. I don't know if there is a plugin for GIMP that does that. DXTBmp is the freeware converter that I use.
 
"Fall" - yep, according to the ex-Eagle Squadron pilots who traded their Mk.Vs for the jug, that's about all it could do!:playful: Seriously though, that is a gorgeous looking model.
I knew that whatever my reaction was, you would come with a witty reply. Well done, sir! :-D
 
Thank you Frosty for all you effort and passion. My favorite Allied aircraft ,along with the Hellcat, of WW II. Sorry Spitfire fans ! Regards,Scott
 
Absolutely marvelous read. A ton of info and excellent stories ! No wonder it is one of my all time favorite fighter of WW II. I don't care what others say about the "Jug" but i love her ! Thanks Andy for sharing this. Regards,Scott
 
Frosty, did you do the FM or has someone else ? Regards,Scott
No, that's beyond my capabilities, I just do the modeling; I used a stock 3us_p_47d_40 airfile from my ETO install for now. So that is AvHistory v2.xx series. Hopefully a certain person is willing to give it 'the' treatment...
 
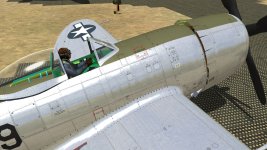
As the riveting is nearing completion, I felt a little experimenting with bump mapping was due:
 

Attachments

  • Teaser36.jpg
    Teaser36.jpg
    404.5 KB · Views: 109
Really great work Joost! Now you are getting the hang of it, I can just see you doing a B17 with all the correct rivets and bump mapped!:biggrin-new::biggrin-new:
 
Back
Top