Learning AD2K

Hello Smilo,
Glad you´re pleased too!
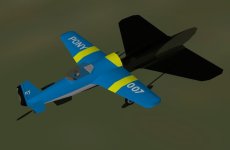
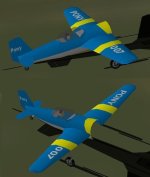
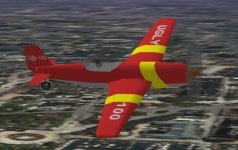
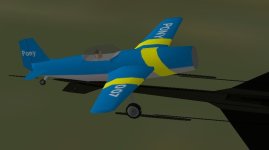
Correct! The Pony is just my build of the Ugly100, blue instead of red, renamed with a better name - a little Mustang because of the nice shape. Maybe "FirePony" would be more fitting - a cross between a Spitfire and a Mustang.


What I find difficult is making the Model Editor use the correct bulkhead and texture support templates, especially if tied. Sometimes the defined template is unrecognizable. At the moment the wing textures are distorted. I´ve made the wing texture support templates several times but it won´t accept them. Then, although both wing bitmaps in the working directory are blue, the left wing is red - the original Ugly100 bitmap!! WTF??

Eventually I´ll get it sorted out, no hassle!
Great stuff! I´m glad I got my teeth into this.

Cheers,
Aleatorylamp
 
just my opinion, so take it or leave it.
if it was me, i would worry less
about textures and texture mapping,
than i would about everything else.
ie, building parts, how templates work,
moving parts, and sequencing.
in my opinion, making it pretty with paint
is last on the list....but, that's my opinion.

i am still unable to compile the 3DM
we were talking about earlier.
i went through every sub assembly,
but, was unable to find a problem.
i finally wised up and quit looking.
i opened the version 1b 3DM
and was able to compile, no problem.
the first thing i noticed ends as a question,
you do understand why there are so many bleeds, right?

i know it's getting late for you,
but, i hope you can answer my question.
if not, sleep well.
 
Hello Smilo,
Can´t sleep at the moment...
The failure to compile may be file corruption while sending? I´ll try and e-mail the CubeFly to you.

Yes, I understand that it´s full of bleeds because there is only one sequence written inside the prop/spinner, and Fore-Body/Prop works with no bleeds because the prop is first on the main code page listing.

Regarding the Pony textures distortion on the wings: I´d got mixed up with defining top and side! Silly - so that went well.

On the rudder and the head there´s parts of the texture that shouldn´t be on though, even though I selected the correct options on the bitmaps. Perhaps I can adjust the texture support template better.

Here´s a screenshot of the as yet noseless Pony. There´s a glitch to be seen in the aft cabin floor too - template tie problem!

Cheers,
Aleatorylamp
 

Attachments

  • noseless.jpg
    noseless.jpg
    22.4 KB · Views: 0
no need to send the cubefly 3dm,
unless, you want practice with seals and jump planes.
speaking of which, that's what i've been doing.
have currently done, pilot and canopy to dice.
then, left and right wings to dice.
the prop/spinner group should be easy.

no, i've only added the prop animation.
actually, you did.
haven't done the gear or ailerons, yet.

about your troublesome floor panel,
have you considered manually adding it,
instead of using the template tie process?

ps...your model is looking very good.
 
Hello Smilo,
Thank you for your good words. The Pony-come-Ugly100 does have a nice shape, doesn´t it?

CubeFly:
Yes, Sir. Please Sir, can you post your CubeFly file as soon as you have added something so that I can practise? :onthego: Sounds like a school classroom! :biggrin-new:, doesn´t it?
Even if it doesn´t compile I can copy the sequences to see how they work. If you have something already, I could test it and tell you how it works.

Pony:
...adding a separate floor panel... I don´t know if I can do that yet. Learning to copy and alter is different from learning to produce.... No, I´m just joking.
I know where the problem is, and I can correct the floor panel - I hadn´t seen it before the screenshot, as it was the first time I noticed after correcting the wrongly-flipped textures.

OK then! Cheers,
Aleatorylamp
 
well, that should teach me to look
at the site before i go to bed.
okay, here you go...the cubefly 3DM,
prop/spinner, center fuselage, wings,
and canopy/pilot all sequenced with jump planes.
as of yet, animated gear and ailerons are not added.
same goes for the tail section.
i'll look into that tomorrow.

...and yes, sir, it is like a classroom,
with, at least, two students
working off each other.
it's pretty fun stuff,
if you ask me.

i haven't been up this late since new years.
good night, enjoy
 

Attachments

  • cubefly0221.zip
    8.4 KB · Views: 0
Hello Smilo,
Definitely! Teamwork is most fun.

Last night I kept checking my e-mail and the thread and got to bed at 2 in the morning... Like with you now! Here it´s 10.20 in the morning!

Thanks for your CubeFly sequence WIP! I´ll check it out right away.
Update: I just checked it out, and the body+pilot+canopy+wings+prop build is working perfectly.
Now I´ll study it, to understand exactly how the sequence flows.
The tail is missing, (of course), as on my file when I tried to put in some sequencing,
but as soon as you deal with the tail, it will come back.

With the Popny, I´ve managed to fix the cabin floor - after fixing the panels involved (floor and side panels) I thought about it: I had had to untie them first! So... the light went on in my brain: Tied to the template - I only had to correct the bulkhead template there, to fix all panels involved! So that´s fixed.

Then I moved the Pilot texture template into another position to correct Texture Spread, but it got worse, so I put it back and it fixed itself. Wierd... I checked with the Ugly100 tutorial 3DM file (which won´t compile, giving the same error as my CubeFly files in your case). Now the pilot´s hair is perfect, without the Propdisk on the back of his head.

I also fixed the tail texture - I finally managed to get it to accept the correct template.

I discovered that I hadn´t fixed the texture naming mistake in the Tutorial98 .pdf, just changed it for another mistake. The landing gear texture is neither the wing nor the pilot one, but the rudder one - that´s where the wheels are!
At the moment you get Propdisk textures on the wheels if you follow the .pdf: Blue tyres!!! :biggrin-new:

Should I re-post the .pdf? Maybe yes, and delete the two previous ones. I´ve only fgot 8Mb attachment space left...


Here´s a new screenshot of the Pony!
... it occurs to me to slant the landing-gear strut so that the lower fwd part coincides with the strut-bracket on the wheel bitmap.
...and the middle of the cabin floor is still blue - should be grey. well...

Cheers,
Aleatorylamp
 

Attachments

  • fixed.jpg
    fixed.jpg
    29.4 KB · Views: 0
Last edited:
greetings all...a quick rhetorical question,
what have i been harping about,
since, day one of this little escapade?
answer,
back up, back up, back up

and for good reason.
ad2k likes to screw with you...big time.
for several hours today, i've been working
on jump plane sequencing for the tail assembly.
i'm happy to report, i was successful.
all is bleed free and includes animated control surfaces.
next, i opened the forward fuselage posted last night,
inserted and joined the newly completed tail section.
after compiling, i jumped into cfs to have a look at my handy work.
as it turns out, there was an odd issue with the horizontal stabilizers.
long story longer, i went into the ad2k tail section, found the problem
and when i went to compile the whole aircraft again.
WEIRD!!!
the entire forward section 3DM was empty...nothing,
not even a name.
i am perplexed.

fortunately, i have a back up.
 
just lost another post to
the server is busy..bull****
WTF?

was able to move the backup cube 3DM
into the ad2k project folder,
run it and join the tail section.
with no issues.
all that's left is to add the gear and ailerons.

but, that's for later....i'm tired.
 
Hello Smilo,
The server is often too busy to accept attachments, sometimes to accept smileys, and other times to accept the message itself.

So the same thing happened to you with the disappearing tail. Crazy aspect of this program. It can drive me crazy too.:confused:

Another wierd thing is, why it is sometime so difficult to get the templates that you want. Although one has defined a part as a seal for the PLANE sequence, it sometimes needs it in the Sub-Assembly in question and other times in the Desk (where the hidden templates go), and when they are duplicated into both, it sometimes refuses to accept them, and so, you define a separate part to be a seal, shaped similarly (not the same!) and place it in the same place, and Bingo, it accepts the part you wanted in the first place! Crazy.:dizzy:

Then, but this is my fault, I got mixed up with the RFO and and the Ugly100 bitmaps from the tutorials: There are two different sets of wheels, one on the Pilot Bitmap (it´s not the Propdisc) and one on the Rudder Bitmap. That´s the reason for the wheel bitmap confusion in the Tutorial98 .pdf. The correct one is in fact the one in the second Tutorial .pdf I posted.

Now I have to make the nose section, and the first part is done, upto where the prop goes.
There is a defined template for the seal, and it exists, but it isn´t being accepted... So I have to do something about that now.
Punch it in the face, or something.:livid: As soon as I get some more progress, I´ll post a screenshot.

Anyway, I´ve been going through the original tutorial source file in order to sort out exactly where the seal planes have to go for the sequencing, to correct them on mine, and found one or two that I could correct.

This leads me to another issue: The Ugly100 Tutorial I found, was on my old hard disk from several years ago, but I haven´t seen it on the net, unless I´m mistaken. So, the bitmaps and all the source file are not accessible to anyone wanting to do the tutorial. Hence, I´m posting the tutorial here as an attachment, with screenshot, just in case.
What I can´t find anywhere is the .air file editor the tutorial makes reference to, nor the .air file, but at least there are some useful tips at the end of the tutorial for the main parameters, so I suppose it should fly quite nicely. I haven´t got there yet, but I will!

Hello NoDice:
Perhaps it will be a good idea for you to have the attached Tutorial 98.zip on your site? The screenshot could come in handy for that as well, to slip into the .zip or something.

Ooops, and I´ll make 3 Backups of the Pony 3DM before anything else happens! Thank you Smilo for your reminder.
Cheers,
Aleatorylamp
 

Attachments

  • Ugly100.jpg
    Ugly100.jpg
    71.2 KB · Views: 0
lots to answer to, but, am afraid to write too much,
in case the server decides to flush my post.

no, the tail didn't disappear...all entries in the cube vanished.
the cubefly 3DM in the ad2k folder was there,
there was nothing in it.

i haven't used templates for quite a while,
so i'll refrain from commenting.

about seals...these beggars are critical.
if you don't get them right,
the jump plane process won't work correctly.
as for template seals...i don't know about that.
consider covering a template
and declaring that new chain as a seal.
then, in model editor, make said chain hidden.

enough for now
 
Hello Smilo,
Sorry, I jumped to the wrong conclusion, but strange things sometimes happen.
With "template seals", I should have said just "seals". OK, thanks, so seals have to be hidden if they are not part of a visible section then, in which case they have to be in the Sub-assembly in question. By putting them in the Desk Assembly, they are also hidden.


Don´t worry about answering to everything I write... perhaps I tend to ramble on a bit!

Let´s see if I´m tired enough now to sleep! it´s almost 4 in the morning!
Cheers,
Aleatorylamp
 
i do not believe seals must be in the sub assembly in question.
they simply need to be made a seal...Ctrl+F2
here's something i discovered last night,
i had declared a chain as a seal,
but, when i tried to call it in a jump plane
the damn thing wasn't in the call list.
after much dinking around,
i finally realized the chain
was being highlighted at the same time
in the graphic editor.
as soon as i highlighted a different chain
(keystroke c) and called the seal,
BINGO, there it was in model editor.

there's so much more...later
sleep well
 
Hello Smilo,
Still can´t sleep...
So that´s what´s the problem with seals! Good job you found out. Well, at least we know!

Incidentally, I kept forgetting to look at the recetly uploaded BRETOAL´s Breguet, mentioned by Ivan in the thread on new aircraft for CFS1, and I just downloaded the 369 with the Gnome engines.

3 curious things: One not so good one good one and one really good one, that could be a good experiment for us:
>The not so good one: Pity that most textures don´t work. They must be FS2000 type 512 color bmp.
>The good one: Transparencies are fantastic! The interior is great! Detail is incredible.
>The even better one: The wheels turn! (these are textured).

So, maybe the chapter on the turning wheels on the RFO tutorial could work after all! I´ll try it out on the CubeFly.
Cheers,
Aleatorylamp
 
as i said, there is much more
to be said about seals,
which will lead into jump plane.
this is the heart of ad2k for cfs.
...among other things.

here's another little something,
next time you compile,
leave it set on 2000/cfs2.
just push Enter until it's done.
it's quicker, easier and makes no difference.

about the wheels,
experiments need to be done,
as do with the lights feature.

here's something else about jump plane and seals,
say, you compile a jump plane sequence
and the two sections still bleed through.
instead of changing the sequence,
open the seal coordinates selection in model editor,
click on the reverse button and compile again.
i believe the misalignment will be gone.

damn server was busy again.
fortunately, i copied my post.
 
Hello Smilo,
Interesting - I noticed the reversed thing commented in the wing sections, but I couldn´t get the seals on, so that must be why the wheels show only sometimes. I have finished going over the seals on the rear fuselage and wheel, and was just going to start re-doing the wing ones now, so your post has come in very handy indeed!

Update: Wing seals seem OK, but one or the other wheel still disappears. Maybe it will be OK once the complete nose and prop sequencing is done. The the nose section is finished now, but as yet it´s lacking the propeller, so the nose sequencing isn´t there yet. Here´s the promised screenshot.

In the cabin area, I´m still paying dearly for the initial difficulties with templates and seals, so one thing is clear: It is VITAL to set them up correctly, otherwise one´s sins of ommission will make one suffer further on and on!!
:devilish: - An important lesson!

Then there´s another error in the Tutorial98 instructions for mid-cabin floor under the pilot - it erroneously says to make a seal out of the bottom panel of the MIDMID Fuselage Section, when it should be the TOP panel. At least the Code list of the tutorial (and in the Ugly100 Tutorial 3DM file) gives the correct height: 0.900 and not -2.496, so it becomes obvious when you can´t find the seal to put in. :untroubled:

Cheers,
Aleatorylamp
 

Attachments

  • SLOWLY BETTER.jpg
    SLOWLY BETTER.jpg
    22 KB · Views: 0
Last edited:
am finding too much confusion here.
we are working on and therefore,
talking about two different projects.

i have finished the cubefly gear sequencing
and the subsequent attachment to the wings.
there is an issue with the gear being too long
and folding into the fuselage as well as the wing.
this could be corrected by moving
the gear pivot vectors farther out on the wings,
but, frankly, i have no interest in doing it.
as far as i'm concerned, the cubefly jump plane
sequencing refresher exercise is done.
i will post a completed cubefly 3DM if there is interest.

that was fun...thanks
 
Hello Smilo,
I´m very sorry about the confusion between the two things that are happening at once, but I´m glad that you enjoyed working on the sequencing.

Your comments have got me out of more than one rut, and the final outcome will not only be very welcome but helpful! You have done a great job on the CubeFly sequencing, and I can´t wait to see it!

Of course I will fix the landing gear on the CubeFly Jump Plane Refresher.
I also think moving the struts out will be the easiest.

I´m sorry that you had so much trouble with Ad2k, but thankfully you had the backup and didn´t have to do everything twice.
I learnt the lesson and backed up loads on the second tutorial, the Pony (Ugly100).

Now I´m finishing the prop and copying the sequencing from the text. The learning process is difficult, but the sequencing is done in chewable chunks and explained enough for me to get the Gist of what´s happening.

That way I will be able to understand your bit on the CubeFly much better. I´m definitely looking forward to seeing it!

I have to dash off to a class now,
Cheers, and thanks again for your help!
Aleatorylamp
 
okay, then, i'll gather and zip it on the sim machine,
transfer it here and post it up.
i'll try to get that done later today.

am now, among other things, trying to figure out
a way to explain the process (with short cuts),
to ease and enhance the learning process.
providing screen shots would be helpful.
the trick will be, doing it step by step,
without too much overwhelming detail.

there's a challenge if there ever was one.
we shall see how it goes.
 
Hello Smilo,
Well, a simple, illustrated guide would be great.
Hopefully it will not be too complicated for you to produce.

I´m still trying to figure out a mystery in Section 6 of the Ugly100 Tutorial 98, with y=0 as a starting point for the main hexagon, versus suddenly y=8 for the propeller position, all this related to a Fuselage Template at y=7.3 (huh??), resulting in both the gearbox and the spinner appearing in the middle of the aircraft, not on the nose, added to Jump Plane Seal distances at -7.3 and -8.:dizzy:

Well, perhaps I can finish the tutorial tomorrow!
Good luck with the guide.:encouragement:
Cheers,
Aleatorylamp
 
Back
Top