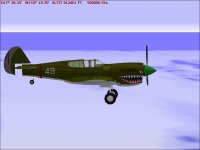
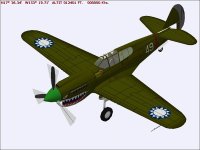
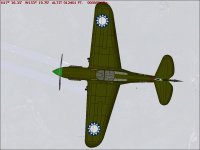
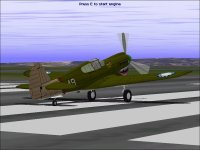
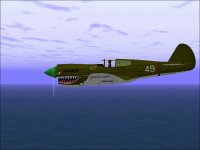
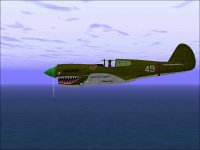
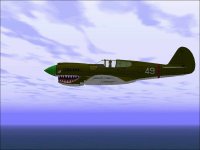
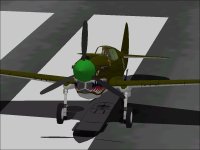
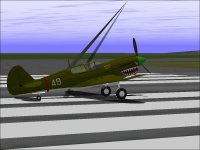
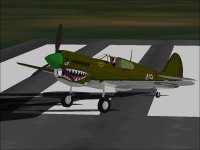
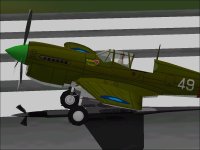
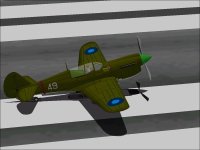
Warhawk

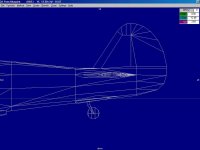
A couple days ago, (Actually before my last two posts) I decided to try shifting the Tail pieces from the P-40E to produce a P-40K.
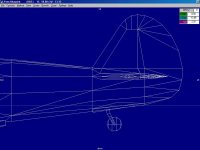
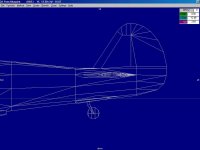
I did this by trying to project the lines that I already had for the existing Tail. The end result was very interesting because it produced a model that had a Fin / Rudder that was 12 feet 4.8 inches above the underside of the Main Wheels.
This is why I was looking for the drawings that specified that dimension
One of the drawings is an exact match. The other obviously is not.

Although I don't know the dimensions are absolutely correct, I believe this may be as good as I am going to get and probably good enough to build with.

- Ivan.
 

Attachments

  • LongTail01A.jpg
    LongTail01A.jpg
    39 KB · Views: 0
  • LongTail01B.jpg
    LongTail01B.jpg
    54.9 KB · Views: 0
  • LongTail01C.jpg
    LongTail01C.jpg
    44.5 KB · Views: 0
Texture Adjustments

The actual dimensional change to convert MY Warhawk from a Short Tail to a Long Tail is to move the Fin / Rudder
0.20 Feet Up
and
1.58 Feet Back.

This was shown in the screenshots for the prior post.
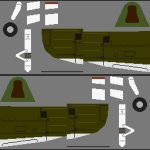
This post shows the adjustments of the Textures and all the messy stuff inside.

The Fin and upper half of the Rudder is done as a single Component.
Its location in the AFA file was moved back 1.58 Feet.
That alone isn't enough; The actual paint needs to be shifted up by 4.41 Pixels.
(Since we can't shift a fraction of a Pixel, it was moved up by 5 Pixels.)
The lower half of the Rudder is part of the Tail Cone Component.
It does not get adjusted in the AFA File.
I moved the paint from just ahead of the Rudder Hinge Line Up 5 Pixels and Back 35 Pixels.
(It really should be 34.87 Pixels.)

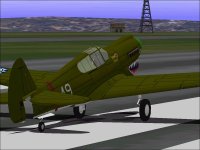
The screenshots show the result.
There is also something else worth noting in the screenshots:
The Ribs on the Rudder and Elevators are plainly visible in the Texture Files but not visible at all in the screenshots from the Simulator, at least not as .?af (R8 format) files. As BMP files, they become visible.

- Ivan.
 

Attachments

  • Hawk87BA.jpg
    Hawk87BA.jpg
    29.5 KB · Views: 0
  • Hawk87B5.jpg
    Hawk87B5.jpg
    37 KB · Views: 0
  • LongTail02A.jpg
    LongTail02A.jpg
    66.3 KB · Views: 0
  • LongTail02B.jpg
    LongTail02B.jpg
    41.8 KB · Views: 0
Hello All,

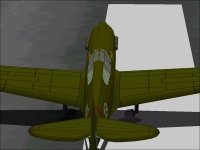
In the last post, I included an overhead view of the Long Tail Warhawk which didn't really fit in with the theme.
The original intent was to comment about the center frame at the top of the canopy.
Many illustrations of the Warhawk (P-40D through P-40M) do not show this center frame.
I have several P-40 model kits and some show the center frame and some do not.
The paint guide I used for the Merlin Warhawk did not show this frame but a restored P-40F has it.

I spent a fair amount of time trying to find photographs of original wartime aeroplanes to see if they actually had this frame or not. As stated earlier, sometimes modern photographs are not reliable. Many aeroplanes have been converted with modern instrumentation, a passenger seat, additional antennas and possibly combining parts from later birds.

My conclusion now is that this frame was a part of every standard canopy from the P-40D through the P-40M.
(The P-40N had a radically different canopy.)
The reason for this conclusion is that I found parts manuals for the P-40E-1 and the P-40M/N.
They both show the center frame in the Canopy Frame. Perhaps things changed mid production but until I find conflicting evidence, this is how I will be building the models.

- Ivan.
 
More Long Tail Stuff

Yesterday, I went through a marathon session with the Long Tail Warhawk.
The Tail Cone needed an almost complete redesign (actually done in two tries) and some of the Glue Parts needed to be adjusted.
The end result is that by the end of the evening, I had a pretty fair (in my opinion) 3D model even though the textures needed to be adjusted more.....

*******
 

Attachments

  • FrameShortTail.jpg
    FrameShortTail.jpg
    52 KB · Views: 0
  • FrameLongTail.jpg
    FrameLongTail.jpg
    46.1 KB · Views: 0
  • LongTail-BleedCheck1.jpg
    LongTail-BleedCheck1.jpg
    48 KB · Views: 0
  • LongTail-BleedCheck2.jpg
    LongTail-BleedCheck2.jpg
    49.6 KB · Views: 0
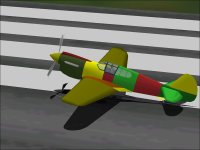
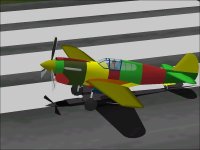
The shape of the Tail Cone just in front of the Fin is a bit of a compromise.
I really would like to put in a Fillet as on the real aircraft but the problem is that it would either cost resources I do not have or cause some bleeds from below that are more unsightly.
I believe that the compromise is probably the best that I can do at this point and I don't dislike the result.

The next part was to adjust the textures and panel lines to fit the new tail.
I found here that I may have made a mistake earlier with the textures.
They did not line up between the top and bottom halves of the Rudder.
The new location of the dividing line also splits the Rudder Trim Tab which resulted in a bit more work in matching.

Panel lines are always a compromise of some kind. Plastic modelers have the same problem.
On the actual aeroplane, the skin panels are usually butt joints and cannot be seen from more than a few feet away.
The rivet detail also cannot be seen.
The problem is that without panel lines, the model starts to look like a shapeless blob.
This is particularly noticeable with Combat Flight Simulator because the rendering engine doesn't get very sophisticated with shading and highlights and shadows simply do not exist.
Adding all the panel lines starts to make the model look like patchwork and full of scars.
....So a decision has to be made regarding which lines are significant and need to be represented.

The contrasting colours here are to make the panel lines more obvious so they can be easily adjusted.
The model has since been painted Army Olive Green and doesn't look quite as strange.

- Ivan.
 

Attachments

  • LongTail-PrimerBase1.jpg
    LongTail-PrimerBase1.jpg
    41.2 KB · Views: 0
  • LongTail-PrimerBase2.jpg
    LongTail-PrimerBase2.jpg
    64 KB · Views: 0
Moving Parts

Animating the Long Tail Warhawk started off strangely.
None of the original moving parts were visible.
It finally occurred to me that the new P-40K or Hawk87B was closer to the P-40E than the earlier release of the P-40K.
Copying the moving parts file from the Warhawk project and renaming it solved most of the animation issues.
Flaps of course still needed attention.

An interesting observation can be made about the Short Tail versus the Long Tail P-40:
No functional pieces other than the Rudder actually moved.
All the Landing Gear pieces remained where they were.
Even the Elevator did not move.
From an AIR file and texture mapping standpoint, that makes things much easier.

This profile view gives an idea of the shape issue in front of the Fin. As with most Aircraft Factory 99 models, the resource limitation may mean that this will not be changing.

From this Long Tail P-40K, a minor texture change and a slightly more curved Carburetor Scoop are the only changes needed to get to the P-40M. To build the P-40L requires grafting the new pieces onto the Merlin Warhawk and removing one of the Wing Guns from each side. Only with the P-40N do things become significantly different.

- Ivan.
 

Attachments

  • LongTail-Profile1.jpg
    LongTail-Profile1.jpg
    43.6 KB · Views: 0
I wrote prematurely....

Just because I did not see a solution to a problem does not mean that there was not one and a fairly easy one at that.
I had an idea while cooking dinner tonight and will see tonight whether it will work or not.
That is the danger of a running commentary: Sometimes given enough time, a better idea becomes obvious.

- Ivan.
 
Minor Adjustment

The Tail Cone adjustment actually worked better than expected.
The Parts Count is now back to 1145 which is the same as the P-40E.

My original distraction was that I didn't see that adding a Fin Fillet (which would normally cost an additional Component that I didn't have) would actually allow the blending of the Fin with lowered Tail Cone WITHOUT an additional Component.

At this point I am reasonably satisfied with the shape.

Last night, one computer crash actually destroyed my AFA Project file and I had to restore a backup to continue.
Over the last few days, the crashes and blue screens have become quite frequent.

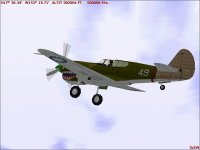
The screenshots show a comparison between the two versions of the lengthened Tail and views from the simulator.

- Ivan.
 

Attachments

  • FrameLongTail.jpg
    FrameLongTail.jpg
    46.1 KB · Views: 0
  • FrameLongTailVersion2.jpg
    FrameLongTailVersion2.jpg
    52.6 KB · Views: 0
  • LongTail-Profile1.jpg
    LongTail-Profile1.jpg
    43.6 KB · Views: 0
  • LongTail-Profile2.jpg
    LongTail-Profile2.jpg
    44.1 KB · Views: 0
SCASM Process has just been complete. It was almost exactly the same as the P-40E Warhawk so very little real work had to be done. It was mostly a matter of copying SCASM source from the Warhawk project.
Surprisingly, the Pilot Shoulder Component was slightly relocated but nothing else in the SCASM process was affected.

Next step is to select a paint scheme for release.

- Ivan.
 
Hello Ivan,

Very interesting, the Long-Tail development of your Warhawk, and the results of your meticulous research.

A question for the .air file: I would expect the effectivity of the CFS1 air file to be able to perhaps reflect the small changes in behaviour for the Long Tail. Would this be achieved by simply adjusting the further aft positioning of the fin/rudder, or would you think any extra adjustments elsewhere would be needed, like rudder effectivity or something?

BTW I thought you´d remedied the computer crashes. I´m sorry to hear that your machine is playing up again. I have managed to speed up my wife´s old Pentium Dual Core XP workhorse laptop with some extra memory and a faster CPU from E-Bay, and it is turning out to be a very stable and fast platform, and I even got a new battery for it.

Cheers,
Aleatorylamp.
 
Hello Aleatorylamp,

Currently, all I am doing with the AIR file for the Long Tail K model is to move the Rudder back.
There were some other things that were done but until I am more familiar with how to do things in the AIR file, I am not putting those in just yet.

There are also some low speed handling issues on ALL my P-40s that need to be addressed at some point.
At the moment, there are several areas I need to work on: Gauges, 3D Models, and a few effects in AIR files that need some research / experimentation.

No, I never really addressed the machine that is having problems. Sometimes it is fairly stable and sometimes it is not.
I also need to get a KVM switch at some point to bring another machine online next to the current development machine.

- Ivan.
 
Hello Ivan,
Step by step then, with quite a full to-do list!
I like using a KVM switch too, as it helps keeping 2 computers apart and simplifies having them together.
With modernities now though, my fast computer only has 1 PS2 socket, for either a mouse or a keyboard (it won´t take a "Y" splicer to have both), so I have to use a USB mouse on it and a SP2 Mouse on the paralell Pentium-4 Of course a new KVM switch with USB ports would be perfect, but it´s not worth the money just for that.
Anyway, KVM´s are practical!
Cheers,
Aleatorylamp
 
Wide Chord Propellers

Some time during the production run of the Curtiss Hawk 87 series of aircraft, the Propeller was switched.
The early Propeller Blades were fairly narrow which was all that was necessary to handle the power from the early engines.
As engine power increased, a Wide Chord Propeller was fitted.
When exactly this occurred is hard to pin down.
It is also hard to determine whether earlier Hawk 87s were retrofitted.

One can be fairly certain that the early P-40E had a Narrow Chord Propeller as original equipment.
One can be fairly certain that by the time the P-40M was built, the Wide Chord Propeller was standard.

General belief is that some time during the production run of the P-40K, the Wide Chord Propeller was fitted.
My belief was that it happened fairly early in the production because of the efforts made to enhance directional control of the aircraft:
First, an extended Fin Fillet was added and later, the Tail was lengthened. Note that this was not retrofitted to P-40Es

I have not found an explicit statement to this effect, but believe that the Wide Chord Propeller was also fitted some time during the production run of the P-40F or P-40L as well.

Creating a Wide Propeller Blade from the Narrow version w.as actually quite easy.
First, the original Blade Template was widened by 31% which brought the maximum chord to a touch over 11 inches.
This created a blade with a tip that appeared too wide and rounded.
Next, the tip was reduced in width by 10% and the two section were blended which resulted in what I consider to be a fairly reasonable shape.
After the Blade Template was updated, it was rotated 26.5 degrees in Yaw to add pitch and saved as Propeller Blade #1.
Propeller Blades 2 and 3 were created by rotating Blade 1 in Bank and relocating to a common center point.

This is just the first of the changes required to produce the P-40M and P-40N. Many more changes will be necessary.
Perhaps I will retro fit this to the P-40K project.

- Ivan.
 

Attachments

  • OriginalPropeller.jpg
    OriginalPropeller.jpg
    44.8 KB · Views: 0
  • WidePropeller.jpg
    WidePropeller.jpg
    45 KB · Views: 0
P-40m

The following changes were needed to get from the P-40K to P-40M:

Wide Chord Propeller - As noted earlier, they may have been fitted or retrofitted to earlier models
Filtered Intake Openings - Holes in front of Exhaust Manifold
Antenna Mast - Although earlier aircraft may have had them, they became much more common on later versions
Vent Window - A Small Window was added to the Left Side of the Windscreen. This could be opened slightly for ventilation

I believe that was all that was visibly different with the P-40M.
The P-40M also introduce a new version of the Allison with changes to the supercharger to increase high altitude performance.
The power rating went from 1150 HP to 1300 HP, but actual maximum power was considerably lower because the new supercharger did not tolerate higher boost pressures that were successfully used on the earlier engines.

Interestingly enough, the P-40M production was intended for export and never used operationally by American forces.
They served with Australia, New Zealand, The Soviet Union and possibly others.

The first screenshot shows a problem that luckily went away by itself.
The second screenshot shows the visible differences

- Ivan.
 

Attachments

  • P-40M Slight Problem.jpg
    P-40M Slight Problem.jpg
    61.9 KB · Views: 0
  • P-40M Differences.jpg
    P-40M Differences.jpg
    49.4 KB · Views: 0
Last edited:
Hello Ivan,
I find the well researched small details that you introduce into you models as the versions progress from one to the next, fascinating, as well as the information you provide to explain the variations.
Cheers,
Aleatorylamp
 
Thanks Aleatorylamp,

The evolution of the P-40 series is actually quite interesting though not necessarily a happy one.
We are certainly getting near the end of the P-40 line. I have already started work on dimension checks for the P-40N.
When I am done there, I will likely take a little break and then go back to the ancestor of the series: The P-36 / Hawk 75.

Consider how this story evolved:
A fairly good 1930's design, The P-36 / Hawk 75, makes a nice transition from Biplane fighters to Monoplane and retains the flying qualities of the Biplane with performance of contemporary (for 1935) monoplanes.

A couple years later, the US Army sees the developments in Europe with inline engines and wants the improved performance.
Curtiss responds by fitting the Allison V-1710 to the Hawk 75 an eventually gets to the Hawk 81.
The level speed is improved but everything else suffers: Climb Rate, Maneuverability and Handling are all noticeably worse with the Hawk 81 which is actually a fairly competitive design but for Altitude performance which can be blamed entirely on the engine.

A few years later, Curtiss does a major redesign to fit the new Allison F series engines and arrives at the P-40D/E (Hawk 87) series.
Firepower and Protection are better but engine power is actually very nearly the same and performance actually doesn't change much.
If anything, climb rate is worse because of the increased weight.
One of the major changes in the Allison engine was in the reduction gearing (which raised the thrust line). The new gearing could handle output that the old gearing could not. Some folks figured out that the Allison could actually take much more boost than was claimed.
They managed to get an engine rated at 1150 HP to put out around 1550 to 1600 HP.

With the beginning of Merlin engine production at Packard in the United States, some of the engines which were intended for Bombers were installed in the P-40E series which resulted in the P-40F. Altitude performance was considerably improved.
About this time, the extra engine torque was causing directional controllability problems which were addressed by first adding a fillet to the fin and afterwards with a longer tail section which remained with all subsequent P-40s.

The P-40 was always a relatively heavy aircraft for its power and Curtiss tried to address this issue in a very interesting manner.
With the P-40L model, Curtiss reduced weight by decreasing the ammunition load and removing one internal fuel tank (the Forward tank).
Some other parts were also replaced with lighter and more poorly made pieces. The decreased operational capabilities and increased maintenance issues caused many of the changes to be reversed in the field. Thus these changes were ineffective.

The demand for Merlin engines was greater than the production capacity so the P-40 was forced to revert back to the Allison.
By this time, the P-40 was considered to be suited for use as a fighter-bomber or for places where the opposition was not very modern.
It was sent to China, Burma, India, to Australia and New Zealand, to the Mediterranean, and as an export aircraft to the Soviet Union.
An Allison engine with an improved supercharger also entered production at this time which is the main distinction between the P-40M being built now and the earlier P-40K. This also might explain why the P-40M never served operationally with US forces though Australia, New Zealand and the Soviets used them.
The "improved" supercharger gave better altitude performance but had much less capability at low altitudes.

My intention here was to use South East Asia Command insignia as carried by the RAF (not RAAF or RNZAF) but I don't know for sure that the RAF ever used the P-40M operationally either.

Just to complete this story:
The P-40N was a more successful attempt to produce a lightened version. The earliest version (P-30N-1) was visually the same as the P-40M other than having only two instead of three guns per wing. The changes which distinguish this model were all in internal equipment.
The next P-40Ns had the cut down rear fuselage that we typically associate with this model.
The P-40N was the fastest and possibly the best performing of the production models but even then, production was terminated at the end of 1944. By the end of the war, it was no longer serving as a front-line fighter in any of the major services.

- Ivan.
 
Hello Ivan,
So it appears that the airframe was very well capable of superior performances, limited only by the available engine technology, and it is very intesting to see how different strategies were experimented with varying degrees of success to try and get round the limitations.
Also interesting is how modifications to increase performance went in detriment of other factors - it happens so often, that compromises have to be reached!
Cheers,
Aleatorylamp
 
Quality of the Airframe

Thanks Smilo,

This was obviously a somewhat informal summary just for general understanding.
It also reminded me of why I was so reluctant to build a P-40 to begin with, but it is way too late now!

Hello Aleatorylamp,

Here are my opinions based on a fair amount of reading:
As I mentioned in a much earlier post, the P-40 series was a rather heavy airframe.
Its durability and strength were quite good and by reputation was much better than either the Mustang or Spitfire.
Also by reputation, its maneuverability was probably between that of the Spitfire and Mustang.
Its aerodynamics was probably comparable to the Spitfire and much worse than the Mustang.

Its weight limited the climb rate as compared to the Spitfire and the Aerodynamics limited the speed as compared to the Mustang.
So what we have here is an aircraft that was always going to be slower than the Mustang even though it was more agile.
The Mustang in comparative testing was not a particularly maneuverable aeroplane and quite comparable to the Thunderbolt.
By that stage of the war though, the services were all looking for high climb rates and high maximum level speeds and didn't really care about nice handling and good maneuverability. The Mustang fit the requirements.

The Spitfire was never particularly fast for its power but it climbed well. When the Griffon engine was installed starting with the Mk.XIV, it became quite a lot faster.
(Yes, I know the Mk.XII was the first to carry a Griffon, but it was fast only at low altitudes; The Mk.IX was still faster up high.)
Remember that it was to be replaced after the war with the Spiteful / Seafang series which were much faster aircraft with the same engine.

Even when the P-40Q came along, it was still 20-30 MPH slower than the Mustangs so it made sense not to continue producing it.
Yes, they were improved during the war, but not enough to keep up with expectations.

- Ivan.
 
Metal Cutting for the P-40N

After a couple nights, this is what sits in the Workshop.
There is still much to do and some of the textures needed to be remapped.

The Technicians will be fabricating more Canopy Frame Parts for the fixed sections on the Fuselage and also cutting a piece of Armour Plate to be installed behind the Pilot.
Other Technicians are gathering patterns for artwork to be used on the new aeroplane.
The artistic types in my shop are not particularly good or fast though.

- Ivan.
 

Attachments

  • P-40N-MetalCutting2.jpg
    P-40N-MetalCutting2.jpg
    48.6 KB · Views: 0
  • P-40N-MetalCutting1.jpg
    P-40N-MetalCutting1.jpg
    52.2 KB · Views: 0
  • P-40N-MetalCutting3.jpg
    P-40N-MetalCutting3.jpg
    46.9 KB · Views: 0
Back
Top