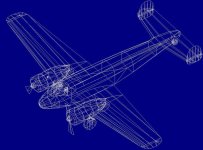
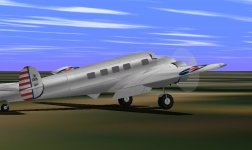
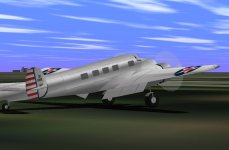
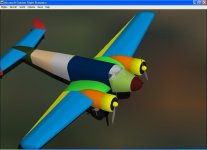
Lockheed Electra Model 10

Hello Ivan, Hello Ivan,
Ivan, I hope your son´s grades will reflect the effort that has gone into preparing him for his tests. Good Luck!

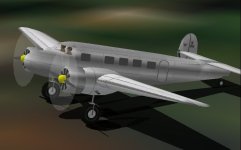
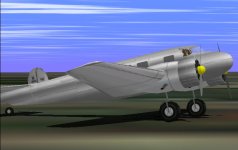
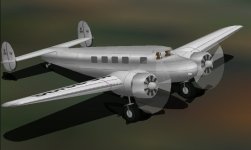
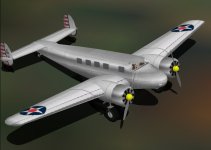
Right now I´m trying my luck at the metallic textures, adapting, changing and fitting some existing ones. Most of the plane is textured now - at least provisionally.
I also got the crew in, with a rather complicated glue sequence that also involved the nose, the roof and the windows, apart from the cabin body, back and floor. But it worked!

What was really difficult was the windscreen and the cabin roof shape, and also the nacelle shapes with relation to the wing.

The fuselage in this case has no structures - it´s all components except for the nose. The engine nacelle structures are now 12-sided. Fins and wheels are also structures, and now parts count is still at a modest 129%. Perhaps adding parts with SCASM won´t be necessary this time.

With the available power, I suppose it´s difficult to get this kind of plane any faster.
This Electra 10A does 202 mph top speed, with 2 x 450 Hp engines and a 55 ft wingspan.
The similar Beechcraft 18 with the same engines and 7 ft less wingspan, did 225 mph.
Amelia Earhart´s Electra Model 10E had 2 x 600 Hp, so it must have been a bit faster.
Remember the Curtiss Fledgling? That one only did 197 mph, but had less power with its 2 x 300 hp engines, but compensated for it with its shorter 31.8 ft wingspan.

Well... I still have to add the tail-wheel strut, and generally clean up the build, get rid of cracks and so on, so it´ll be a while yet until it´s ready - but of course, there´s no hurry!
Anyhow, here´s a bit more eye candy, Smilo! The tucked-in wheels, visible when retracted, are also on now.

Cheers,
Aleatorylamp
 

Attachments

  • Textured1.jpg
    Textured1.jpg
    39.3 KB · Views: 0
  • textured4.jpg
    textured4.jpg
    44.4 KB · Views: 0
Hello Aleatorylamp,

Unfortunately, I believe his grades will reflect the effort he put in. He spent more time gaming and watching you-tube videos than actually studying. Tonight is one of the few night he is actually studying. He has a subject he is interested in. Most of his classes bore him but not because he knows the material.

When combining a Nose Cone Structure with a Component Cockpit / Cabin, you need to be really careful or the result starts looking too much like a C-130 Hercules.

This may surprise you, but if I remember the articles I was reading, Amelia Earhart' Electra was about the same speed as the Fledgling. The extra weight probably reduced performance from a standard Electra.

On my own project, just as I having a little success, I encountered a bug that I can't seem to fix.

- Ivan.
 
Hello Ivan,
I see what you mean about nose-cone structures!
I think I´ll have to put in a component there too, because the
12-sided cross-section causes a narrowing-deformation where
the cabin component at the moment adapts its vertical sides to
the rounder nose.

Update: Corrected! I took away a slice of the nose-cone structure,
adding it to the cabin component but giving a more gradual transition
for the cabin sides to the rounder nose. See the sacreenshots!
Funny how just a casual comment leads to an improvement!


Regarding the Electra´s rather slow speed:
With all the fuel tanks Amelia had, and for fuel economy, she never
flew over 175 mph. As there are no specs referring to the maximum
speed of the Electra with a 600 Hp engine and a CV propeller at
normal weight, I decided to experiment a bit:

Adding 3 cylinders gave me 600 Hp, and with the 8.25 ft 2-position
20-30 pitch propeller, the engine went at 2500 RPM at S.L., (obviously),
with a speed of 231 mph. Then I put in a 8.5 ft FW190a-type CV propeller,
and I got 592 Hp at 2200 RPM, which is most probably more correct for
this engine, and a speed of 232 mph.

The simulator seems to give quite a good approximation here.
Anyway... still on the slow side, I suppose! But, as it was not a fighter but
really a passenger
airliner, this must have been intentional because of the
lower fuel costs.
Cheers,
Aleatorylamp
 

Attachments

  • newnose.jpg
    newnose.jpg
    128.2 KB · Views: 0
Last edited:
Hello Aleatorylamp,

The C-130 nose wasn't really a casual comment. It was really the second time I was trying to hint at what I was seeing without offending. Normally I would be a lot more direct but I haven't followed this thread for the last few months and didn't go bacj to read how it got here. I had thought it was a AD2000 project and I am not qualified to discuss those at all.

A couple points to make about performance:
You need to know what the actual limits were for the engine.
There are Take-Off ratings of very minimal duration (Typically one minute).
Military Power which might be a 5 minute or 10 minute limit (or whatever the equivalent term was for Civilian engines)
Climb Power typically around 30 minutes
Maximum Continuous - As long as there is fuel and operating temperatures are not exceeded
Economical Cruise....

You need to determine why these limits exist: Whether the limits are written in the manual so that the engine will have a sufficiently long time between overhauls or whether the engine really could be damaged by the high power operation.

I am sure you get the picture.
That 600 HP rating probably wasn't available for long enough for a maximum speed run or could not be maintained high enough to where the aeroplane would go its fastest in thinner air.

I had the same kind of issue to deal with when working on the AIR file for the Ki 61 Hien.
The engine could make 1175 PS or around 1160 HP at 2500 RPM, but that was only for Take Off
Manifold Pressure was +330 mm but it was in theory only good for one minute.
Essentially this was pretty much a short duration WEP rating which is how I handled it in the AIR file.

Its "real" military power was more like 1080 HP @ 2400 RPM with +240 mm Manifold Pressure and all performance testing that I recorded was at the lower RPM and manifold pressure.

These numbers are from memory, but they should be pretty close and hopefully provide a good illustration.

- Ivan.
 
Hello, Ivan,
I´m afraid I found AD2000 too complicated to be able to continue with it, and
I´ve switched the build over to AF99. Despite its shortcomings, specially when
topped off with a bit of SCASM, I find AF99 more pleasing to work with.

Anyway, you can be more direct without me getting offended - no problem!
The whole point of my writing and illustrating my building progress on the
thread is not only to ask for advice in case I get stuck, but also to leave the
door open for comments related to possible improvement I haven´t noticed.

I agree with your comments on the maximum power ratings for the two P&W
radials in question. Obviously, for the standard Model 10A with 2 x 450 Hp, it
would mean that 450 Hp is the limited-time take-off power, and that its
specified 202 mph max. speed is also only allowed only for a limited time.

Cruising is stated between 150 and 190 mph, so most probably 190 mph is
for maximum continuous power, and 150 mph for standard cruise.

Similarly, the 600 Hp engine on the 10E would provide 600 Hp for a certain
limited time, and would have a certain maximum speed. The only specification
I´ve found is that economical cruising was 175 mph - 25 mph higher than for
the 2 x 450 Hp engines.

Musing on the performance of Amelia´s Electra 10E under maximum throttle with
its 2 x 600 Hp engine, I wanted to see what 300 extra hp would do on the sim. I
got 232 mph, i.e. an extra 30 mph, which would perhaps tie in with the 25 mph
cruise increase mentioned above. I wonder...

It suppose it´s plausible, but I just don´t know enough to be able to judge this.

Anyway, I´m not worried, as I´m building the standard 10A, for which I´m getting
the specified 202 mph (limited time) top speed, with the 1000 fpm specified RoC.

Anyway, you know that your comments are always interesting and welcome!
Cheers,
Aleatorylamp
 
Further Progress

Hello Gentlemen!
Here´s a second WIP model for you to try out at the weekend, if you wish!
Most parts have now been completed, some shapes have been further improved.
We now have a crew too!

The engine nacelles are back to 10-sided cross-sections as the upper curvature
was a little higher than on the 12-sided cross section. I even managed to get
in the exhaust pipe on the outside of the nacelle-body.

The model is now completely textured, at least with provisional ones,
although the registration number is fictitious. It´s slowly looking better, I think!

I´ve
adapted a panel too, and the model also has the propeller-blurs, but the
military stripes aren´t on the tail fins yet.

Here´s some eye-candy.
If anyone feels like having the AFX, do let me know and I´ll post them.

I hope you like it! Feel free to point out any glitches and/or suggestions.

Ooops! - I missed the flaps...
...and I´m doing the military Army Air Corps colour scheme.


Cheers,

Aleatorylamp
 

Attachments

  • Further.jpg
    Further.jpg
    36.9 KB · Views: 0
  • Image1.jpg
    Image1.jpg
    89.2 KB · Views: 0
Last edited:
Flap complications

Hello Folks,
I got the flaps in now, although it isn´t perfect.

Without them, the well-working mid-wing sequence was:
>>inner wing, glue, nacelle, glue, exhaust pipe, outer wing

There are inner and outer flap-halves, but, only the inner half
can go into the mid-wing sequence:

>>inner-flap, glue, inner wing, glue, nacelle, glue, exhaust pipe, outer wing.

The lower engine nacelle and/or the exhaust always bleed through the outer half-flap
if it is placed in this sequence, in any position. Even duplicated at the beginning, glued
to the inner flap-half and at the end of the sequence, glued to the wing, won´t work.

Update:
No success yet, by any means!
There are also interferences with the retracted
wheel-halves when seen from the front. Innumerable tries included a different
approach with
the outer flap-half in tail left/right, but it interfered with the fin
halves glued to the tailplane...
So, it´s back to square one!

Update 2:
The complete flap in Wing-low turned out to be unnecessary, and deleting it did
away
with the flap/retracted wheel bleed. Now the only bleed left is a momentary
one with a portion of the
rear-lower nacelle through the deployed flap, seen from
the aft-side.
It´s not terrible, so it may be acceptable if it were impossible to eliminate.

Cheers,
Aleatorylamp
 
Last edited:
Hello Aleatorylamp,

I hope you realise that most of us here probably do not have any idea what the arrangement of Flaps on the Model 10 Electra is supposed to look like. That factor is very easy to forget when one spends a lot of time working on a model, but please remember that others may never have seen this aeroplane before.
It might be a good idea to post a photograph of the underside of the real Electra with the Flaps deployed.

- Ivan.
 
Momentary bleed

Hello Ivan,
Oh dear, I´m so sorry! Yes, you´re absolutely right!

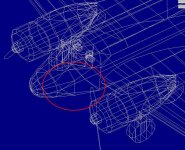
They are split flaps, and there´s only 1 pic I found, but
and it´s from an FSX model,
although the exhaust on the
model is a bit small. (The first picture on the left).


The only other reference I have is a 3-view drawing,
one which also shows the underside - a rare thing too!

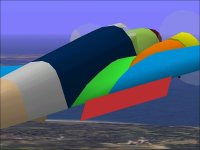
Then here are two screenshots of my model. From a certain
point on the rear side, the nacelle bleeds through the flap
(the second picture on the left). From further back, it
doesn´t (bottom picture).

Cheers,

Aleatorylamp
 

Attachments

  • No-K here.jpg
    No-K here.jpg
    42.1 KB · Views: 0
  • OK here.jpg
    OK here.jpg
    44 KB · Views: 0
Hello Aleatorylamp,

Now comes the "20 Questions" or perhaps it is really 20 Guesses....

Here is what I am assuming:
1. The Nacelle in Orange is a Component.
2. The Inner Wing in Light Blue is a Component
3. The Outer Wing in Light Blue is yet another Component
(I wish you had coloured either the Inner or Outer Wing a different colour to confirm my assumption.
4. The Cowl is a Structure
5. The Spinner is a Structure
6. The Propeller Blades and Propeller Blur are each single Parts.
7. The Flap is a single Part and represents the DEPLOYED Flaps
8. The Landing Gear and possibly the Gear Doors are in a separate Group.

I don't know what you have for extra Parts, but I believe I can edit the sequence to make everything EXCEPT possibly the Landing Gear completely bleed free. It would cost about 8 to 10 additional Parts per side depending on how your Glue is arranged now.
(Some Parts would need to be doubled up and a few additional Glue Parts would need to be added.)

- Ivan.
 
Colours

Hello Ivan,
First of all, thank you very much for your cooperation and help!
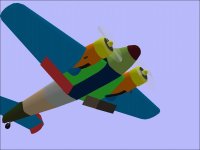
What I´ve got at the moment, with corrected colours, is:

1. The Nacelle in Orange is a Structure, not Component.
2. The Inner Wing now in Green, not Light Blue, is a Component.
3. The Outer Wing in Light Blue is yet another Component.
4. The Cowl is a Structure in yellow.
5. The Spinner is a Structure in yellow.
6. The Propeller Blades and Propeller Blur are each single Parts, grey and transparent light grey.
7. The Flap is not a single Part but two parts, inner in brown and outer in dark brown and represent the RETRACTED Flaps (which I always tag Speed Below 195 for Aircraft Animator) - but I can make them into one, and as DEPLOYED if you like.
8. The Landing Gear (no gear Gear Doors) are in a separate Group - Gear Left/Right.
9. The yellow triangle on the outer wing is an panel insignia panel that covers a bleed of the outer flap through the top of the rear of the wing. Obviously it can be removed if unnecessary!

So, it is almost the same as your assumtions, except for the nacelles being structures and the flaps being done in two parts each, and being etracted. Shall I proceed to change the flaps?

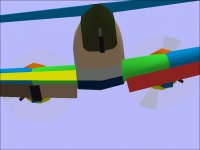
Here are new untextured pictures! In the botrtom picture, from this viewing position, there are no bleeds.
If you would prefer to have the AFX, I can gladly post them - no problem!
Cheers,
Aleatorylamp
 

Attachments

  • colours1.jpg
    colours1.jpg
    43 KB · Views: 0
Last edited:
Hello Aleatorylamp,

Thanks for the clarifications.

I was thinking over how this would fit together and have a slightly revised comment.
I think there will be a slight bleed between the extended Flap and the Retracted Main Wheel, but I can't be sure without checking out the angles in AF 99. I downloaded your model but haven't loaded it on the Game Machine to flip it around the simulator yet. I probably should do that, but there is actually quite a lot that can be gathered from your screenshots.
(I am at a good breaking point in my project because I got a bit stuck. I know what I want to do but don't know how to do it. Lack of knowledge has that effect sometimes!)

Here are a couple more questions:
There actually are no "Gear Doors" as such except for whatever fairings might be attached to the Main Gear Strut.
Are you planning on adding additional parts around the Nacelle?
Wheel Wells or additional bracing or anything? If so, add them now, because what I am thinking of will most likely move some pieces around to different Groups and adding them later might be harder.

Your construction of the Flaps as "Retracted" actually makes things simpler in some ways and slightly more complicated in others.
I can't really tell without doing a fair amount of experimenting.

If you want to send me some files to experiment with, the AFX, and Aircraft Animator Files would be good. I suspect I would need to do quite a few changes to the animation because the Parts would change enough behind the scenes even though nothing really would change in appearance. Texture files might also help confirm that nothing has changed in the final appearance.

When you see what I have in mind, you might be pleasantly surprised. If not, you can always just stay with the original version.
....Let's hope that my Development Computer chooses to behave well. I have a minor update to another model that I also want to do.

- Ivan.
 
Hello Ivan,
Thanks for your reply and your interesting offer for improvement!

Re. wheel wells: I was doing them with the lower nacelle textures,
but it´s a bit messy. Their shape below at the back is too sharp a "V"
to allow clean lines. Even making corrections on the under-wing
texture,
it looks blurry.


The cleaner solution is to flatten the rear nacelle-bottom, making it as
wide as the wheel, and then add black insignia rectangles.

As soon as I´ve done it, I´ll send the AFX and the model. I´m very curious
to see the improvements you can provide!


Thanks again! Cheers,

Aleatorylamp
 
Hello Aleatorylamp,

My suggestion there is DO NOT flatten the back of Nacelle on the underside just to apply an Insignia Part.
If you apply the Insignia Part "below flush" with the surface of the Nacelle, it will look just fine because even on detailed examination, it will be difficult to tell that it isn't even with the bottom of the Nacelle.

If you flatten out the Nacelle, you will cause more texturing problems when texturing the Nacelle.
You will be unable to properly texture it Right-Left without having a single pixel extend across the entire Structure.

(Just my recommendation.)

- Ivan.
 
WIP-3 plus AFX

Hello Ivan,
OK, thanks for the suggestion.
I only widened the rearmost nacelle part a bit so that the insignia wheel-well parts wouldn´t portrude on the sides - but you´re right, there was no need to flatten it.

Well, It looks surprisingly clean now. I had discarded my "texturing manouever" for the wheel wells because it needed a "top/bottom" texture type, and caused lots of blurry contours.
What is still a bit iffy is the flaps issue, which I hope your modifications can cure!

You will see an insignia part called "w-panel-x" a top-rear panel which extends throughout the whole wing, to cover an upwards flap bleed, but it only works when viewed from the rear. From up-sideways, the flaps still shine through the wings!

Here is the current model, with the corresponding .AFX, .PCX and .R8 files.
Thank you very much for offering to look into the model!

Hello Smilo:
I´d have a question for you about the military Air Army Corps markings that several of the Electra 10A´s had when they were used by the military.

Apart from the vertical blue stripe and the horizontal red-and-white ones on the fins with the numbers, are the old-fashioned stars with the red circle in the middle on both wings, or only on the left above and the right below?

Then, I saw that they didn´t have any stars on the sides. The few photos I´ve seen are not all too consistent either. What would you suggest? At the moment I have the stars on both wings, above and below.

Cheers,
Aleatorylamp

 

Attachments

  • WIP3.jpg
    WIP3.jpg
    43.9 KB · Views: 0
Hello Aleatorylamp,

I downloaded your package and AFX earlier today but when I came back to post a reply here, the site was not responding for some reason. It was quite amusing to find out that I had two other Lockheed Model 10 Electra installed on my Development Machine. I generally don't look for the type.

I had a look at your model in the simulator about an hour ago and just finished my first exploration of your AFX.
It is always interesting to see how other designers do things. You and I do things in a radically different manner.

This is your current AF99 resource usage:
23 Structures
22 Components
67 Parts
----------------------
1141 Parts Total.

I am very surprised your Components count is so low.
Even on a single engine Fighter, I typically use 28 to 30 Components.
In this case, I believe you can significantly improve the appearance and reduce bleeds by changing the Engine Nacelles into Components.

As I have commented before, "Part A can't bleed through Part B if Part A isn't behind Part B."

I will have to revise my estimate how many extra Parts I will have to add.
It seems like you use a lot of "Automatic Glue" and most of those will have to be replaced by Glue Parts so that I can control the assembly sequence better.

- Ivan.
 

Hello Ivan,
Thanks for your preliminary message. The flap problem is certainly a headache.

I´ve kept on trying different things out with different sequencing and grouping,
but to no avail. It´s quite frustrating - it was working so nicely without, even
the exhaust wasn´t bleeding anywhere!

There must be something I´m missing, which is annoying, especially after I was
able to get the crew into the cabin with quite a complicated glue sequence that
seems to work quite nicely!

Well, regarding my use of structures, that you would perhaps qualify as "over-use":
I find symmetrical whole elements logical candidates to be built as structures, if the
parts count will allow it to be done in that way.

As structures, I have 1 nose, 2 spinners, 2 rear spinners, 2 engines, 2 exhausts,
2 nacelles, 2 fin top parts, 2 fin bottom parts, 3 wheels, 2 pilot torsos, 2 heads,
1 tail wheel strut = 23 structures.

As the nacelle-bodies are complete bodies in the wing, i.e. not top and bottom
wing-covers with parts whose vertices are not to be aligned with the wing-part
vertices, then I thought there would be no difference as far as bleeds are concerned,
and they´d be OK as structures too.

Updated paragraph: Actually, I was overlooking one factor:
A nacelle Component, even if done built in one piece, would not have any
sides inside the wing, they´d be hollow there, so there wouldn´t be any
of the minor bleeding at the edges where the wing joins the nacelle.
So you are right, they would be better done as components!
But the flaps would still pose a problem, as it´s the lower rear nacelle section
that bleeds there.

As far as glue is concerned, I thought I´d used it as much as possible:
On wheels/struts, in the cabin/crew/nose, and with the wing/nacelles/exhaust,
tailplane/fins, so I´m surprised you say there´s so little. In this particular case,
I hadn´t used the Spinner/propeller/engine glue sequence, because it seemed
to work OK without.

Anyway, I´m certainly looking forward to your possible solution to the flaps problem!
Thanks very much again,
Aleatorylamp
 
Hello Aleatorylamp,

This response might get a bit long with a lot of attachments, so I am planning to split it into two posts.
First, you might be curious as to where I have gotten thus far so I have attached an updated AFX with just the Starboard side changed so you can do a comparison.

In making the changes, I have actually introduced a new bleed which I believe is not too severe but can be addressed hopefully without many extra resources. I have a pretty good idea how to go about it but thought you might want a response sooner. The solution I have in mind involves a few build and check cycles and the Development Computer isn't well behaved.
See First Screenshot for the New Flap Bleed.

Total resource count thus far is +3 Parts but if I had stayed on task, it would actually be exactly the same as before. I added a few Parts, but also deleted a few.

The difference in Parts count is because I noticed a bleed in the Retracted Main Wheels which of course required additional Glue Parts to correct.
See Second Screenshot to compare Original Port and New Starboard sides.

The Third Screenshot shows Flap Bleed comparison from an view low and aft.

**********
 

Attachments

  • Electra_Modified.zip
    268.4 KB · Views: 0
  • Electra10_WheelWellBleeds.jpg
    Electra10_WheelWellBleeds.jpg
    32.2 KB · Views: 0
  • Electra10_NewFlapBleed.jpg
    Electra10_NewFlapBleed.jpg
    47.4 KB · Views: 0
  • Electra10_FlapBleedAft.jpg
    Electra10_FlapBleedAft.jpg
    30.6 KB · Views: 0
Flap Bleeds Continued....

Here are a couple more Screenshots showing a comparison of the Flaps view from outboard and low.

The last Screenshot shows a Bleed of the Pilot Head through part of the Cabin Frame.
It is a bit out of scope so I did not pursue it but wanted to make sure you were aware of it.

Regarding use of Components versus Structures:
Our Design Practices are very different.
You tend to use a lot of Structures, I tend to use as many Components as I can.

This is my opinion of course, but I believe that sometimes your selection of WHERE to use Components is a bit strange. I see that the Engine Nacelle is a Structure but surprisingly the retracted Main Wheel is a Component.
As I see it, we know Aircraft Wheels are not large blocky stone rollers but we are forced to use Structures for that purpose and end up with blocky wheels because there are too few Components.
The retracted Main Wheel is a natural candidate for a Structure because it is just as blocky as the extended Main Wheel. It would only cost a few additional Parts.

With CFS and even more so with models built with AF99, we have to compromise on the shapes because there are too few Polygons to model them in a more faithful manner. Why choose to limit yourself to a less than optimal shape by using a Structure?

I recognize that there are advantages to Structures. AF99 does a better job of blending shapes quickly into a smooth curve with a Structure than manual editing of each Part of a Component. That is why I used them to get the basic form of the Nacelle for the P-38 Lightning and the Fuselage of the Macchi C.202 and C.205.
I couldn't keep them as Structures because the actual pieces do have irregular bumps and other pieces attached though.

With extra Components and Parts left, I believe it makes sense to either correct bleeds or improve shapes such as Pilots' Torso or Tail Fins. Unfortunately we don't get credit on the next project for whatever we don't use on this project.

- Ivan.
 

Attachments

  • Electra10_FlapOutboardBefore.jpg
    Electra10_FlapOutboardBefore.jpg
    29.7 KB · Views: 0
  • Electa10_FlapOutboardAfter.jpg
    Electa10_FlapOutboardAfter.jpg
    29.9 KB · Views: 0
  • Electra10_CabinFrameBleed.jpg
    Electra10_CabinFrameBleed.jpg
    37.2 KB · Views: 0
Very Pleasing Results!

Hello Ivan,
Don´t worry about long answers - personally, I like them for their rich content!
Thanks for the surprisingly prompt answers and developments.
I thought it would take at least a day longer!

Thanks for the changes and improvements. For a start, it all sounds and looks
very interesting, and
I´ve just taken a quick look. It is very surprising indeed!

Your new glue sequence is rather unexpected, starting with the exhaust pipe,
moving inwards to nacelle and inner wing, and then outwards again to the outer
wing, finishing with the flap! I also saw the glue on the wheel-well parts. That
took care nicely of the bleeds with the retracted wheel! I hadn´t noticed because
I was too engrossed with the flap issue. Thank you very much.

The short momentary flap-edge bleed just on the trailing edge is not at all worrying!
I wonder if it would be worth trying to simply lower the flap forward edge and hinge,
although it would leave a gap between the wing undersurface and the flapp once
deployed, and that plane had no gap... so better I´ll just leave it.

Updated paragraph.
OK, I´ve just made all the changes: I transferred the new glue parts and put in
the two new sequences.
It´s working perfectly! I notice the flaps are present
in Wing-Mid left/right and in
Wing-Low left/right groups, for obvious reasons.

Thanks too for pointing out the extra areas with glitches! I´ll see to the
disappearing cabin-window strut now.


Incidentally, the retracted wheels are components because a structure has a
top
surface which caused bleeds, and of course, parts count still allows room
for several improvements.

I was at the dentist today and I´m still a little under the weather, but it´s wearing off.
Cheers,
Aleatorylamp
 
Last edited:
Back
Top